

Are you building a Mud Monster or a Pavement Princess??
If so you can have your own thread in this section.
This section on other websites has led to arguments and contention. People are posting pictures of their pride and joy and therefore CONSTRUCTIVE comments only please!
If so you can have your own thread in this section.
This section on other websites has led to arguments and contention. People are posting pictures of their pride and joy and therefore CONSTRUCTIVE comments only please!
Dave's la(te)st buggy build...
28 Feb 2020 07:59 #219180
by sniper
Replied by sniper on topic Dave's la(te)st buggy build...
Jimny flash mob..... that would be funny :laugh: :laugh: :laugh:
sniper
sniper
The following user(s) said Thank You: X8GGY
Please Log in or Create an account to join the conversation.
28 Feb 2020 14:12 #219186
by safari
if u worry u die if u dont worry u still die so why worry
Replied by safari on topic Dave's la(te)st buggy build...
will it have number plates with all those mods
if u worry u die if u dont worry u still die so why worry
Please Log in or Create an account to join the conversation.
Less
More
- Posts: 3727
- Thank you received: 923
28 Feb 2020 20:20 - 28 Feb 2020 20:21 #219198
by X8GGY
I hope so!

I've fallen foul of the DVLA and VOSA when I built "Stumpy" the Grand Vitara years ago -

So I vowed to never alter a chassis again, so the buggy should qualify the same as a kit=car as only the body has changed a little...?")
Replied by X8GGY on topic Dave's la(te)st buggy build...
safari wrote: will it have number plates with all those mods
I hope so!
I've fallen foul of the DVLA and VOSA when I built "Stumpy" the Grand Vitara years ago -
So I vowed to never alter a chassis again, so the buggy should qualify the same as a kit=car as only the body has changed a little...?
Last edit: 28 Feb 2020 20:21 by X8GGY.
Please Log in or Create an account to join the conversation.
Less
More
- Posts: 3727
- Thank you received: 923
28 Feb 2020 20:22 #219199
by X8GGY
Now that would be great :lol:
:woohoo:
Replied by X8GGY on topic Dave's la(te)st buggy build...
sniper wrote: Jimny flash mob..... that would be funny :laugh: :laugh: :laugh:
sniper
Now that would be great :lol:
:woohoo:
Please Log in or Create an account to join the conversation.
Less
More
- Posts: 3727
- Thank you received: 923
11 Mar 2020 17:26 - 11 Mar 2020 17:31 #219734
by X8GGY
Replied by X8GGY on topic Dave's la(te)st buggy build...
Back to it today... not got much done in the last week as our youngest daughter flew to Malta (for seven months  ) last Wednesday (my day off in the week usually) and the wife went to wave her off with her sister, and then the wife was away in EuroDisney from Thursday to Monday with a youth choir she chaperones for... but, as said, back to it today...
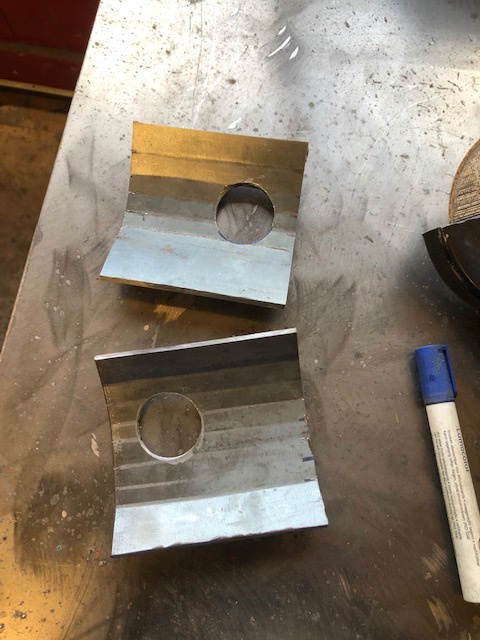
I began by making a gusset plate for the top of the roof hoop on the passenger (Alan's) side
And having drawn around all the fixing points I ground them back to shiny metal, and then re-assembled for the last time, ready for welding...
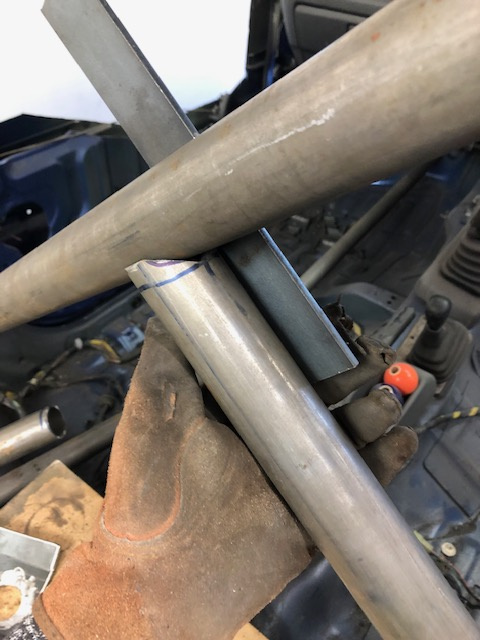
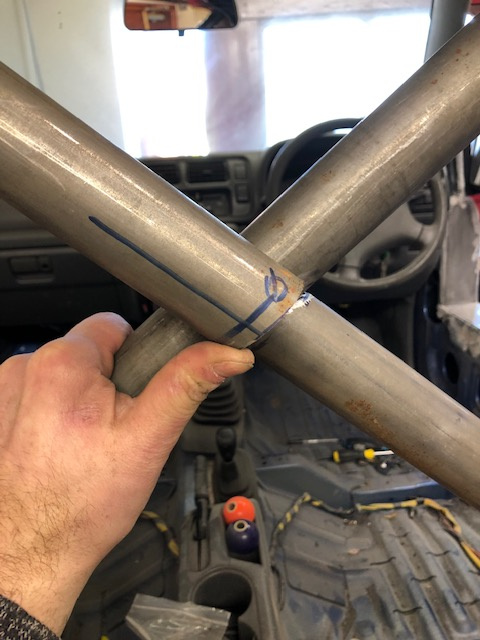
Notice the flat bar welded to the 'main' crossbar?...
You can just about see it there... that's to line up the other crossbar after I've cut in in half...
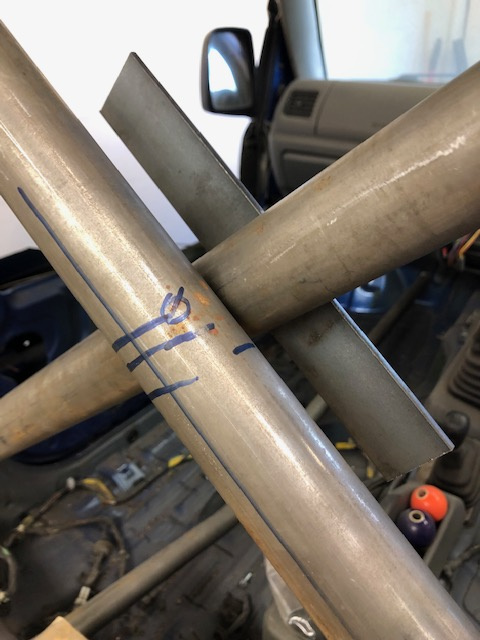
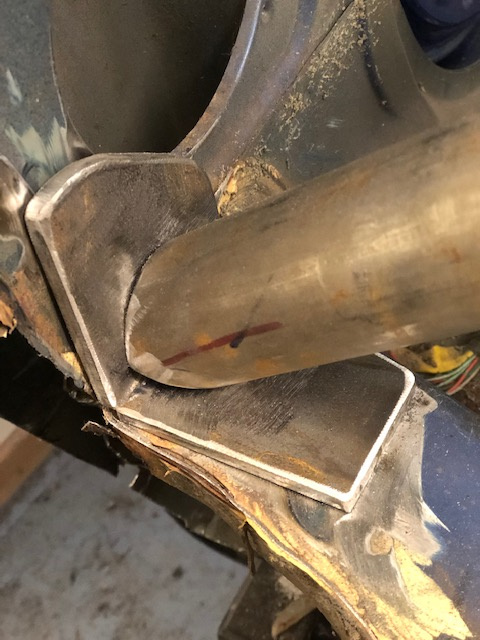
I marked the centre line, and then the start and end of the 'fishmouth' cut...
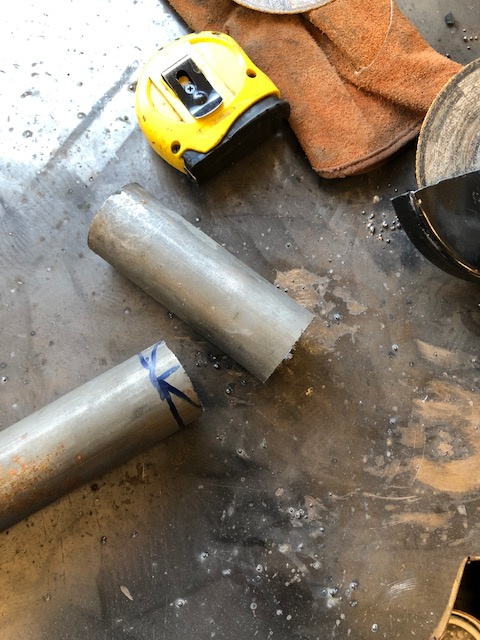
There on the bench you can see it better, just a flat triangle cut to start it off...
Like that...
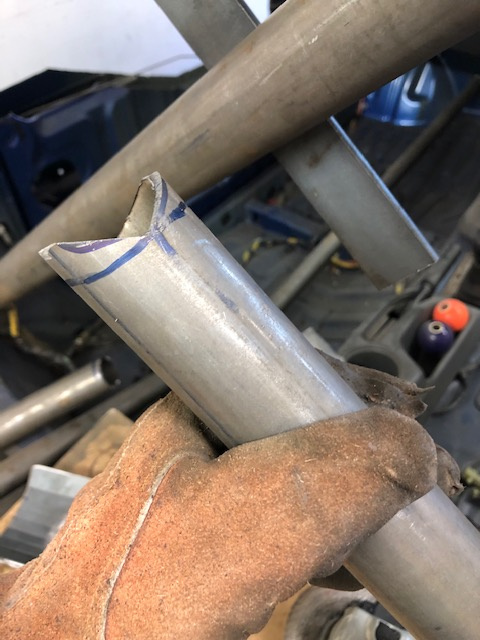
So that roughly fits around the 'main' crossbar, and then attack it with a grinding disk...
So that we get a nice join like this")
And then bring in the other half again, and mark that up...
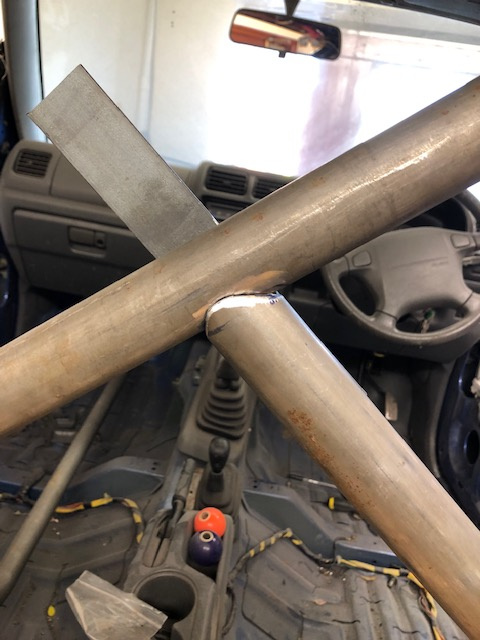
Repeat the fishmouth cutting and grind, et-voila!
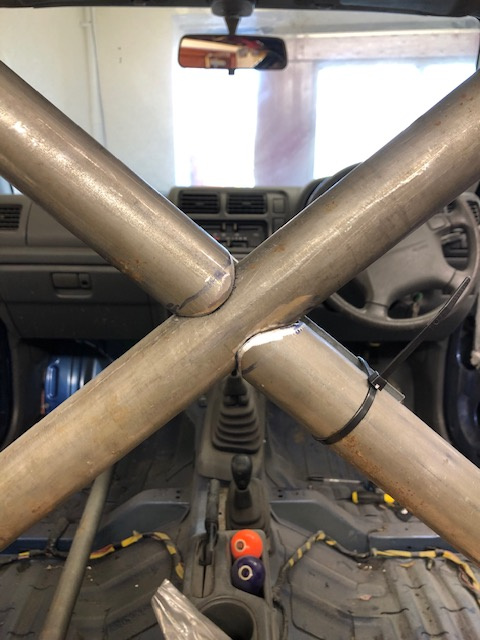
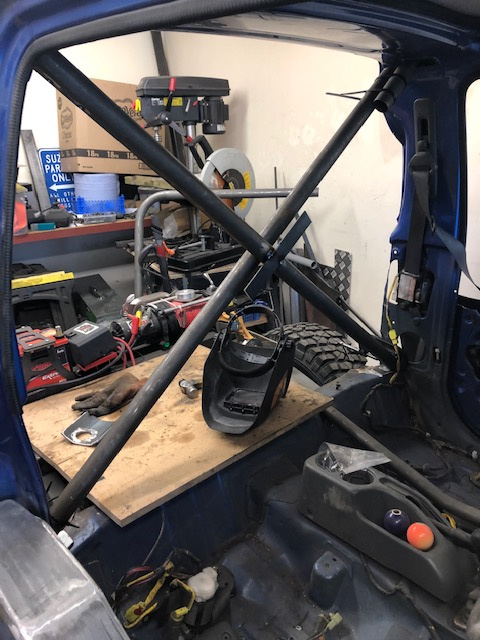
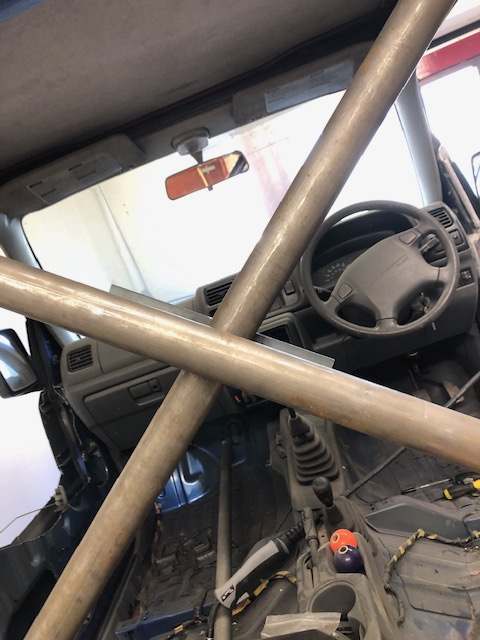
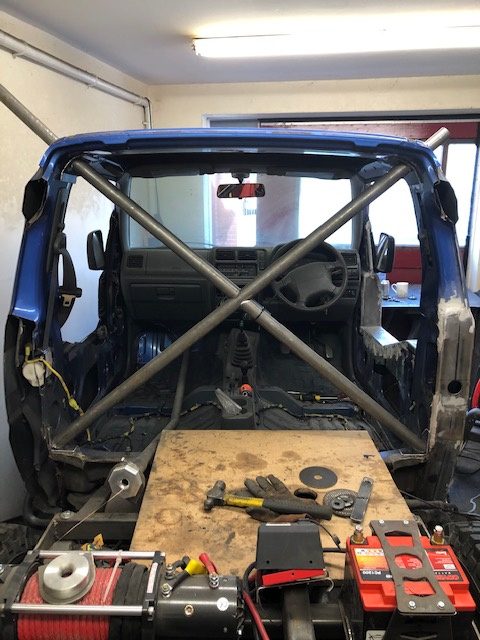
And we have our X crossbrace in place!
And during assembly the gusset plates are squeezed into position...
All ready for welding, probably on Sunday...
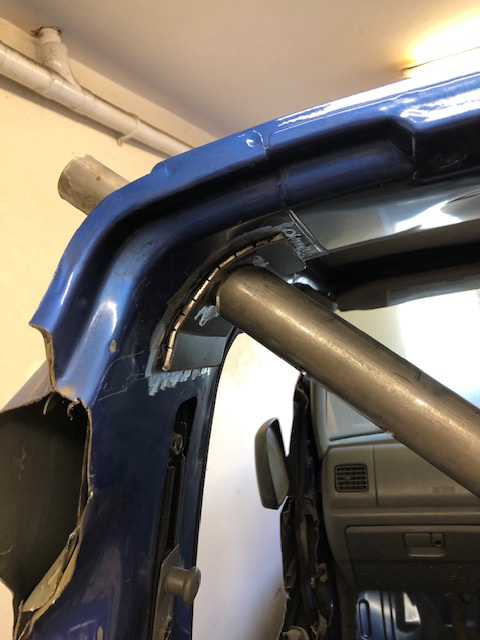
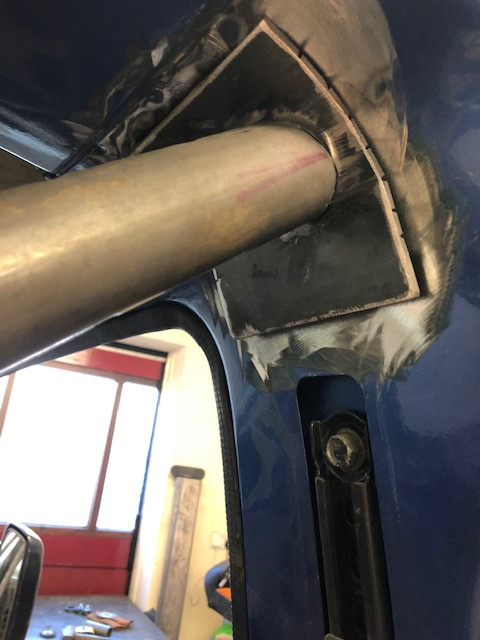
The other side (Alan's) with the gusset plate in place...
So the thicker tube of the 'X' butts up to the gusset place, and the smaller seamless tube is then hammered through the hole in the roof / hoop of the body into the bigger tube as it just passes through the hole in the gusset plate, I've also drilled four holes in the tops of the crossbars to puddle weld through to the smaller tube inside... once it's all welded up it should be super strong, and brace the weakened body due to back half being removed...
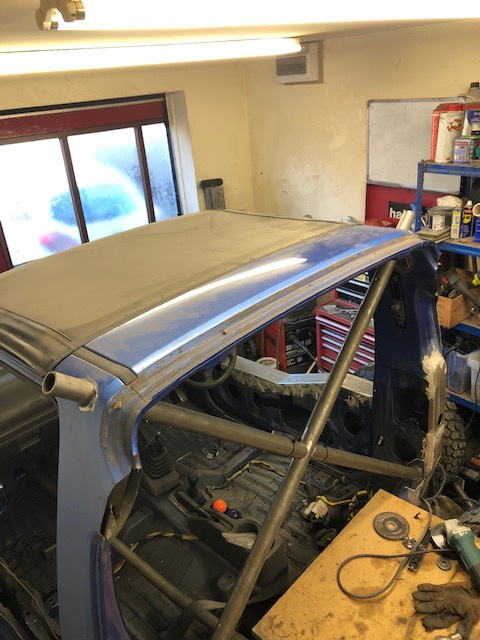
From the top you get the idea?... the bits protruding through are to hold / join to the tree scraper bars that will go around the roofline of the buggy, and also protect the front section of the soft-top, just like my previous blue Jimny previously known as S200KYS...
I had sketched up the roofline bars like this -

To get a quote for them bent up for me, but it proved to be too expensive (for a budget 'laning fun buggy) so I'm going to have to rethink it... Which I did after finishing today, I stood back with a cuppa and planned it all in my mind, and will come back to that one...
I also mocked up the back of the buggy when the X-brace was in place, but I've run out of time now, I need to have a shower and get back to the shop, so I'll post all the other photos later tonight...
) last Wednesday (my day off in the week usually) and the wife went to wave her off with her sister, and then the wife was away in EuroDisney from Thursday to Monday with a youth choir she chaperones for... but, as said, back to it today...I began by making a gusset plate for the top of the roof hoop on the passenger (Alan's) side
And having drawn around all the fixing points I ground them back to shiny metal, and then re-assembled for the last time, ready for welding...
Notice the flat bar welded to the 'main' crossbar?...
You can just about see it there... that's to line up the other crossbar after I've cut in in half...
I marked the centre line, and then the start and end of the 'fishmouth' cut...
There on the bench you can see it better, just a flat triangle cut to start it off...
Like that...
So that roughly fits around the 'main' crossbar, and then attack it with a grinding disk...
So that we get a nice join like this
And then bring in the other half again, and mark that up...
Repeat the fishmouth cutting and grind, et-voila!
And we have our X crossbrace in place!
And during assembly the gusset plates are squeezed into position...
All ready for welding, probably on Sunday...
The other side (Alan's) with the gusset plate in place...
So the thicker tube of the 'X' butts up to the gusset place, and the smaller seamless tube is then hammered through the hole in the roof / hoop of the body into the bigger tube as it just passes through the hole in the gusset plate, I've also drilled four holes in the tops of the crossbars to puddle weld through to the smaller tube inside... once it's all welded up it should be super strong, and brace the weakened body due to back half being removed...
From the top you get the idea?... the bits protruding through are to hold / join to the tree scraper bars that will go around the roofline of the buggy, and also protect the front section of the soft-top, just like my previous blue Jimny previously known as S200KYS...
I had sketched up the roofline bars like this -
To get a quote for them bent up for me, but it proved to be too expensive (for a budget 'laning fun buggy) so I'm going to have to rethink it... Which I did after finishing today, I stood back with a cuppa and planned it all in my mind, and will come back to that one...
I also mocked up the back of the buggy when the X-brace was in place, but I've run out of time now, I need to have a shower and get back to the shop, so I'll post all the other photos later tonight...
Last edit: 11 Mar 2020 17:31 by X8GGY.
The following user(s) said Thank You: Max Headroom
Please Log in or Create an account to join the conversation.
Less
More
- Posts: 9909
- Thank you received: 1983
11 Mar 2020 17:50 #219735
by Lambert
Temeraire (2018 quasar grey automatic)
R.E.D Retired Extremely Dangerous
Bellerophon (2024 grello van) daily dose of disappointment.
Replied by Lambert on topic Dave's la(te)st buggy build...
Yet more good work that man! I think you should knock through into the shop and do these professionally! :laugh:
Temeraire (2018 quasar grey automatic)
R.E.D Retired Extremely Dangerous
Bellerophon (2024 grello van) daily dose of disappointment.
The following user(s) said Thank You: X8GGY
Please Log in or Create an account to join the conversation.
Time to create page: 0.271 seconds