

Are you building a Mud Monster or a Pavement Princess??
If so you can have your own thread in this section.
This section on other websites has led to arguments and contention. People are posting pictures of their pride and joy and therefore CONSTRUCTIVE comments only please!
If so you can have your own thread in this section.
This section on other websites has led to arguments and contention. People are posting pictures of their pride and joy and therefore CONSTRUCTIVE comments only please!
Another green laner build
13 May 2022 12:11 - 13 May 2022 12:14 #243306
by LesNewell
Replied by LesNewell on topic Another green laner build
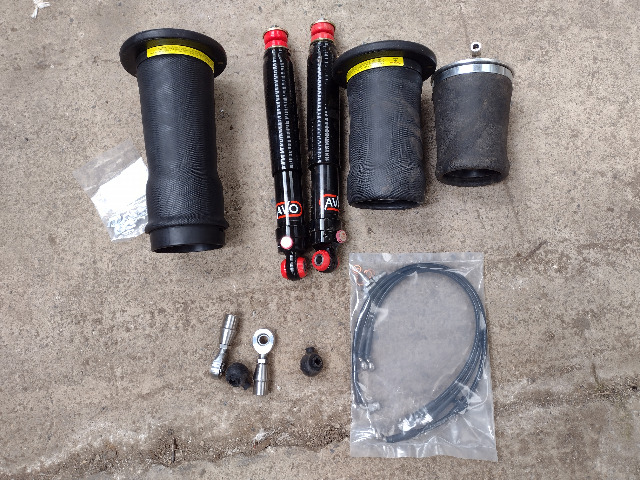
I've been a bit quiet but there has been some progress. Here are some bling bits. The left hand air spring is about 3/4 extended and the middle is mostly compressed. The one on the right is one of the Firestone copies fully compressed as a comparison.
Shout out to Dan at DC performance. He went above and beyond trying to locate some shocks that were in stock. Decent quality long adjustable shocks are in short supply at the moment. He even gave me a discount because they are very slightly shorter than I requested. What a difference compared to Jimnybits who pretty much ghosted me when I requested the dimensions of their shocks. The rod ends and rod end boots are from McGill Motorsport. Good quality joints at a decent price. The brake lines came from Proline braided lines. They made a mistake on one line but had a replacement in my letter box next day. Pretty good service.
It was a very tight squeeze getting everything in and I will have two small humps in the floor for the tops of the shocks. For this size spring I had to make new spring mounts and lower spring platforms. The mount on the right is the original Jimny one, rather hacked about as I tried to fit the Firestone copies.
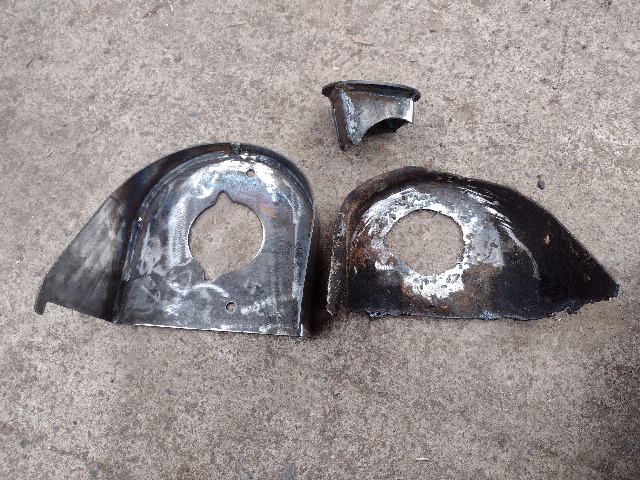
This is what it looks like in place.
Here is it at full extension. It gets really close to the damper but it just fits. I had to cut holes in the floor to clear the dampers. I will make panels witha bit of a bump in them to clear.

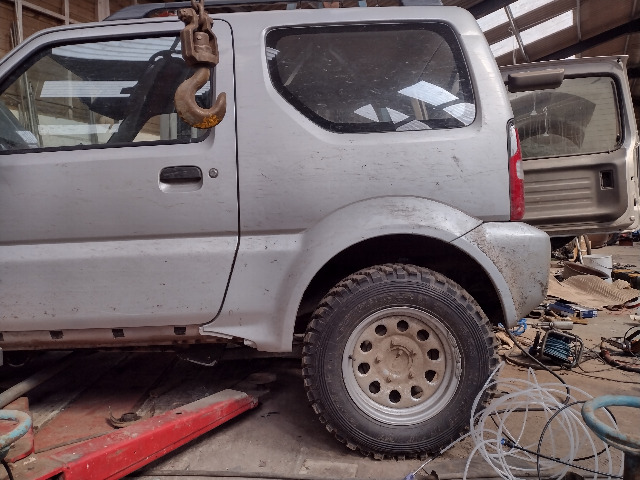
So what does it look like? Full extension:
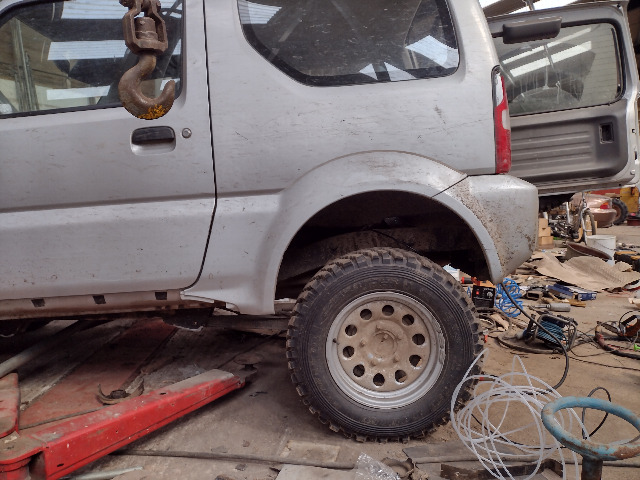
At road ride height. It will lift another inch or so when I engage 4x4.
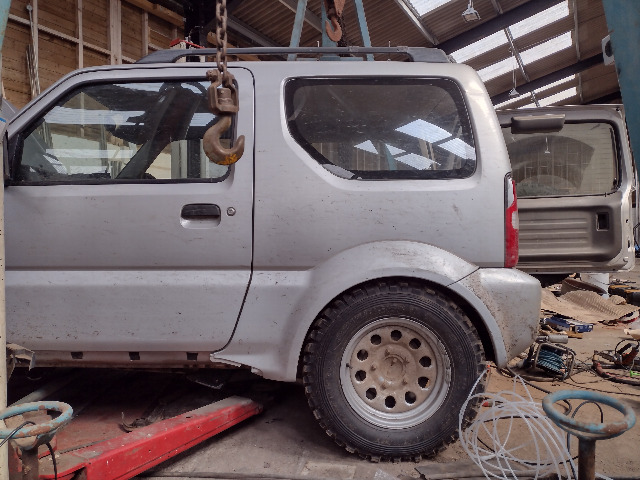
Fully compressed.
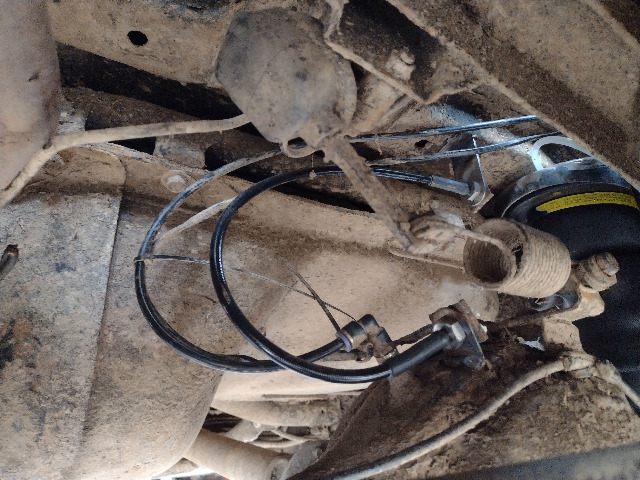
I looked at simply replacing the original rear brake hose with the new extended one but it formed a pretty big loop that was too vulnerable for my liking. The last thing I want to do is drive over a branch and tear it off. Instead I relocated it to the diff pumpkin, along with the breather and locker wiring.
Shout out to Dan at DC performance. He went above and beyond trying to locate some shocks that were in stock. Decent quality long adjustable shocks are in short supply at the moment. He even gave me a discount because they are very slightly shorter than I requested. What a difference compared to Jimnybits who pretty much ghosted me when I requested the dimensions of their shocks. The rod ends and rod end boots are from McGill Motorsport. Good quality joints at a decent price. The brake lines came from Proline braided lines. They made a mistake on one line but had a replacement in my letter box next day. Pretty good service.
It was a very tight squeeze getting everything in and I will have two small humps in the floor for the tops of the shocks. For this size spring I had to make new spring mounts and lower spring platforms. The mount on the right is the original Jimny one, rather hacked about as I tried to fit the Firestone copies.
This is what it looks like in place.
Here is it at full extension. It gets really close to the damper but it just fits. I had to cut holes in the floor to clear the dampers. I will make panels witha bit of a bump in them to clear.
So what does it look like? Full extension:
At road ride height. It will lift another inch or so when I engage 4x4.
Fully compressed.
I looked at simply replacing the original rear brake hose with the new extended one but it formed a pretty big loop that was too vulnerable for my liking. The last thing I want to do is drive over a branch and tear it off. Instead I relocated it to the diff pumpkin, along with the breather and locker wiring.
Last edit: 13 May 2022 12:14 by LesNewell.
Please Log in or Create an account to join the conversation.
13 May 2022 12:33 - 13 May 2022 12:34 #243307
by LesNewell
Replied by LesNewell on topic Another green laner build
I also put some thought into the software for the suspension ECU. The valve block as I have it won't work. It has an up/down valve for each spring. To use those valves I need a pressure sensor for each valve. I showed the block built up in this configuration in a previous post. The problem is that it's bulky and I don't have room for it (the story of my life when it comes to this car).
Without the pressure sensors I have no idea of the pressure in each spring. It would be easy to end up with two diagonally opposed springs over pressurised and the opposite pair under pressurised. The car would sit level but the weight on each wheel would be badly out of balance.
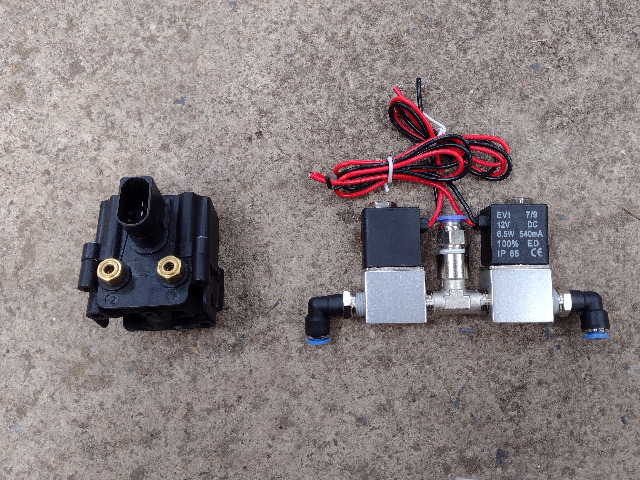
Plan B is to use a similar design to what is used on most air sprung vehicles. It gives me slightly less control for doing clever stuff such as taking weight off of one wheel to help it climb over a slippery rock. In this configuration you have on valve per spring that connects the spring to a central pipe. That pipe can then be pressurised or exhaused as needed. This allows me to for example join the two rear springs together, allowing the pressure to balance between the two. I have two valve block options: The left is a standard BMW part and the right is made from standard pneumatic parts. Pneumatics are like Lego. You just plug bits together. The right hand version can flow a lot more air so I'll probably go with it. I need one of these blocks per axle. I'll have one in the back and one in the front which gives me a lot more mounting options. BMW and Land Rover use 4mm pipes to the springs with 6mm linking the blocks. I'll be using 6mm to the springs and an 8mm link. Bigger has to be better, right?

The front end is fighting me at the moment. On the third try I thought I had everything fitting. It looked great until I turned the steering to full lock and found the wheel hits the shock mount. Cut it all off and start again...
Without the pressure sensors I have no idea of the pressure in each spring. It would be easy to end up with two diagonally opposed springs over pressurised and the opposite pair under pressurised. The car would sit level but the weight on each wheel would be badly out of balance.
Plan B is to use a similar design to what is used on most air sprung vehicles. It gives me slightly less control for doing clever stuff such as taking weight off of one wheel to help it climb over a slippery rock. In this configuration you have on valve per spring that connects the spring to a central pipe. That pipe can then be pressurised or exhaused as needed. This allows me to for example join the two rear springs together, allowing the pressure to balance between the two. I have two valve block options: The left is a standard BMW part and the right is made from standard pneumatic parts. Pneumatics are like Lego. You just plug bits together. The right hand version can flow a lot more air so I'll probably go with it. I need one of these blocks per axle. I'll have one in the back and one in the front which gives me a lot more mounting options. BMW and Land Rover use 4mm pipes to the springs with 6mm linking the blocks. I'll be using 6mm to the springs and an 8mm link. Bigger has to be better, right?
The front end is fighting me at the moment. On the third try I thought I had everything fitting. It looked great until I turned the steering to full lock and found the wheel hits the shock mount. Cut it all off and start again...
Last edit: 13 May 2022 12:34 by LesNewell.
Please Log in or Create an account to join the conversation.
15 May 2022 21:15 #243325
by LesNewell
Replied by LesNewell on topic Another green laner build
Well, I finally did what I should have done in the first place and modelled the front suspension movement in CAD. The news is not good. The problem I have is that the springs can handle a limited amount of misalignment. If any of you have jacked up the front of a Jimny you'll know how much the springs bend at full droop. That's too much for these air springs. Moving the upper spring mount towards the back of the car improves the angles but then the wheel fouls it at full lock. As far as fouling is concerned the spring needs to be pretty much in line with the king pins. This is way too far forward and really messes up the geometry. Suzuki went about half way between the ideal position for minimum misalignment and being inline with the king pins.
So, what to do?
Option1: Go back to springs. That's just admitting defeat. No thanks!
Option2: Longer radius arms. This reduces the amount of angle change over the axle travel, which helps compensate for the poor geometry of having the spring in line with the king pins. At the same time I'll be able to move the chassis end of the arms upwards so they are less likely to catch on rocks.
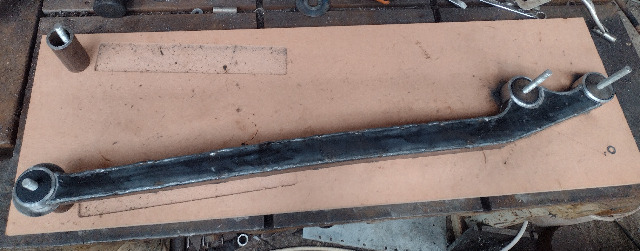
This piece of pipe gives an idea of how long the arms needs to be. Unfortunately there is a lot of stuff in the way on the driver's side. The transfer box bracket could be cut off and relocated on the transfer case rock guard. The gearbox crossmember is a bit more problematic. I need to think on that one.
So, what to do?
Option1: Go back to springs. That's just admitting defeat. No thanks!
Option2: Longer radius arms. This reduces the amount of angle change over the axle travel, which helps compensate for the poor geometry of having the spring in line with the king pins. At the same time I'll be able to move the chassis end of the arms upwards so they are less likely to catch on rocks.
This piece of pipe gives an idea of how long the arms needs to be. Unfortunately there is a lot of stuff in the way on the driver's side. The transfer box bracket could be cut off and relocated on the transfer case rock guard. The gearbox crossmember is a bit more problematic. I need to think on that one.
Please Log in or Create an account to join the conversation.
26 May 2022 09:06 #243454
by LesNewell
Replied by LesNewell on topic Another green laner build
Well, I did my thinking and I can get away with making the radius arms a bit longer but not as long as I'd originally calculated. On the driver's side there is just enough room between the gearbox crossmember and the transfer box mount. Apart from making the springs work I'll be gaining clearance under the chassis and the longer arms also improve the suspension geometry, reducing camber change with suspension travel. Time to start making radius arms.
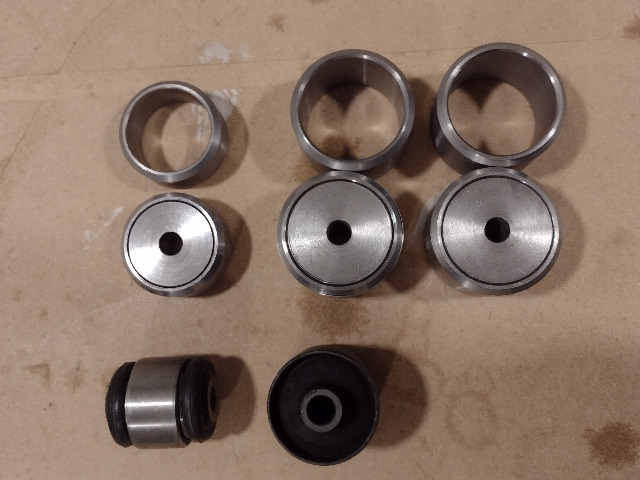
After measuring new bushes and the holes in the radius arms, I am slightly shocked at how much crush there is on the bushes. The new bushes are about 52.2mm diameter and the holes they need to be squeezed into are 51.5mm. 0.7mm is a huge amount of crush. Normally for that diameter a heavy press fit for a solid bush would be around 0.05mm! On the chassis end I'm using Vauxhall Vectra rear ball joints instead of rubber. These should improve the handling a bit. The bush rings will have solid bushes pressed in to stop them distorting and shrinking when I weld them. The middle row are rings with the solid bushes pressed in. The bushes and rings are coated with high temperature moly dry lube to reduce the chance of them seizing together when I weld the rings.
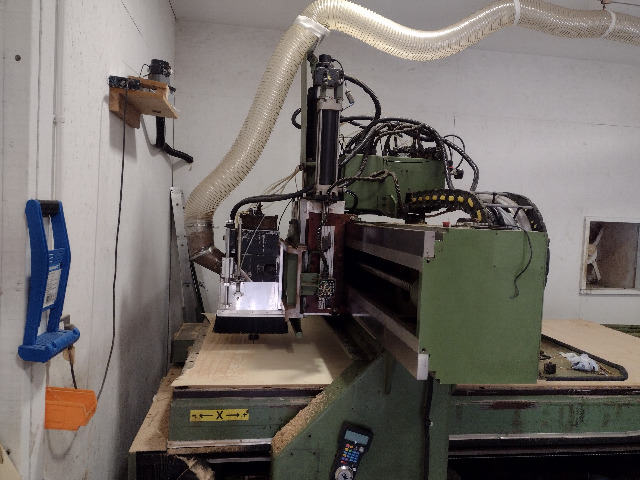
Next, lots of 3D cad work and plywood test pieces to get the geometry dialed in. I rebuilt a CNC router a few years back and here it is being used to cut the test templates out of 3mm ply.
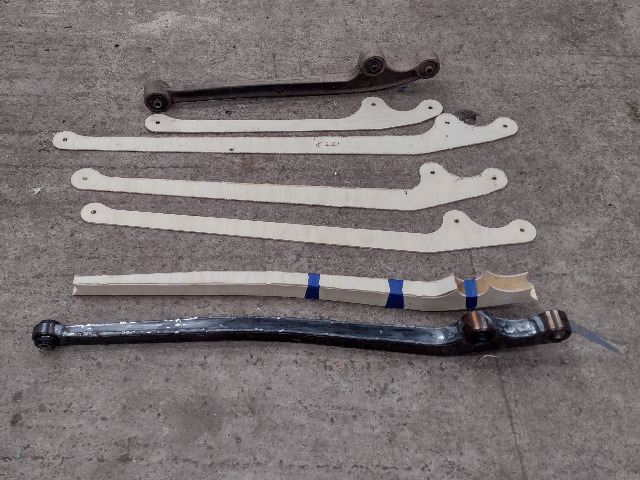
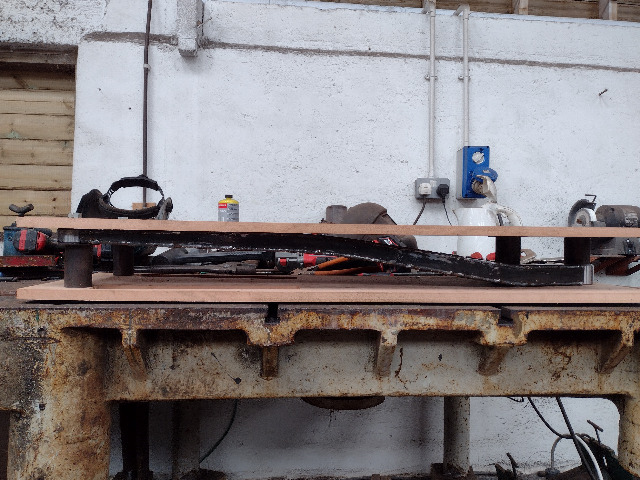
Here is the progression from the original radius arm at the top, through various test pieces to the final part in steel. As the new mounting points are on the side of the chassis the arms need to bend to avoid hitting the chassis at full compression. The box section profile makes these arms a lot stronger in bending than the original I section arms so the bend should not be a problem.
To maintain accuracy I first welded the arms up without the rings then mounted everything in a CNC machined MDF fixture to weld the rings in.
After measuring new bushes and the holes in the radius arms, I am slightly shocked at how much crush there is on the bushes. The new bushes are about 52.2mm diameter and the holes they need to be squeezed into are 51.5mm. 0.7mm is a huge amount of crush. Normally for that diameter a heavy press fit for a solid bush would be around 0.05mm! On the chassis end I'm using Vauxhall Vectra rear ball joints instead of rubber. These should improve the handling a bit. The bush rings will have solid bushes pressed in to stop them distorting and shrinking when I weld them. The middle row are rings with the solid bushes pressed in. The bushes and rings are coated with high temperature moly dry lube to reduce the chance of them seizing together when I weld the rings.
Next, lots of 3D cad work and plywood test pieces to get the geometry dialed in. I rebuilt a CNC router a few years back and here it is being used to cut the test templates out of 3mm ply.
Here is the progression from the original radius arm at the top, through various test pieces to the final part in steel. As the new mounting points are on the side of the chassis the arms need to bend to avoid hitting the chassis at full compression. The box section profile makes these arms a lot stronger in bending than the original I section arms so the bend should not be a problem.
To maintain accuracy I first welded the arms up without the rings then mounted everything in a CNC machined MDF fixture to weld the rings in.
The following user(s) said Thank You: Soeley
Please Log in or Create an account to join the conversation.
29 May 2022 18:15 - 29 May 2022 18:24 #243494
by LesNewell
Replied by LesNewell on topic Another green laner build
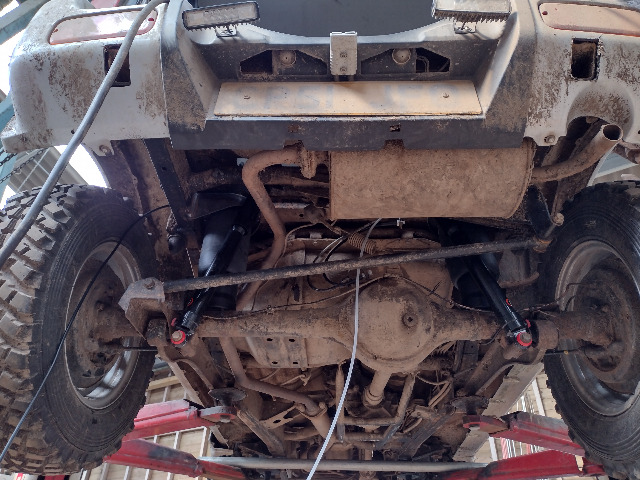
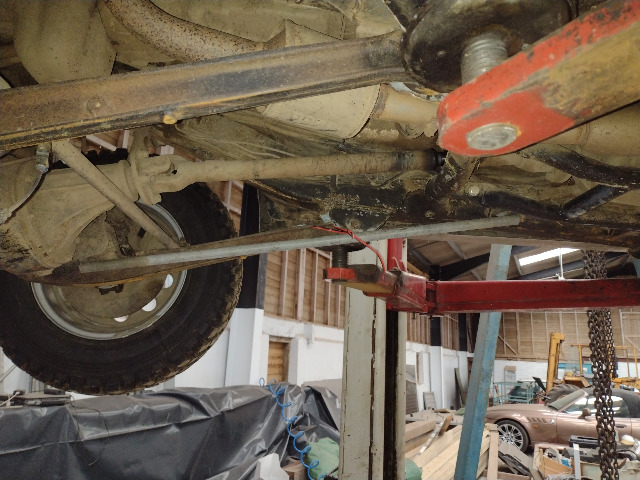
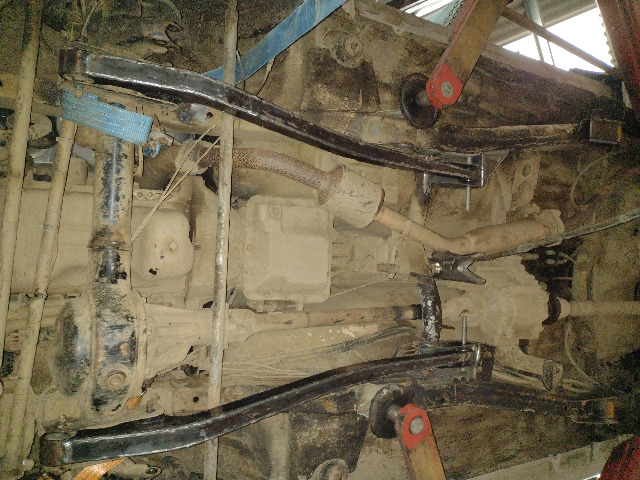
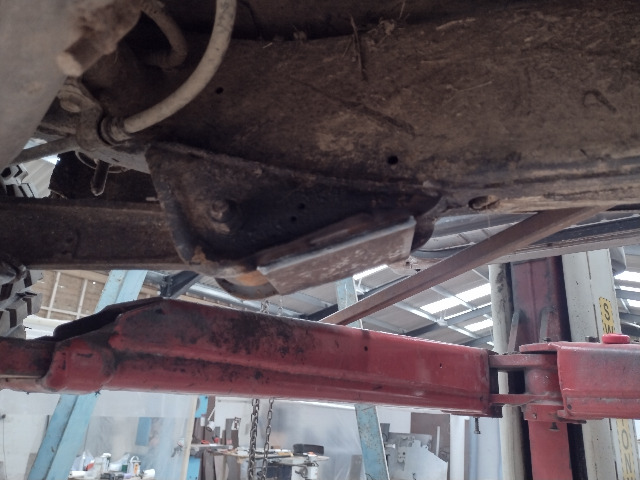
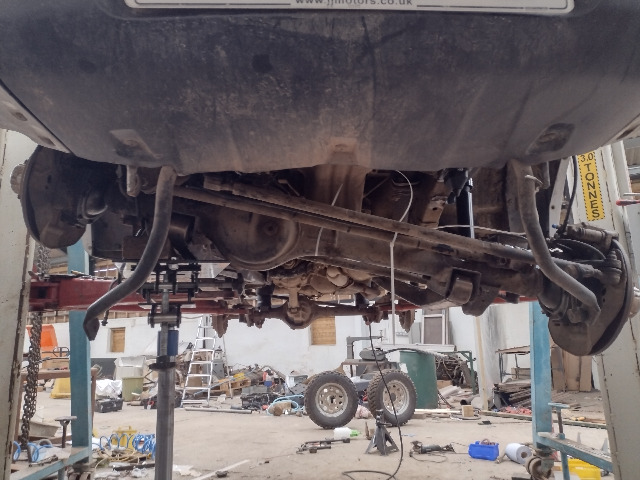
A bit more progress over the weekend. The arms are now installed. On the driver's side I had to cut half way through the gearbox crossmember to get enough clearance at full compression. Hopefully the extra reinforcement I have added will compensate. You can see how the arms need to snake around the chassis legs. One nice side effect of the longer arms is that the front prop stays nearly the same length over the full suspension travel.
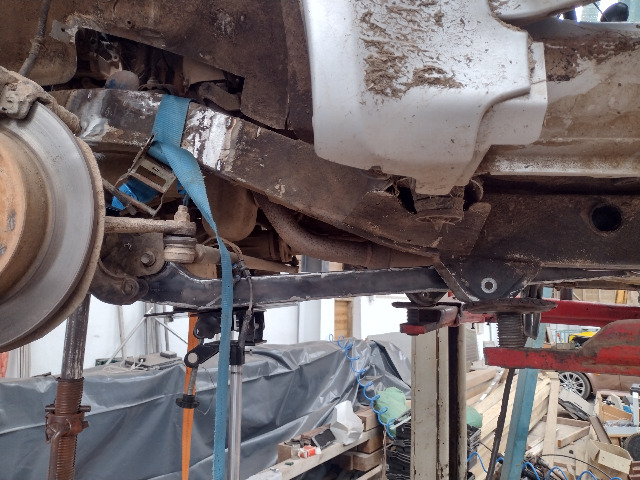
The original mounts will be coming off but here is a view at about ride height. There is quite a bit more clearance with the new arms. It is so tempting to do something similar on the back but it is a heck of a lot of work. By the way, if you think the way the car is sitting on the arms of my car lift looks a bit sketchy, you are right. When I'm working on the car I have an overgrown axle stand under the front crossmember just in case. The stand is made out of an acrow prop with three legs added for stability.
I recently bought a GYA Alien XXL true colour welding helmet. My eyesight isn't as good as it used to be and I have been struggling to see what I am doing with a standard helmet these days. I have to say I am very impressed. I can actually see what I am doing again. I added reinforcing plates to the rear radius arm mounts using this helmet and the welds came out sweet.
Last edit: 29 May 2022 18:24 by LesNewell.
Please Log in or Create an account to join the conversation.
06 Jul 2022 21:28 #243976
by LesNewell
Replied by LesNewell on topic Another green laner build
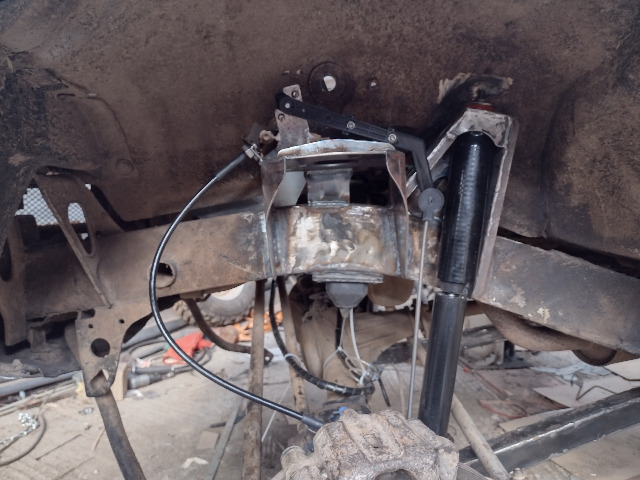
I haven't made an update for a while but the job has been progressing. The front mounts are now made. This is version 3 of the mount. The arm on the top of the mount is the ride height sensor. It's a modified Discovery sensor.
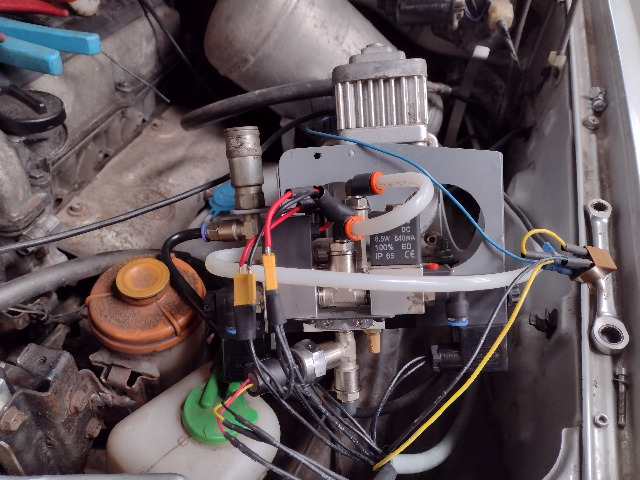
Here's the Mk2 valve block. It includes the up/down solenoid and the front left/right solenoid.
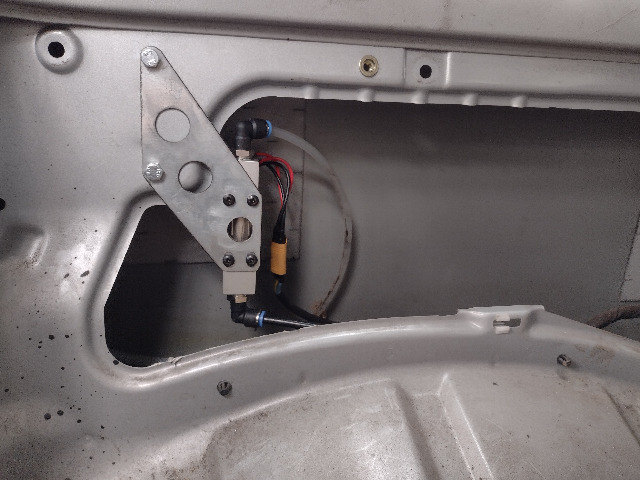
This is the rear valve block mounted in the back.
I'm wondering if I can get away with leaving the anti roll bar disconnected. Without the bar has pretty good articulation.
The software is coming together. It can now hold whatever height is selected and also whatever roll angle is selected. As there is only one up/down valve making the car roll is a bit jerky. For example if I want it to roll right it lifts the left a bit then drops the right a bit, repeating as many times as needed to reach the required roll angle. With the original valve block it would have been able to raise one side and drop the other at the same time, which would be much smoother. I'll need to drive it a bit off road to see if this is actually a problem. I've still got a fair amount of tidying up to do before I can road test it.
Here's the Mk2 valve block. It includes the up/down solenoid and the front left/right solenoid.
This is the rear valve block mounted in the back.
I'm wondering if I can get away with leaving the anti roll bar disconnected. Without the bar has pretty good articulation.
The software is coming together. It can now hold whatever height is selected and also whatever roll angle is selected. As there is only one up/down valve making the car roll is a bit jerky. For example if I want it to roll right it lifts the left a bit then drops the right a bit, repeating as many times as needed to reach the required roll angle. With the original valve block it would have been able to raise one side and drop the other at the same time, which would be much smoother. I'll need to drive it a bit off road to see if this is actually a problem. I've still got a fair amount of tidying up to do before I can road test it.
Please Log in or Create an account to join the conversation.
Time to create page: 0.303 seconds