

Are you building a Mud Monster or a Pavement Princess??
If so you can have your own thread in this section.
This section on other websites has led to arguments and contention. People are posting pictures of their pride and joy and therefore CONSTRUCTIVE comments only please!
If so you can have your own thread in this section.
This section on other websites has led to arguments and contention. People are posting pictures of their pride and joy and therefore CONSTRUCTIVE comments only please!
Dave's la(te)st buggy build...
Less
More
- Posts: 3727
- Thank you received: 923
28 May 2020 17:12 - 28 May 2020 17:20 #222939
by X8GGY
Replied by X8GGY on topic Dave's la(te)st buggy build...
Bugger... stood at my till thinking about the buggy... what’s missing from the rear?
A blummin’ foglight ?!
Bah...
I’ll have to add one just below the offside rear light cluster?...
They’re SJ / Samurai rear lights and don’t feature fog lights
A blummin’ foglight ?!
Bah...
I’ll have to add one just below the offside rear light cluster?...
They’re SJ / Samurai rear lights and don’t feature fog lights
Last edit: 28 May 2020 17:20 by X8GGY.
Please Log in or Create an account to join the conversation.
Less
More
- Posts: 3727
- Thank you received: 923
28 May 2020 21:28 #222949
by X8GGY
Replied by X8GGY on topic Dave's la(te)st buggy build...
Finished in the shop, had tea with the family, and then grabbed a(nother) beer and wandered into the garage..
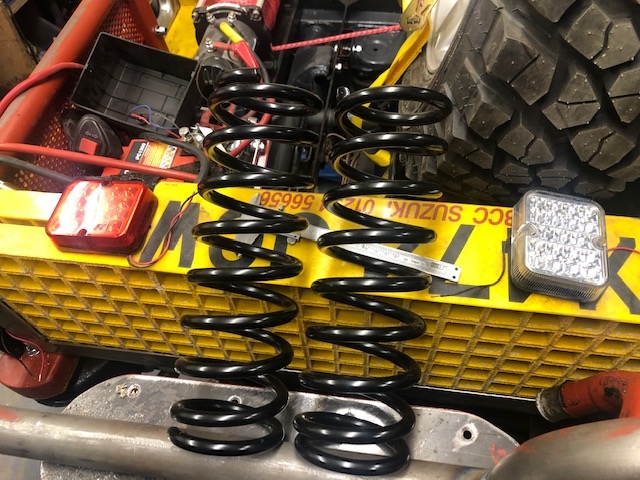
The 2" rear lift springs from JimnyBits turned up this morning, next day delivery... impressive!
And I found a pair of LED fog lights and reverse lights from a previous project (the fastback Jimny) in the garage...
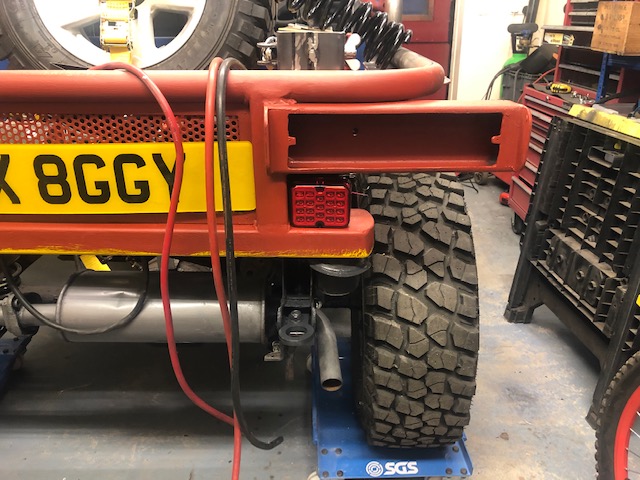
So the fog light is an easy fix, just a bracket here'ish...
And I figured the other one would make a good...

... a good centre hi-level brake light up here at the back of the small winch rope loop, on the back of the halo-hoop..
I decided not to use the reverse lights, as either reverse lights or work lights over the winch area, as I don't plan on greenlaning in the dark...
The 2" rear lift springs from JimnyBits turned up this morning, next day delivery... impressive!
And I found a pair of LED fog lights and reverse lights from a previous project (the fastback Jimny) in the garage...
So the fog light is an easy fix, just a bracket here'ish...
And I figured the other one would make a good...
... a good centre hi-level brake light up here at the back of the small winch rope loop, on the back of the halo-hoop..
I decided not to use the reverse lights, as either reverse lights or work lights over the winch area, as I don't plan on greenlaning in the dark...
Please Log in or Create an account to join the conversation.
- Max Headroom
-

- Offline
- Banned
-

Registered
- OPEN AIR MOTORING... 93 MILLION MILES OF HEADROOM
Less
More
- Posts: 1091
- Thank you received: 217
28 May 2020 21:47 #222953
by Max Headroom
No - seriously - she's looking great - I'm fascinated watching how these projects evolve - wish I had more time not to mention more skills!
IF IT AINT BROKE, KEEP FIXING IT UNTIL IT IS
Replied by Max Headroom on topic Dave's la(te)st buggy build...
X8GGY wrote: Holy cow, what a load of bull, pull the udder one, I’m sure I’ve herd that before?! :lol:
No - seriously - she's looking great - I'm fascinated watching how these projects evolve - wish I had more time not to mention more skills!
IF IT AINT BROKE, KEEP FIXING IT UNTIL IT IS
Please Log in or Create an account to join the conversation.
Less
More
- Posts: 3727
- Thank you received: 923
30 May 2020 15:31 #223033
by X8GGY
Replied by X8GGY on topic Dave's la(te)st buggy build...
Another day, another few deliveries...
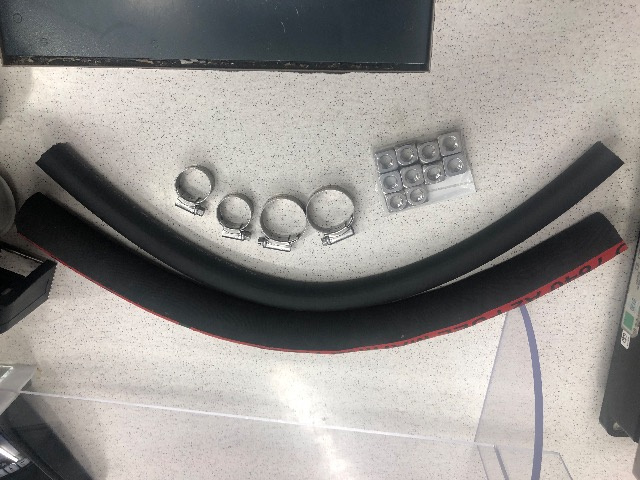
New fuel filler and return hoses, old ones were a little too short and very old and floppy :lol:
Matching new jubilee clips
Square nuts for the winch mounts... had the right length bolts “in stock” but can I find the original square nuts that came with the winch?! :laugh:
Is It Sunday Yet? Out to do some more tomorrow :woohoo:
Please Log in or Create an account to join the conversation.
Less
More
- Posts: 3727
- Thank you received: 923
31 May 2020 16:50 - 31 May 2020 16:52 #223073
by X8GGY
Replied by X8GGY on topic Dave's la(te)st buggy build...
Not much done today...
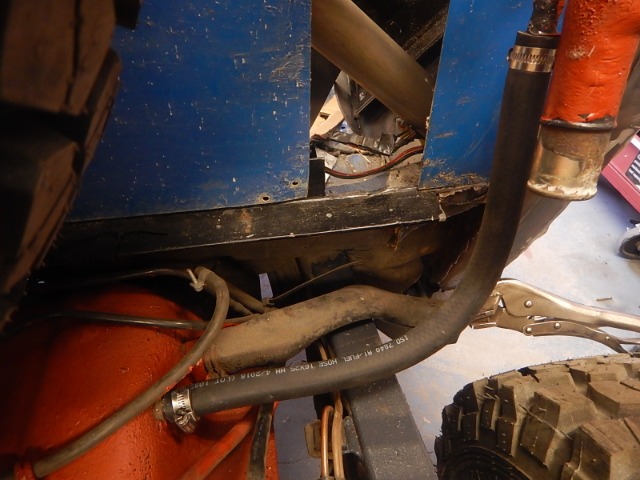
I started early, and hence quietly. by fitting the fuel tank hose(s)... errr, just the return one then? As I'd mis-measured / ordered the filler hose.. so another one is on the way... :lol:
I used the 2" offcut though to make an anti-rub end for the cable guide...
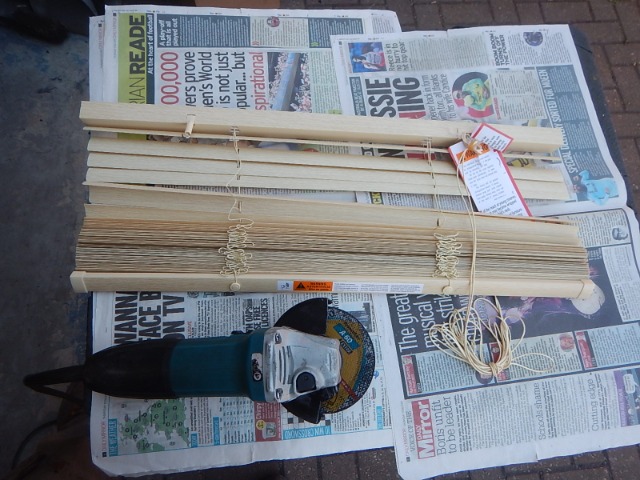
And then the missus grabbed me and wanted two blinds trimming to size and hanging, a mirror screwing to the wall, and a hidden-mount shelf putting up... :lol: They've been re-decorating the daughters bedrooms, so I couldn't really say No? :ohmy:
So, when I eventually got back to the garage...
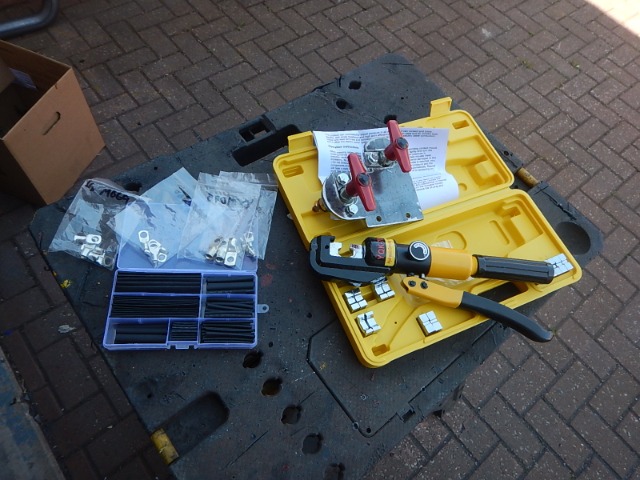
I thought I'd have a play with the new [strike]toy[/strike]... errr, tool...

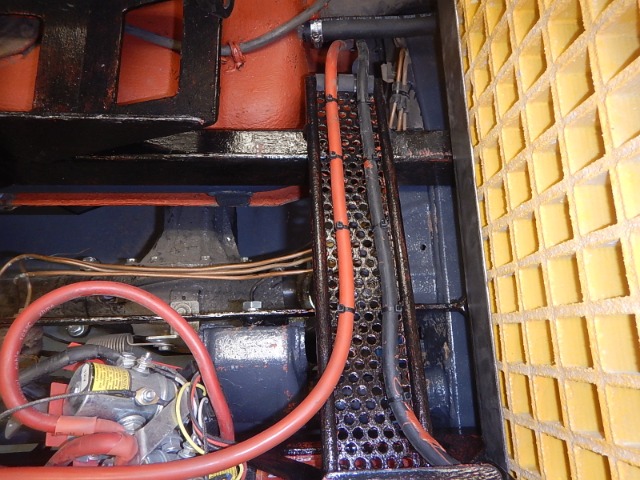
So I bolted down the winch solenoid pack to it's mount, and then tidied all the cables, shortening the positive and negative battery cables, ready to connect to the switch(es)...

Unfortunately, at the front, I've misjudged the size of the standard battery cables, so I've ordered some more crimp connectors hopefully ready for Wednesday... But these are the negative cables, so one to the back winch battery, one to the vehicle's chassis ground, one to the original engine bay wiring (currently bare need a 16mm2 crimp for that) and one over to the engine battery, eventually, when it gets a cradle mount on the passenger side...
And these are the positive cables, so one to the back winch battery (switch), one over to the engine battery, and another two bare 16mm2 original engine bay wires that I also need crimp terminals for..
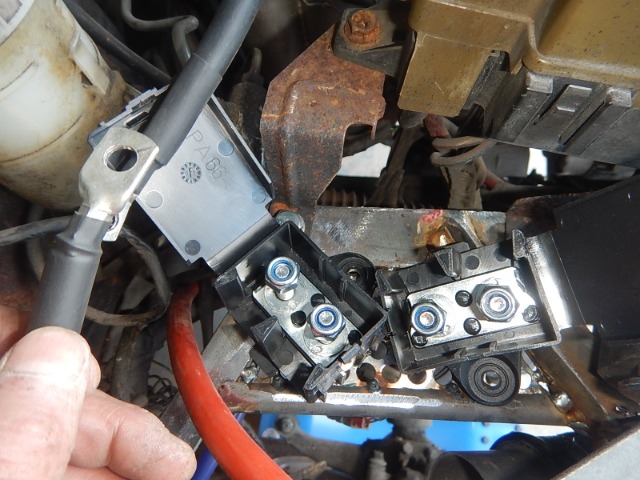
They'll all connect up in these two connector terminal boxes... soon... I'll paint the bracketry this week before Wednesday, and hopefully the new crimp terminals will also appear in the post on Wednesday...? Get them all bolted in, and hopefully test-fire the engine... it hasn't run for a good while! :ohmy: !
I started early, and hence quietly. by fitting the fuel tank hose(s)... errr, just the return one then? As I'd mis-measured / ordered the filler hose.. so another one is on the way... :lol:
I used the 2" offcut though to make an anti-rub end for the cable guide...
And then the missus grabbed me and wanted two blinds trimming to size and hanging, a mirror screwing to the wall, and a hidden-mount shelf putting up... :lol: They've been re-decorating the daughters bedrooms, so I couldn't really say No? :ohmy:
So, when I eventually got back to the garage...
I thought I'd have a play with the new [strike]toy[/strike]... errr, tool...
So I bolted down the winch solenoid pack to it's mount, and then tidied all the cables, shortening the positive and negative battery cables, ready to connect to the switch(es)...
Unfortunately, at the front, I've misjudged the size of the standard battery cables, so I've ordered some more crimp connectors hopefully ready for Wednesday... But these are the negative cables, so one to the back winch battery, one to the vehicle's chassis ground, one to the original engine bay wiring (currently bare need a 16mm2 crimp for that) and one over to the engine battery, eventually, when it gets a cradle mount on the passenger side...
And these are the positive cables, so one to the back winch battery (switch), one over to the engine battery, and another two bare 16mm2 original engine bay wires that I also need crimp terminals for..
They'll all connect up in these two connector terminal boxes... soon... I'll paint the bracketry this week before Wednesday, and hopefully the new crimp terminals will also appear in the post on Wednesday...? Get them all bolted in, and hopefully test-fire the engine... it hasn't run for a good while! :ohmy: !
Last edit: 31 May 2020 16:52 by X8GGY.
Please Log in or Create an account to join the conversation.
Less
More
- Posts: 3727
- Thank you received: 923
31 May 2020 17:00 #223074
by X8GGY
Replied by X8GGY on topic Dave's la(te)st buggy build...
Here's the cable crimp tool in action if it helps anyone?...
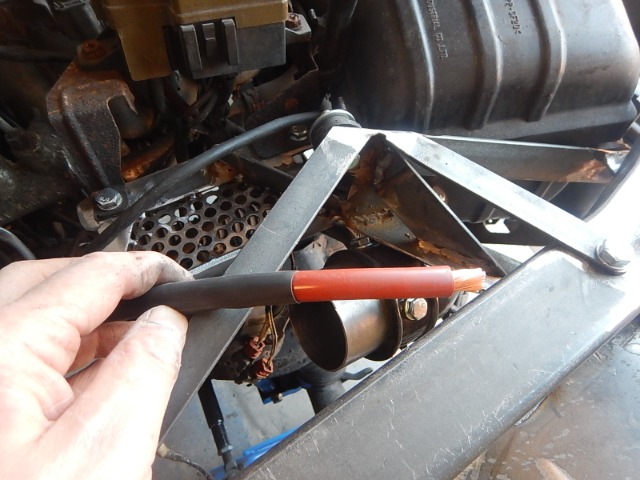
Heat shrink sleeve placed over the cable and then aprrox 12mm of cable sheath removed...
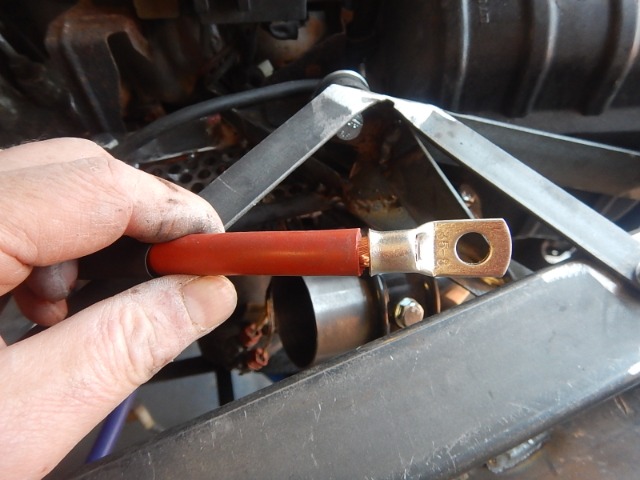
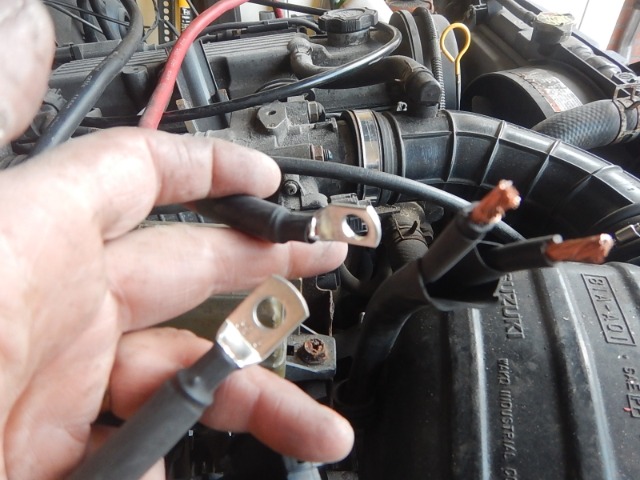
Crimp terminal slipped over the exposed copper cable...
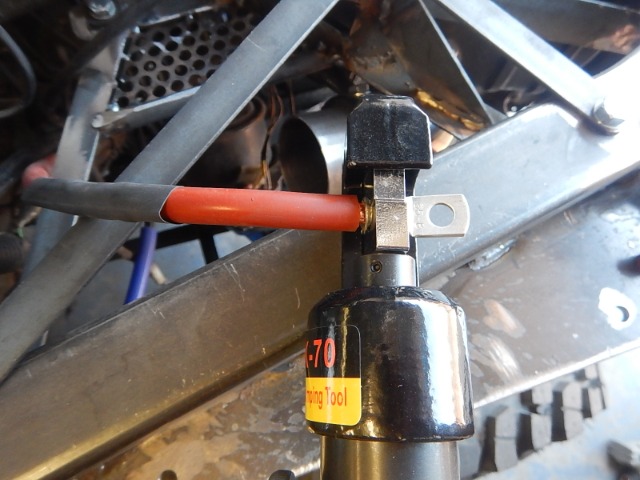
Crimp tool used to make the...
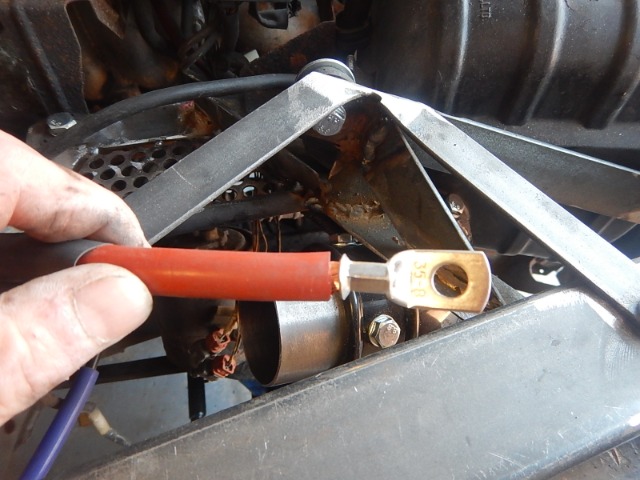
... crimp")
and then...
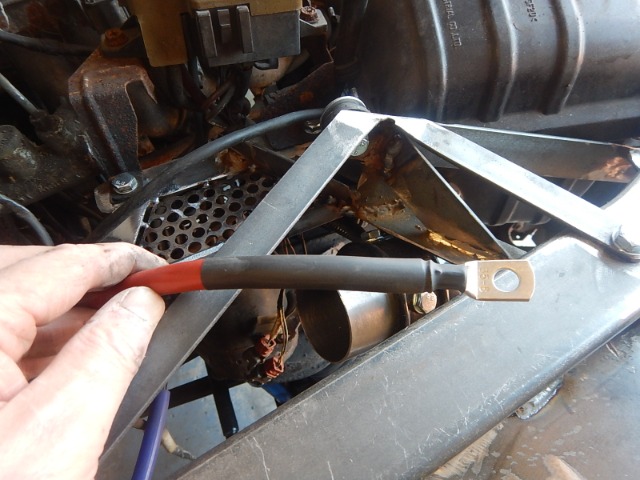
Hot air gun used to heat the heat-shrink sleave...
Et'Voila!")
Heat shrink sleeve placed over the cable and then aprrox 12mm of cable sheath removed...
Crimp terminal slipped over the exposed copper cable...
Crimp tool used to make the...
... crimp
and then...
Hot air gun used to heat the heat-shrink sleave...
Et'Voila!
Please Log in or Create an account to join the conversation.
Time to create page: 0.300 seconds