Difference between revisions of "Rear wheel bearing replacement"
m (Mlines moved page Rear wheel bearing replacement to Rear Wheel Bearing Replacement) |
m (Some small wiki code adjustments, and a new intro note) |
||
| Line 1: | Line 1: | ||
| − | + | {{intro-notes}} | |
| + | |||
== Introduction == | == Introduction == | ||
| − | The Rear Wheel Bearings on a Jimny can be prone to wearing, particularly when used off-road. The drum brake backing plate is supposed to provide protection for the bearing but it is very poor and you can expect the bearing to fail VERY regularly | + | The Rear Wheel Bearings on a Jimny can be prone to wearing, particularly when used off-road. The drum brake backing plate is supposed to provide protection for the bearing but it is very poor and you can expect the bearing to fail VERY regularly. |
| + | Providing you have the correct tools, the replacement work can be a straight forward task. | ||
| − | + | The symptoms of worn Rear Wheel bearings: | |
* Grating/Grinding as you rotate a jacked up wheel | * Grating/Grinding as you rotate a jacked up wheel | ||
* Oil/Grease leaking from rear of drum | * Oil/Grease leaking from rear of drum | ||
* Wheel falling off (yes, really, comes out complete with driveshaft!) | * Wheel falling off (yes, really, comes out complete with driveshaft!) | ||
| − | [[File:oilleaks1.jpg |thumb|left|250px|Typical symptom of failure]] | + | [[File:oilleaks1.jpg |thumb|left|250px|Typical symptom of failure]] |
<br clear=all> | <br clear=all> | ||
| − | |||
| − | |||
| − | |||
| − | |||
| − | |||
| − | |||
| − | |||
| − | |||
| − | |||
| − | |||
== Bearing kits == | == Bearing kits == | ||
| − | You will need a suitable bearing kit for your car | + | You will need a suitable bearing kit for your car. |
| − | + | Two kits are available, one for [https://www.bigjimny.com/store/rear-wheel-bearing-kit-abs-suzuki-jimny.html ABS] and one for [https://www.bigjimny.com/store/rear-wheel-bearing-kit-suzuki-jimny.html non-ABS cars]. | |
[[File:Rear_Wheel_Bearing_Kit.jpg|thumb|left|250px|Non-ABS Bearing kit]] | [[File:Rear_Wheel_Bearing_Kit.jpg|thumb|left|250px|Non-ABS Bearing kit]] | ||
| − | |||
| + | * The non-ABS kit has a plain retainer ring. | ||
| + | * This kit is available from a number of suppliers including the [https://www.bigjimny.com/store/jimny-parts/service-items-and-parts/bearings-and-seals.html BigJimny Store]. | ||
| + | * The ABS kit has a retainer ring with an ABS ring installed. | ||
| + | * The fitment procedure of the ABS kit is the same as non-ABS kit. | ||
| + | * However, the ABS retainer is much larger overall (if you were considering using the cheaper non-ABS kit). | ||
| + | * Some kits have a retainer ring with the ABS ring, whilst other have the ring as an integral part. | ||
| − | + | {{note|I have sold a number of different kits over the years and found the quality of the retainer ring varies, with some cheap kits being very poor quality.}} | |
| + | <br clear=all> | ||
| + | <gallery widths="320px" heights="240px" class="center"> | ||
| + | Old_retainer.jpg|Old retainer ring | ||
| + | ABS_retainer.JPG|Full ABS retainer | ||
| + | </gallery> | ||
| − | |||
<br clear=all> | <br clear=all> | ||
| + | == Changing the bearings == | ||
| − | + | === Tools === | |
| + | |||
| + | {{tools|<ul><li> Standard metric sockets and spanners</li><li>Assorted screwdrivers</li><li>Slide Hammer</li><li>Angle Grinder</li><li>Bearing Press</li></ul> | ||
| + | <br> | ||
| + | }} | ||
| + | {{note|You will have to use a press.}} | ||
<br clear=all> | <br clear=all> | ||
=== Removing the hub === | === Removing the hub === | ||
| + | |||
[[File:Rear drum.jpg|thumb|left|250px|Jimny Rear Drum]] | [[File:Rear drum.jpg|thumb|left|250px|Jimny Rear Drum]] | ||
| − | First of all secure the car | + | |
| + | * First of all secure the car. | ||
| + | * Release the wheel nuts and jack up the car and remove the road wheel. | ||
| + | * This then reveals the [[Wikipedia:brake drum | brake drum]]. | ||
| + | * The drum on the picture has a spacer fitted to it. | ||
| + | * With all the wheel bolts removed, the drum can be pulled forward and off the hub. | ||
| + | |||
| + | {{warning|The handbrake must be OFF, otherwise you will not be able to remove the the drum!}} | ||
<br clear=all> | <br clear=all> | ||
| + | |||
[[File:Drum_removal.jpg|thumb|left|250px|Using bolts to remove drum]] | [[File:Drum_removal.jpg|thumb|left|250px|Using bolts to remove drum]] | ||
| − | If the drum is stuck then first of all check that the | + | |
| + | * If the drum is stuck, then first of all check that the brake system (cable, shoes, etc.) is not stuck. | ||
| + | * Then insert two small bolts in the holes in the face of the drum. | ||
| + | * Reach around the back and feel near the top for a rubber bung. | ||
| + | * Remove the rubber bung and insert a flat bladed screwdriver. | ||
| + | * Angle the screwdriver so that the blade is pointing to the back of the car and the handle towards the front. | ||
| + | * You should be able to feel the adjuster wheel. | ||
| + | * Using the screwdriver turn the adjuster downwards a few clicks. Then gradually tighten the bolts you inserted in the front, the drum should come off. | ||
<br clear=all> | <br clear=all> | ||
[[File:Rear_brake_shoes.jpg |thumb|left|250px|Drum removed]] | [[File:Rear_brake_shoes.jpg |thumb|left|250px|Drum removed]] | ||
| − | With the drum removed the brake shoes can be seen (covered in mud in this case!). As the hub has to come off to change the bearings you need to remove the brake assembly. | + | |
| + | * With the drum removed, the brake shoes can be seen (covered in mud in this case!). | ||
| + | * As the hub has to come off to change the bearings you need to remove the brake assembly. | ||
<br clear=all> | <br clear=all> | ||
| Line 58: | Line 83: | ||
[[File:Shoes_lower_spring.jpg|thumb|left|250x250px|Lower spring]] | [[File:Shoes_lower_spring.jpg|thumb|left|250x250px|Lower spring]] | ||
| − | Use a small pair of pliers and remove the small spring that connects across the base of the brake shoes. | + | |
| + | * Use a small pair of pliers and remove the small spring that connects across the base of the brake shoes. | ||
<br clear=all> | <br clear=all> | ||
[[File:Shoes_adjuster_spring_2.jpg|thumb|left|250x250px|Adjuster Spring]] | [[File:Shoes_adjuster_spring_2.jpg|thumb|left|250x250px|Adjuster Spring]] | ||
| − | Use a pair of molegrips to remove the strong spring that joins the top of the shoes with the adjuster. Make a careful note of how the adjuster is fitted | + | |
| + | * Use a pair of molegrips to remove the strong spring that joins the top of the shoes with the adjuster. | ||
| + | * Make a careful note of how the adjuster is fitted. | ||
| + | * The rod has a forked end and on part of the fork has a step in it. | ||
| + | * Make careful note of how this fork is fitted. | ||
<br clear=all> | <br clear=all> | ||
| + | |||
[[File:Shoes_retainer_clip.jpg|thumb|left|250x250px|Shoe retainer]] | [[File:Shoes_retainer_clip.jpg|thumb|left|250x250px|Shoe retainer]] | ||
| − | Use a pair of pliers and twist the end of the shoe retaining pin until the spring clip | + | |
| + | * Use a pair of pliers and twist the end of the shoe retaining pin until the spring clip is released. | ||
<br clear=all> | <br clear=all> | ||
[[File:Shoe_assembly_removal.jpg|thumb|left|250x250px|Shoe removal]] | [[File:Shoe_assembly_removal.jpg|thumb|left|250x250px|Shoe removal]] | ||
| − | Now the shoes will lift away. Take care not to loose the little adjuster arm and its small spring. | + | |
| + | * Now the shoes will lift away. | ||
| + | * Take care not to loose the little adjuster arm and its small spring. | ||
<br clear=all> | <br clear=all> | ||
[[File:Handbrake_cable.jpg|thumb|left|250x250px|Handbrake cable]] | [[File:Handbrake_cable.jpg|thumb|left|250x250px|Handbrake cable]] | ||
| − | Release the end of the handbrake cable from the arm on the shoe. | + | |
| + | * Release the end of the handbrake cable from the arm on the shoe. | ||
<br clear=all> | <br clear=all> | ||
[[File:Brake_cable_retainer.jpg|thumb|left|250x250px|Handbrake cable retainer]] | [[File:Brake_cable_retainer.jpg|thumb|left|250x250px|Handbrake cable retainer]] | ||
| − | The handbrake cable is held into the brake backing plate by an expanding spring clip around the cable. The clip needs to be squeezed so the cable can be pulled out complete with the clip. This is not easy to do but will come out with persistence. | + | |
| + | * The handbrake cable is held into the brake backing plate by an expanding spring clip around the cable. | ||
| + | * The clip needs to be squeezed, so the cable can be pulled out complete with the clip. | ||
| + | * This is not easy to do but will come out with persistence. | ||
<br clear=all> | <br clear=all> | ||
| − | + | PICTURE REQUIRED | |
| − | You then need to remove the brake pipes from the cylinder. Undo the pipes and catch the drips of brake fluid. There is one pipe if you are doing the passenger side and two pipes if you are doing the drivers side. | + | |
| + | * You then need to remove the brake pipes from the cylinder. | ||
| + | * Undo the pipes and catch the drips of brake fluid. | ||
| + | * There is one pipe if you are doing the passenger side and two pipes if you are doing the drivers side. | ||
<br clear=all> | <br clear=all> | ||
| Line 87: | Line 128: | ||
[[File:Backplate_bolts.jpg|thumb|250px|left|Backplate bolts]] | [[File:Backplate_bolts.jpg|thumb|250px|left|Backplate bolts]] | ||
| − | The hub is retained by four bolts on the rear. | + | |
| + | * The hub is retained by four bolts on the rear. | ||
<br clear=all> | <br clear=all> | ||
PICTURE REQUIRED | PICTURE REQUIRED | ||
| − | The hub can now be removed. The unit is a friction fit into the axle casing. Attach a slide hammer to the hub and pull it out by using the slide hammer action. Alternatively refit the wheel or old wheel or brake drum (backwards) and hit the hub from behind to drive it off. | + | |
| + | * The hub can now be removed. | ||
| + | * The unit is a friction fit into the axle casing. | ||
| + | * Attach a slide hammer to the hub and pull it out by using the slide hammer action. | ||
| + | * Alternatively refit the wheel or old wheel or brake drum (backwards) and hit the hub from behind to drive it off. | ||
<br clear=all> | <br clear=all> | ||
[[File:Rear_axle_oil_seal.jpg |thumb|250px|left|Rear axle oil seal]] | [[File:Rear_axle_oil_seal.jpg |thumb|250px|left|Rear axle oil seal]] | ||
| − | With the hub pulled you can then see the oil seal and oil splash protector in the axle. Hook the old seal out, clean up the axle and push the new seal supplied with the kit into place. | + | |
| + | * With the hub pulled, you can then see the oil seal and oil splash protector in the axle. | ||
| + | * Hook the old seal out, clean up the axle and push the new seal supplied with the kit into place. | ||
<br clear=all> | <br clear=all> | ||
| Line 102: | Line 150: | ||
[[File:Bearing retainer.jpg|thumb|250px|left|Bearing retainer]] | [[File:Bearing retainer.jpg|thumb|250px|left|Bearing retainer]] | ||
| − | The old bearing is held in place by a retainer ring which needs cutting off. | + | |
| + | * The old bearing is held in place by a retainer ring which needs cutting off. | ||
<br clear=all> | <br clear=all> | ||
[[File:Cut_bearing_retainer.jpg|thumb|250px|left|Cutting the Bearing retainer]] | [[File:Cut_bearing_retainer.jpg|thumb|250px|left|Cutting the Bearing retainer]] | ||
| − | The best way seems to be to cut it away with an angle grinder. I do not know of anyone who has removed it in a different way. | + | |
| + | * The best way seems to be to cut it away with an angle grinder. | ||
| + | * I do not know of anyone who has removed it in a different way. | ||
<br clear=all> | <br clear=all> | ||
[[File:Stuck inner race.jpg|thumb|250px|left|Stuck inner race]] | [[File:Stuck inner race.jpg|thumb|250px|left|Stuck inner race]] | ||
| − | With the retainer cut away you should be able to remove the remains of the bearing. As you can see in the picture, my bearing had collapsed and left the inner race on the axle . | + | |
| + | * With the retainer cut away, you should be able to remove the remains of the bearing. | ||
| + | * As you can see in the picture, my bearing had collapsed and left the inner race on the axle . | ||
<br clear=all> | <br clear=all> | ||
| + | [[File:Collapsed bearing.jpg|thumb|250px|left|Collapsed bearing]] | ||
| − | + | * The damage to mine is clear! | |
| − | The damage to mine is clear! | ||
<br clear=all> | <br clear=all> | ||
| + | |||
[[File:New rear bearing.jpg|thumb|250px|left|New bearing]] | [[File:New rear bearing.jpg|thumb|250px|left|New bearing]] | ||
| − | This is what a new bearing should look like. Note that it has a built in "spacer" on one edge, this should be to the OUTSIDE of the hub/wheel. | + | |
| − | New bearing kits are available in the [https://www.bigjimny.com/store/rear-wheel-bearing-kit-suzuki-jimny.html | + | *This is what a new bearing should look like. |
| + | * Note that it has a built in "spacer" on one edge, this should be to the OUTSIDE of the hub/wheel. | ||
| + | * New bearing kits are available in the BigJimny store: for [https://www.bigjimny.com/store/rear-wheel-bearing-kit-suzuki-jimny.html non-ABS vehicles] and for [https://www.bigjimny.com/store/rear-wheel-bearing-kit-abs-suzuki-jimny.html ABS equipped vehicles] | ||
<br clear=all> | <br clear=all> | ||
| − | |||
=== Re-assembly === | === Re-assembly === | ||
| Line 128: | Line 183: | ||
=== Torque Settings === | === Torque Settings === | ||
| + | |||
Full details of the torque settings can be found in the [[Torque#Front_Hub | reference data]] | Full details of the torque settings can be found in the [[Torque#Front_Hub | reference data]] | ||
<br clear=all> | <br clear=all> | ||
| Line 133: | Line 189: | ||
{{Edited}} | {{Edited}} | ||
| − | |||
[[Category:Howto]][[Category:Steering]] | [[Category:Howto]][[Category:Steering]] | ||
Revision as of 15:28, 24 January 2017
![]() The content of any article might be expanded / improved in the future - revisit it sometimes.
The content of any article might be expanded / improved in the future - revisit it sometimes.
![]() Seen a mistake? Know something that isn't written? Edit and change this article yourself!
Seen a mistake? Know something that isn't written? Edit and change this article yourself!
![]() Some images in the article (if present) can be enlarged by clicking on them.
Some images in the article (if present) can be enlarged by clicking on them.
Contents
Introduction
The Rear Wheel Bearings on a Jimny can be prone to wearing, particularly when used off-road. The drum brake backing plate is supposed to provide protection for the bearing but it is very poor and you can expect the bearing to fail VERY regularly.
Providing you have the correct tools, the replacement work can be a straight forward task.
The symptoms of worn Rear Wheel bearings:
- Grating/Grinding as you rotate a jacked up wheel
- Oil/Grease leaking from rear of drum
- Wheel falling off (yes, really, comes out complete with driveshaft!)

Bearing kits
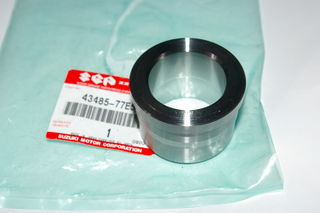
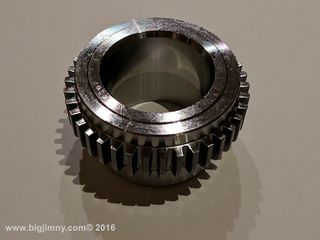
You will need a suitable bearing kit for your car.
Two kits are available, one for ABS and one for non-ABS cars.

- The non-ABS kit has a plain retainer ring.
- This kit is available from a number of suppliers including the BigJimny Store.
- The ABS kit has a retainer ring with an ABS ring installed.
- The fitment procedure of the ABS kit is the same as non-ABS kit.
- However, the ABS retainer is much larger overall (if you were considering using the cheaper non-ABS kit).
- Some kits have a retainer ring with the ABS ring, whilst other have the ring as an integral part.
![]() I have sold a number of different kits over the years and found the quality of the retainer ring varies, with some cheap kits being very poor quality.
I have sold a number of different kits over the years and found the quality of the retainer ring varies, with some cheap kits being very poor quality.
Old retainer ring
Full ABS retainer


Changing the bearings
Tools
- Standard metric sockets and spanners
- Assorted screwdrivers
- Slide Hammer
- Angle Grinder
- Bearing Press
![]() You will have to use a press.
You will have to use a press.
Removing the hub

- First of all secure the car.
- Release the wheel nuts and jack up the car and remove the road wheel.
- This then reveals the brake drum.
- The drum on the picture has a spacer fitted to it.
- With all the wheel bolts removed, the drum can be pulled forward and off the hub.
![]() The handbrake must be OFF, otherwise you will not be able to remove the the drum!
The handbrake must be OFF, otherwise you will not be able to remove the the drum!

- If the drum is stuck, then first of all check that the brake system (cable, shoes, etc.) is not stuck.
- Then insert two small bolts in the holes in the face of the drum.
- Reach around the back and feel near the top for a rubber bung.
- Remove the rubber bung and insert a flat bladed screwdriver.
- Angle the screwdriver so that the blade is pointing to the back of the car and the handle towards the front.
- You should be able to feel the adjuster wheel.
- Using the screwdriver turn the adjuster downwards a few clicks. Then gradually tighten the bolts you inserted in the front, the drum should come off.

- With the drum removed, the brake shoes can be seen (covered in mud in this case!).
- As the hub has to come off to change the bearings you need to remove the brake assembly.
Removing the shoes

- Use a small pair of pliers and remove the small spring that connects across the base of the brake shoes.

- Use a pair of molegrips to remove the strong spring that joins the top of the shoes with the adjuster.
- Make a careful note of how the adjuster is fitted.
- The rod has a forked end and on part of the fork has a step in it.
- Make careful note of how this fork is fitted.

- Use a pair of pliers and twist the end of the shoe retaining pin until the spring clip is released.

- Now the shoes will lift away.
- Take care not to loose the little adjuster arm and its small spring.

- Release the end of the handbrake cable from the arm on the shoe.

- The handbrake cable is held into the brake backing plate by an expanding spring clip around the cable.
- The clip needs to be squeezed, so the cable can be pulled out complete with the clip.
- This is not easy to do but will come out with persistence.
PICTURE REQUIRED
- You then need to remove the brake pipes from the cylinder.
- Undo the pipes and catch the drips of brake fluid.
- There is one pipe if you are doing the passenger side and two pipes if you are doing the drivers side.
Removing the Hub

- The hub is retained by four bolts on the rear.
PICTURE REQUIRED
- The hub can now be removed.
- The unit is a friction fit into the axle casing.
- Attach a slide hammer to the hub and pull it out by using the slide hammer action.
- Alternatively refit the wheel or old wheel or brake drum (backwards) and hit the hub from behind to drive it off.

- With the hub pulled, you can then see the oil seal and oil splash protector in the axle.
- Hook the old seal out, clean up the axle and push the new seal supplied with the kit into place.
Removing the Bearing

- The old bearing is held in place by a retainer ring which needs cutting off.

- The best way seems to be to cut it away with an angle grinder.
- I do not know of anyone who has removed it in a different way.

- With the retainer cut away, you should be able to remove the remains of the bearing.
- As you can see in the picture, my bearing had collapsed and left the inner race on the axle .

- The damage to mine is clear!

- This is what a new bearing should look like.
- Note that it has a built in "spacer" on one edge, this should be to the OUTSIDE of the hub/wheel.
- New bearing kits are available in the BigJimny store: for non-ABS vehicles and for ABS equipped vehicles
Re-assembly
This section needs completing but essentially it is a reverse procedure of above.
Torque Settings
Full details of the torque settings can be found in the reference data
Page last edited on 24/01/2017 by user Bosanek