


BigJimnyMeet (North) 2024 (12 Jan 2024)

14th July 2024
Parkwood Nr. Leeds
Click HERE for details
Expedition Jimny Project
- Ruby2
- Visitor
-

Public
Decalwizard wrote: Well finally managed to get round to building the storage compartments in the back of the Jim. i removed all the seats and made a plywood floor with hinged section for the tool well. Its paneled behind the front seats which will have a series of cargo nets to house maps, translation books etc.
I made two batons and covered them with carpet which sit in the recess of the tropicool cooler to lock it into position. The bottom will have strong Euro crates each side for cooking utensils etc and the other side will be food items..

Hi
Thanks for the idea of the shelf idea in the boot.
We have the seats folded down for the dogs and then have no boot space. So as we've small dogs and have a dog guard at the front of the boot, this looks like a fab idea.
The dogs even get to see out of the side windows easier too
")
Better get a move on.
Ta
Richard
Please Log in or Create an account to join the conversation.
- Decalwizard
- Visitor
-
Public
They are held in place by the steel angle brackets and a good old ladder roof clamp, a good alternative to nuts and bolts..


Please Log in or Create an account to join the conversation.
- markyp2000
- Visitor
-
Public
Please Log in or Create an account to join the conversation.
- Decalwizard
- Visitor
-
Public
Please Log in or Create an account to join the conversation.
- Ruby2
- Visitor
-
Public
I'm going for measuring up for my MCB 4X4 roof rack this week
)I'm just wondering if you took your roof rails off before you had the measuring up done? Or did they do that whilst you where there?
Going to get a full size roof rack like yours, but I fancy a rail all around the edge about 1/3rd the height of your front section.
Also I'll be getting a terrain awning like yours
") although I might just stick to the 150mm version :-: not sure about that yet.
although I might just stick to the 150mm version :-: not sure about that yet.Oh yes...... Last but not least I have done a raised platform boot floor similar to yours, I've used B&Q table legs on each corner and two spaced in the centre to add a bit of rigidity for the two 7kg dogs on top. Took a test drive with the dogs in and they loved being a bit higher so they could see out of the windows
I've also got the idea to get another X4 longer table legs from B&Q and I can then screw them together when we go off with the caravan and can extend the awning and take out the table and screw the legs together like tent poles to make a. Ice large 90X75 table I'll add pics when done!
Thanks for the inspiration!
Thanks
Richard
Decalwizard wrote: Well after a long time I decided to write up my project so far and after the fantastic service I received from MCB4x4 and crimble Powder Coatings I thought I would share them.
My plans are to build an expedition Jimny fully kitted and ready for an expedition adventure.
Below is what I found on the internet some time ago and decided I would do similar..

After doing my usual trick I rushed out and bought a very nice ARB expedition roof tent off Ebay which was in perefect condition apart from the outer cover (A little light needlework required to stitch it). The trouble was I didnt actually consider how the hell I was going to mount it on the roof
The standard roof rails are actually only metal on the rail itself, the rest of the rail is brittle plastic so horizontal roof bars were out of the question when the tent weighs 40kg. What I needed was a pukka expedition roof rack that can take the tent and the fuel and water jerry cans. After endless searching the internet Could I find one like I wanted err no. Whilst looking on Ebay for a second hand van rack to convert I stumbled across MCB4x4 who specialize in Landrover roof racks which they fabricate and sell for very reasonable prices. I took a chance and rang them to see if they would consider my requirements. To my surprise the answer was yes and the owner Matt told me to pop over for a quick measure up. I shot over the their workshop and got measured.. 5 days later the rack was ready apart from the mounting points.
Matt phoned me to arrange for a day for me to get the rack fitted which I eagerly awaited.
Thursday arrived and I raced over to his gaff ready for action. Matt and Liam quickly jumped on my Jimny and removed the old rails. The whole mounting brackets and feet were fabricated, tacked in place then speedy Liam quickly welded all the seams and finished it with the grinder. A final test fit of the rack to see if I was happy then it was off to the powder coaters. With my new rack bolted to the roof I drove to Crimble Powder Coatings in Slaithwaite where I was met with a very warm welcome from Josh, Richard and the CPC Team. I asked Josh if I could take some pics for the purpose of this little review and he kindly agreed..
Whilst Josh performed the degrease and zinc coating pre prep I decided to nip out for a cheeky sandwich in the local town, very nice fish and chips from BB's chippy
I arrived back in time to see Rachel "The Powder Princess" liberally dusting my new roof rack and I mean dust no wet fluids or sticky substances just dust. Its amazing how the process works, the dust is electrically charged which makes it stick to the metal. After a liberal dusting the rack was placed in a huge gas fired kiln and baked at 180 degrees until all the powder becomes fused into the plastic coating we all know.
Once the rack had cooled enough to handle, Richard, Josh and myself bolted the rack back on the jimny ready for me to shoot back up to MCB for the final check over. Josh also took the time to show me the powder coated wheels on his Discovery, man was it good. I would have not known they were re-furbished, you cant tell them apart from factory finished wheels. josh explained its all in the prep work, a total refurb for a 4x4 alloy is approx £60 and believe me its worth every penny for the finished result. I am going back to have my Daihatsu alloys refurbed with sparkle silver powder coating...
With the rack bolted on I drove the 5 miles back to MCB for Liam to check over the finished item and to fasten the powder coated mesh to the front of the rack. He even helped me put on the spotlights. Once he was 100% happy with all the rack and its mountings he told me I was free to leave( I could have stayed all day)
A massive massive thanks to Matt and Liam for the most excellent and friendly service they provided, they went above and beyond to ensure I was totally happy and boy O boy am I. You guys rock!!!!!
Also massive thanks to all at CPC powder coatings for their excellent quality part in the process..
Some pics of the day below and more to follow as I mount the tent, Awning and other items..
Matt Busy Removing and Measuring


The Rack Tub Ready For Mounting Brackets

Trial Fitting for mounting points

Rachel "The Powder Princess" and Josh


Ready For Baking

After Baking all shiny

Bolted on and Ready for action


Liam Making Final Adjustments


Next Review "Mounting The Tent"

For The Record, I do not know any of the above mentioned companies or people who are associated with them, I just wanted to praise them for the level of service they both provided, If you fancy a custom roof rack, Rock sliders or something a little different, give them a call.
MCB 4x4
Crimble Powder Coatings

Please Log in or Create an account to join the conversation.
- Decalwizard
- Visitor
-
Public
Matt removed the rood rails but its easy to do. If you are getting a terrain awning think about the fixings. I didnt plan on getting one i bought mine on a whim. The awning needs a flat surface to bolt it around so let Matt know this.
They fit on like this (But dont come with L brackets)
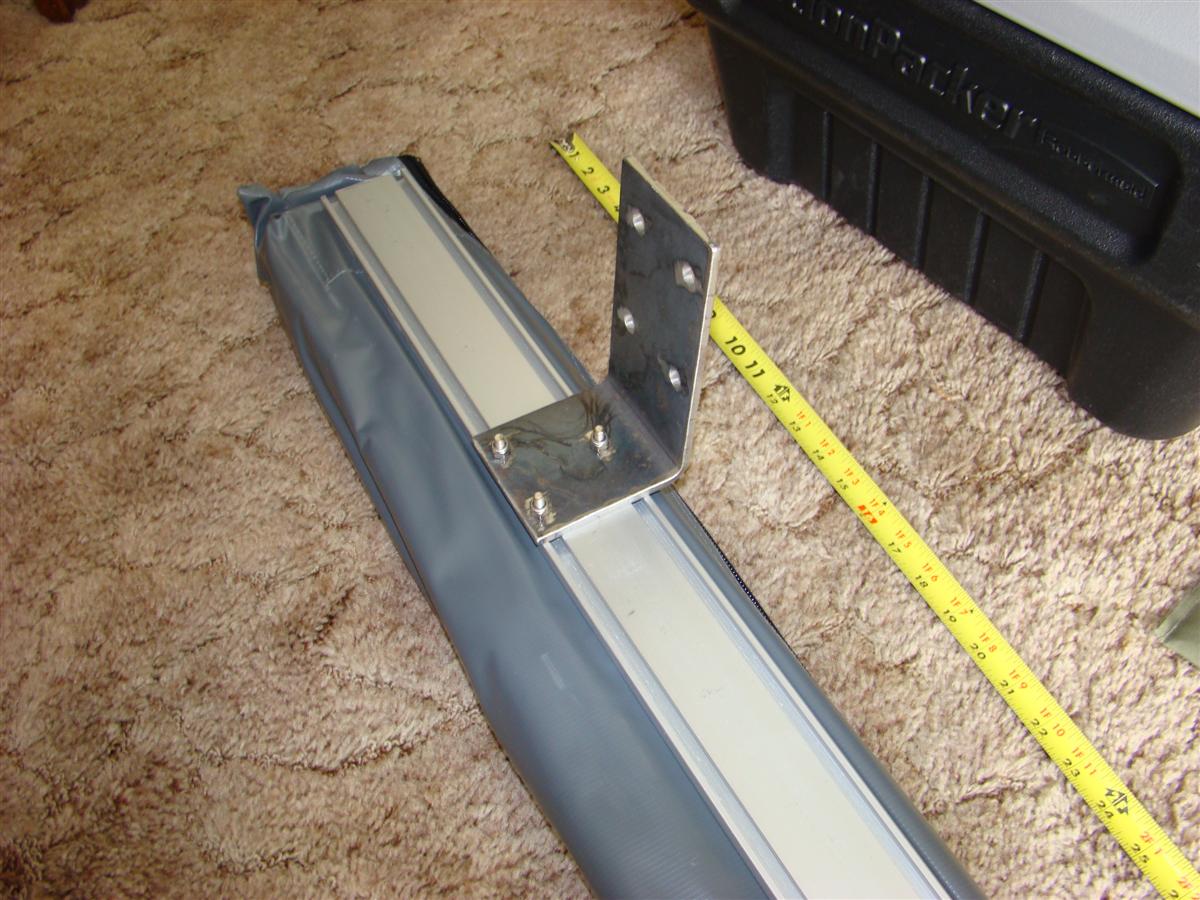
Ask Matt to ring me if he needs measurements for the awning off mine
I gave my old roof rails to Matt and he has them as a template. A basket idea will be good if you dont want a roof tent on. Also remind him to add the front supporting leg that just sits on the roof, he will know what you mean
Post the pics when you are done
Steve
Please Log in or Create an account to join the conversation.
- Ruby2
- Visitor
-
Public
That's great Ta
I'll let him know about the fact that I'll be fixing an awning to one side.
Ahhh yes, just spotted the front foot/rest.
Please Log in or Create an account to join the conversation.
- Decalwizard
- Visitor
-
Public
You can see the optional sides for the Terrain awning too

Please Log in or Create an account to join the conversation.
- JerseyJimny
- Visitor
-
Public
Please Log in or Create an account to join the conversation.
- Decalwizard
- Visitor
-
Public
Please Log in or Create an account to join the conversation.
- JerseyJimny
- Visitor
-
Public
I have seen a set for £50 on Ebay that are guaranteed to take the weight of a Land rover 110 so i can use them with the Colorado once i have one
Please Log in or Create an account to join the conversation.
- Decalwizard
- Visitor
-
Public

Please Log in or Create an account to join the conversation.