Difference between revisions of "Tyre selection and usage - best practices"
(Added additional notes about air compressors and about tyre air deflators) |
m (Beautified the table about Jimny-compatible tyre sizes) |
||
| Line 684: | Line 684: | ||
! H | ! H | ||
! R | ! R | ||
| − | |- | + | |- style="background:#FFE6E6" |
| 195 | | 195 | ||
| 65 | | 65 | ||
| Line 693: | Line 693: | ||
| 1993 | | 1993 | ||
| -5,01 | | -5,01 | ||
| − | | NO | + | | <span style="color: #FF0000;">'''NO'''</span> |
| -17 | | -17 | ||
| Very cheap size for very cheapish owners | | Very cheap size for very cheapish owners | ||
| Significant, but not mechanically stressing as it is negative | | Significant, but not mechanically stressing as it is negative | ||
| − | |- | + | |- style="background:#EBFAEB" |
| 195 | | 195 | ||
| 70 | | 70 | ||
| Line 706: | Line 706: | ||
| 2055 | | 2055 | ||
| -2,1 | | -2,1 | ||
| − | | YES | + | | <span style="color: #008000;">'''YES'''</span> |
| -7 | | -7 | ||
| Cheap size for cheapish owners | | Cheap size for cheapish owners | ||
| Negligible | | Negligible | ||
| − | |- | + | |- style="background:#EBFAEB" |
| 195 | | 195 | ||
| 75 | | 75 | ||
| Line 719: | Line 719: | ||
| 2116 | | 2116 | ||
| +0,82 | | +0,82 | ||
| − | | YES | + | | <span style="color: #008000;">'''YES'''</span> |
| +3 | | +3 | ||
| No real benefit over factory size | | No real benefit over factory size | ||
| Practically none | | Practically none | ||
| − | |- | + | |- style="background:#FFE6E6" |
| 195 | | 195 | ||
| 80 | | 80 | ||
| Line 732: | Line 732: | ||
| 2177 | | 2177 | ||
| +3,74 | | +3,74 | ||
| − | | NO | + | | <span style="color: #FF0000;">'''NO'''</span> |
| +13 | | +13 | ||
| Quite good size for off roading.<br>Moderate gains with some collisions and deviations. | | Quite good size for off roading.<br>Moderate gains with some collisions and deviations. | ||
| Minor to small | | Minor to small | ||
| − | |- | + | |- style="background:#FFE6E6" |
| 195 | | 195 | ||
| 82 | | 82 | ||
| Line 745: | Line 745: | ||
| 2202 | | 2202 | ||
| +4,91 | | +4,91 | ||
| − | | NO | + | | <span style="color: #FF0000;">'''NO'''</span> |
| +16 | | +16 | ||
| Rare size. Quite good size for off roading.<br>Moderate gains with some collisions and deviations. | | Rare size. Quite good size for off roading.<br>Moderate gains with some collisions and deviations. | ||
| Small to moderate | | Small to moderate | ||
| − | |- | + | |- style="background:#E6E6FF" |
| 205 | | 205 | ||
| 70 | | 70 | ||
| Line 758: | Line 758: | ||
| 2099 | | 2099 | ||
| 0 | | 0 | ||
| − | | | + | | <span style="color: #008000;">'''YES'''</span> |
| 0 | | 0 | ||
| Factory Samurai / Jimny dimension | | Factory Samurai / Jimny dimension | ||
| None | | None | ||
| − | |- | + | |- style="background:#FFF2E6" |
| 205 | | 205 | ||
| 75 | | 75 | ||
| Line 771: | Line 771: | ||
| 2163 | | 2163 | ||
| +3,07 | | +3,07 | ||
| − | | PROBABLY YES | + | | <span style="color: #FF9900;">'''PROBABLY YES'''</span> |
| +10 | | +10 | ||
| Mild gains with rarely any collisions or deviations.<br><br>Recommended as the simplest upgrade. | | Mild gains with rarely any collisions or deviations.<br><br>Recommended as the simplest upgrade. | ||
| Negligible to minor | | Negligible to minor | ||
| − | |- | + | |- style="background:#FFE6E6" |
| 205 | | 205 | ||
| 80 | | 80 | ||
| Line 784: | Line 784: | ||
| 2227 | | 2227 | ||
| +6,14 | | +6,14 | ||
| − | | NO | + | | <span style="color: #FF0000;">'''NO'''</span> |
| +21 | | +21 | ||
| Rare size. Very good size for off roading.<br>Significant gains with moderate risks and deviations. | | Rare size. Very good size for off roading.<br>Significant gains with moderate risks and deviations. | ||
| Significant, possibly mechanically stressing. | | Significant, possibly mechanically stressing. | ||
| − | |- | + | |- style="background:#EBFAEB" |
| 215 | | 215 | ||
| 70 | | 70 | ||
| Line 797: | Line 797: | ||
| 2143 | | 2143 | ||
| +2,1 | | +2,1 | ||
| − | | YES | + | | <span style="color: #008000;">'''YES'''</span> |
| +7 | | +7 | ||
| Relatively low effective gain -<br>height does not increase a lot compared to width increase. | | Relatively low effective gain -<br>height does not increase a lot compared to width increase. | ||
| Negligible | | Negligible | ||
| − | |- | + | |- style="background:#FFE6E6" |
| 215 | | 215 | ||
| 75 | | 75 | ||
| Line 810: | Line 810: | ||
| 2210 | | 2210 | ||
| +5,31 | | +5,31 | ||
| − | | NO | + | | <span style="color: #FF0000;">'''NO'''</span> |
| +18 | | +18 | ||
| Quite good size for off roading.<br>Moderate gains with some collisions and deviations. | | Quite good size for off roading.<br>Moderate gains with some collisions and deviations. | ||
| Small to moderate | | Small to moderate | ||
| − | |- | + | |- style="background:#FFE6FF" |
| 215 | | 215 | ||
| 80 | | 80 | ||
| Line 823: | Line 823: | ||
| 2278 | | 2278 | ||
| +8,53 | | +8,53 | ||
| − | | HELL NO | + | | <span style="color: #660066;">'''HELL NO'''</span> |
| +29 | | +29 | ||
| Rare size. Exceptionally good size for off roading.<br>Quite significant gains with significant risks and deviations. | | Rare size. Exceptionally good size for off roading.<br>Quite significant gains with significant risks and deviations. | ||
| Large, requires regearing | | Large, requires regearing | ||
| − | |- | + | |- style="background:#FFE6E6" |
| 225 | | 225 | ||
| 70 | | 70 | ||
| Line 836: | Line 836: | ||
| 2187 | | 2187 | ||
| +4,19 | | +4,19 | ||
| − | | NO | + | | <span style="color: #FF0000;">'''NO'''</span> |
| +14 | | +14 | ||
| Relatively low effective gain -<br>height does not increase a lot compared to width increase. | | Relatively low effective gain -<br>height does not increase a lot compared to width increase. | ||
| Minor to small | | Minor to small | ||
| − | |- | + | |- style="background:#FFE6FF" |
| 225 | | 225 | ||
| 75 | | 75 | ||
| Line 849: | Line 849: | ||
| 2257 | | 2257 | ||
| +7,56 | | +7,56 | ||
| − | | HELL NO | + | | <span style="color: #660066;">'''HELL NO'''</span> |
| +25 | | +25 | ||
| Very good size for off roading.<br>Significant gains with moderate risks and deviations. | | Very good size for off roading.<br>Significant gains with moderate risks and deviations. | ||
| Large, needs regearing | | Large, needs regearing | ||
| − | |- | + | |- style="background:#FFE6FF" |
| 225 | | 225 | ||
| 80 | | 80 | ||
| Line 862: | Line 862: | ||
| 2328 | | 2328 | ||
| +10,93 | | +10,93 | ||
| − | | HELL NO | + | | <span style="color: #660066;">'''HELL NO'''</span> |
| +37 | | +37 | ||
| Rare size. Exceptionally good size for off roading.<br>Quite significant gains with significant risks and deviations. | | Rare size. Exceptionally good size for off roading.<br>Quite significant gains with significant risks and deviations. | ||
| Extreme and requires regearing,<br>plus wheel bearing and CV joint improvements. | | Extreme and requires regearing,<br>plus wheel bearing and CV joint improvements. | ||
| − | |- | + | |- style="background:#FFE6FF" |
| 235 | | 235 | ||
| 70 | | 70 | ||
| Line 875: | Line 875: | ||
| 2231 | | 2231 | ||
| +6,29 | | +6,29 | ||
| − | | HELL NO | + | | <span style="color: #660066;">'''HELL NO'''</span> |
| +21 | | +21 | ||
| Relatively low effective gain -<br>height does not increase a lot compared to width increase. | | Relatively low effective gain -<br>height does not increase a lot compared to width increase. | ||
| Significant, mechanically stressing | | Significant, mechanically stressing | ||
| − | |- | + | |- style="background:#FFE6FF" |
| 235 | | 235 | ||
| 75 | | 75 | ||
| Line 888: | Line 888: | ||
| 2304 | | 2304 | ||
| +9,81 | | +9,81 | ||
| − | | HELL NO | + | | <span style="color: #660066;">'''HELL NO'''</span> |
| +33 | | +33 | ||
| Exceptionally good size for off roading.<br>Quite significant gains with significant risks and deviations. | | Exceptionally good size for off roading.<br>Quite significant gains with significant risks and deviations. | ||
| Extreme and requires regearing,<br>plus wheel bearing and CV joint improvements. | | Extreme and requires regearing,<br>plus wheel bearing and CV joint improvements. | ||
| − | |- | + | |- style="background:#FFE6FF" |
| 235 | | 235 | ||
| 80 | | 80 | ||
| Line 901: | Line 901: | ||
| 2378 | | 2378 | ||
| +13,32 | | +13,32 | ||
| − | | HELL NO | + | | <span style="color: #660066;">'''HELL NO'''</span> |
| +45 | | +45 | ||
| Extremely good size for off roading.<br>Extreme gains with extreme risks and deviations. | | Extremely good size for off roading.<br>Extreme gains with extreme risks and deviations. | ||
| Line 927: | Line 927: | ||
! With 3 cm<br>wheel spacers | ! With 3 cm<br>wheel spacers | ||
|- | |- | ||
| − | |- | + | |- style="background:#FFE6E6" |
| 195 | | 195 | ||
| 65 | | 65 | ||
| Line 939: | Line 939: | ||
| None | | None | ||
| None | | None | ||
| − | |- | + | |- style="background:#EBFAEB" |
| 195 | | 195 | ||
| 70 | | 70 | ||
| Line 951: | Line 951: | ||
| None | | None | ||
| None | | None | ||
| − | |- | + | |- style="background:#EBFAEB" |
| 195 | | 195 | ||
| 75 | | 75 | ||
| Line 963: | Line 963: | ||
| None | | None | ||
| None | | None | ||
| − | |- | + | |- style="background:#FFE6E6" |
| 195 | | 195 | ||
| 80 | | 80 | ||
| Line 975: | Line 975: | ||
| None | | None | ||
| Very low | | Very low | ||
| − | |- | + | |- style="background:#FFE6E6" |
| 195 | | 195 | ||
| 82 | | 82 | ||
| Line 987: | Line 987: | ||
| None | | None | ||
| Low | | Low | ||
| − | |- | + | |- style="background:#E6E6FF" |
| 205 | | 205 | ||
| 70 | | 70 | ||
| Line 999: | Line 999: | ||
| None | | None | ||
| None | | None | ||
| − | |- | + | |- style="background:#FFF2E6" |
| 205 | | 205 | ||
| 75 | | 75 | ||
| Line 1,011: | Line 1,011: | ||
| None | | None | ||
| None | | None | ||
| − | |- | + | |- style="background:#FFE6E6" |
| 205 | | 205 | ||
| 80 | | 80 | ||
| Line 1,023: | Line 1,023: | ||
| None | | None | ||
| Possible.<br>Use of a spacer mount resolves it. | | Possible.<br>Use of a spacer mount resolves it. | ||
| − | |- | + | |- style="background:#EBFAEB" |
| 215 | | 215 | ||
| 70 | | 70 | ||
| Line 1,035: | Line 1,035: | ||
| None | | None | ||
| None | | None | ||
| − | |- | + | |- style="background:#FFE6E6" |
| 215 | | 215 | ||
| 75 | | 75 | ||
| Line 1,047: | Line 1,047: | ||
| None | | None | ||
| Possible.<br>Use of a spacer mount resolves it. | | Possible.<br>Use of a spacer mount resolves it. | ||
| − | |- | + | |- style="background:#FFE6FF" |
| 215 | | 215 | ||
| 80 | | 80 | ||
| Line 1,059: | Line 1,059: | ||
| None | | None | ||
| Will collide.<br>Use of a spacer mount resolves it. | | Will collide.<br>Use of a spacer mount resolves it. | ||
| − | |- | + | |- style="background:#FFE6E6" |
| 225 | | 225 | ||
| 70 | | 70 | ||
| Line 1,071: | Line 1,071: | ||
| Possible.<br>Use of a spacer mount resolves it. | | Possible.<br>Use of a spacer mount resolves it. | ||
| Possible.<br>Use of a spacer mount resolves it. | | Possible.<br>Use of a spacer mount resolves it. | ||
| − | |- | + | |- style="background:#FFE6FF" |
| 225 | | 225 | ||
| 75 | | 75 | ||
| Line 1,083: | Line 1,083: | ||
| Possible.<br>Use of a spacer mount resolves it. | | Possible.<br>Use of a spacer mount resolves it. | ||
| Will collide.<br>Use of a spacer mount resolves it. | | Will collide.<br>Use of a spacer mount resolves it. | ||
| − | |- | + | |- style="background:#FFE6FF" |
| 225 | | 225 | ||
| 80 | | 80 | ||
| Line 1,095: | Line 1,095: | ||
| Possible.<br>Use of a spacer mount resolves it. | | Possible.<br>Use of a spacer mount resolves it. | ||
| Will collide.<br>Use of a spacer mount resolves it. | | Will collide.<br>Use of a spacer mount resolves it. | ||
| − | |- | + | |- style="background:#FFE6FF" |
| 235 | | 235 | ||
| 70 | | 70 | ||
| Line 1,107: | Line 1,107: | ||
| Will collide.<br>Use of a spacer mount resolves it. | | Will collide.<br>Use of a spacer mount resolves it. | ||
| Will collide.<br>Use of a spacer mount resolves it. | | Will collide.<br>Use of a spacer mount resolves it. | ||
| − | |- | + | |- style="background:#FFE6FF" |
| 235 | | 235 | ||
| 75 | | 75 | ||
| Line 1,119: | Line 1,119: | ||
| Will collide.<br>Use of a spacer mount resolves it. | | Will collide.<br>Use of a spacer mount resolves it. | ||
| Will collide.<br>Use of a spacer mount resolves it. | | Will collide.<br>Use of a spacer mount resolves it. | ||
| − | |- | + | |- style="background:#FFE6FF" |
| 235 | | 235 | ||
| 80 | | 80 | ||
| Line 1,541: | Line 1,541: | ||
* If you want to get a cheap, but good quality portable 12V tyre air compressor, try asking around at vehicle junkyards. | * If you want to get a cheap, but good quality portable 12V tyre air compressor, try asking around at vehicle junkyards. | ||
* They might have OEM portable 12V tyre air compressors extracted from some dead commercial vehicles (usually vans). | * They might have OEM portable 12V tyre air compressors extracted from some dead commercial vehicles (usually vans). | ||
| − | ** Some commercial vehicles were initially sold with such tools as additional equipment together with | + | ** Some commercial vehicles were initially sold with such tools as additional equipment together with a standard wheel jack, triangle, tow rope, etc. |
| − | *** Such air compressors get | + | *** Such air compressors get seldom if ever used during their lifetime. |
* Therefore, an (almost) unused Mercedes, Peugeot, Toyota or Iveco etc. OEM air compressor might be just the right deal. | * Therefore, an (almost) unused Mercedes, Peugeot, Toyota or Iveco etc. OEM air compressor might be just the right deal. | ||
| Line 1,629: | Line 1,629: | ||
| − | [[File:Draper 22487 dumb tyre deflation tool - A01.jpg|400px|thumb|left|Draper 22487 serving as an example of a useful and cost-effective tyre deflation tool]] | + | [[File:Draper 22487 dumb tyre deflation tool - A01.jpg|400px|thumb|left|Draper 22487 tyre deflator, serving as an example of a useful and cost-effective tyre deflation tool]] |
<br clear=all> | <br clear=all> | ||
Revision as of 18:52, 18 February 2018
![]() The content of any article might be expanded / improved in the future - revisit it sometimes.
The content of any article might be expanded / improved in the future - revisit it sometimes.
![]() Seen a mistake? Know something that isn't written? Edit and change this article yourself!
Seen a mistake? Know something that isn't written? Edit and change this article yourself!
![]() Some images in the article (if present) can be enlarged by clicking on them.
Some images in the article (if present) can be enlarged by clicking on them.
Contents
- 1 Introduction
- 2 General remarks
- 3 Choosing a proper tyre type for the desired usage
- 4 Tyre tread symmetry and directionality
- 5 Choosing tyre size
- 6 Jimny factory tyre size and approved sizes
- 7 Compatible & interesting tyre sizes for Jimny wheels
- 8 Tyre models in Jimny-compatible sizes
- 9 Spare wheel and tyre usage
- 10 Tyre air pressures
- 11 Wheel balancing
- 12 Wheel damages and repairs
- 13 Tyre damages and repairs
Introduction
- One of the most common questions about improving vehicle's all-terrain performance and endurance is "what is the most effective modification to apply to my vehicle?".
- Well, using proper tyres, and using them properly, is arguably the most effective vehicle "mod" for all-terrain use!
![]() "Most effective" can generally mean in the context of cost, performance, simplicity or endurance.
"Most effective" can generally mean in the context of cost, performance, simplicity or endurance.
Using proper tyres properly can be the most effective "mod" in all of those ways!
Overview of the topics covered by this document
- Choosing a proper tyre type for the desired usage;
- Choosing a tyre size (with various factors);
- List of various tyre models with remarks;
- Best practices on tyre usage (wheel rotation, wheel balancing, air pressures, rim and tyre repairs);
- Use of tyre chains for snow and mud conditions;
- Special situations and combinations;
General remarks
Introduction
First of all, some basic remarks about using tyres on four wheel drive vehicles. Each remark is explained in detail in various chapters of this article.
Constraints on tyre combinations
- Inherent restriction of most four wheel drive transmission systems (Jimny's included) is that the vehicle has to use all four tyres of the same profile (size).
- Furthermore, all four tyres should be the same model and have a very similar tread depth.
- Reason: Even small differences between rotational friction and wheel circumference among wheels can damage the 4WD transmission in the long term.
- Furthermore, all four tyres should be the same model and have a very similar tread depth.
- These restrictions limit the combinations when choosing (buying) tyres.
The spare (5th) tyre
- The stated restrictions also apply to the spare (5th) tyre, which must not be overlooked!
- The spare wheel and tyre should be actively used in a 5-tyre rotation scheme.
- Topic of spare tyre utilization has its own dedicated sub-chapter: Spare wheel and tyre usage.
- People who venture into serious expeditions and overland travels usually use six identical wheels and tyres in a six-tyre rotation scheme.
Tyre (air) pressures
- Frequent checking (and adjusting) of tyre air pressures is much more important for all-terrain use than for ordinary on-road use.
- Reason: tyre pressures significantly affect all-terrain traction as well as the risk of tyre damage.
- Tyres get hotter with low pressures, for example.
- Reason: tyre pressures significantly affect all-terrain traction as well as the risk of tyre damage.
- The topic of tyre air pressures has its own dedicated sub-chapter: Tyre air pressures.
Wheel (dis)balancing
- Wheel (dis)balancing is a much more prominent issue for all-terrain use.
- This is especially important for Jimnys, as they are notorious for developing a "death wobble" issue.
- It is a genetic trait derived from their short wheelbase and solid (rigid) front axle suspension design.
- This is especially important for Jimnys, as they are notorious for developing a "death wobble" issue.
- See the sub-chapter "Wheel balancing" for more details.
Tyre profiles
- For all-terrain use, higher profile tyres are always preferred against lower profile tyres.
- Reasons:
- Higher profile tyres cushion the ride better on all-terrain both for the vehicle and for the passengers,
- They decrease the chance of rim damage,
- They allow better air pressure management.
- Reasons:
- The only disadvantage of "tall" tyres is worse performance when the vehicle corners fast in a bend.
- However, it is insensible anyway to do so in a high, narrow, wobbly, jumpy, twitchy vehicle.
- Therefore, putting oversized rims with thin tyres on a 4WD vehicle is like putting ballet shoes on a village farmer.
- A "higher profile" means a "taller" tyre (taller tyre sidewall).
- The second number in tyre's sizing specification determines its "tallness" as a percentage of its width.
- An example: for a 205 / 70 / R15 tyre, the second number says that its sidewall height is 205 mm * 0,7 = 143,5 mm.
- Sometimes a narrower tyre with a higher second number is actually taller than a wider tyre with a lower second number!
- An example: 195 / 80 / R15 is taller than 205 / 70 / R15 (156 mm sidewall height vs 143,5 mm sidewall height).
Choosing a proper tyre type for the desired usage
Introduction
Tyre designs for passenger and light truck vehicles can be (among other ways) designed and built for:
- Regular "on road" use (the vast majority of tyre models);
- All-terrain use (to a certain extent);
- The difference between those two design approaches is not just in the tread pattern (traction capability).
- Another equally important aspect is the robustness of tyre's body (resistance to various types of trauma, which regularly occurs off the asphalt).
- This is generally given dedicated design attention for all-terrain tyres (based on tyre's exploitation expectancy).
- For ordinary road tyres, robustness is barely considered on itself.
- Also, tyre's adaptability to different weather conditions is also sometimes given more design thought when designing all-terrain tyres.
There is no official standard to differentiate various kinds of all-terrain tyre designs.
There are three "industry categories" of all terrain tyre designs, based on loose practical usage classifications (from "worse" to "best"):
- HT - "Highway Terrain"
- AT - "All Terrain"
- MT - "Mud Terrain"
Tyre manufacturers usually use this classification to position their all-terrain tyre models in their marketing catalogue.
- HT tyres generally have the best on-road performance and worst off-road performance of all three categories.
- MT tyres generally have the opposite performance characteristics.
- AT tyres are generally in the middle - being good but not great for both.
- Since these are loose classifications, there are "weaker" and "stronger" tyre models in each category.
- Therefore, each tyre model should be precisely evaluated on its own.
- For example, Dunlop Grandtrek AT20 could be classified either as a "mild AT tyre", or as an "extreme HT tyre" :).
- Another example is Uniroyal Laredo HD/T, which could be classified either as a "mild MT tyre" or as an "extreme AT tyre".
- Therefore, each tyre model should be precisely evaluated on its own.
- A special case are retreaded (remoulded, "protect") tyres.
- Read more about them in the corresponding subchapter below.
HT tyre class
Main traits:
- Highway terrain tyres are generally meant to be used predominantly on road, with only slight & light off road excursions (dirt roads, possibly rougher gravel at most, etc.).
- The overall tread design and depth of HT tyres is generally quite similar to ordinary road tyres.
- That means that HT tyres generally have equally proficient on-road performance and endurance even for sharp or very fast driving (and similar fuel economy).
- That also means that HT tyres exhibit almost equally bad all-terrain performance as ordinary road tyres.
- However, having the "terrain" part in their name, HT tyres should be slightly more robust than ordinary road tyres.
Conclusions:
- For (almost) always on-road driven all terrain vehicles, HT tyres can be an optimal choice if the vehicles are driven sharply or at high speeds.
- HT-class tyres are always recommended over ordinary on-road tyres for two reasons:
- They should be more robust;
- They at least formally "suit" the all-terrain image of the host vehicle;
- However, AT tyres are definitely a better choice if proper all terrain driving is even occasionally performed, and/or if the vehicle is not driven fast or sharply.
AT tyre class
Main traits:
- All terrain tyres are generally meant to be used in mixed on-road and all terrain conditions (anywhere between 30% and 70% of time for either).
- AT tyres usually have significantly rougher (and a bit deeper) tread design compared to HT and ordinary road tyres.
- AT tyres are a performance compromise which is usually hard to achieve.
- AT tyres are generally good on-road except for sharp or very fast driving, and generally good off-road except for boggy and/or harsh conditions (deep mud, deep snow, sharp rocks, river crossings ...).
- AT tyres are usually significantly more robust than ordinary road tyres.
- AT tyres should slightly impact fuel economy.
- AT tyres can be a challenge to balance properly.
- Many AT tyres are "all season", which further adds to their "all terrain" value.
- For example, mountaineers can encounter ice and snow even as late as in June and as early as in September.
Conclusions:
- For all-terrain vehicles which are used for everything - commuting, intercity travel, and various all terrain conditions, AT tyres are the solution.
- AT-class tyres should not present a jeopardy on the road, and they should be a trusted companion off the road, in the sense of traction and in the sense of reliability.
MT tyre class
Main traits:
- Mud terrain tyres (also called "Maximum Traction") are generally meant to be used predominantly off road, with only slight easy-going on-road excursions.
- MT tyres usually have very deep and striking ("tractor looking") tread and sidewall appearance, and very high robustness capability through various reinforcements.
- MT tyres excel in boggy and/or harsh conditions (deep mud, deep snow, sharp rocks, tree roots, river crossings, etc.) and offer the best protection against punctures, cuts and chipping.
- However, MT tyres are generally noisy on the road, wear faster and present a real jeopardy if not driven slowly and carefully on a wet road and especially on packed snow or ice.
- Also, MT tyres usually significantly affect fuel economy.
- Due to their coarse construction, MT tyres can be very hard or impossible to balance properly.
Conclusions:
- For all-terrain vehicles which rarely touch the asphalt and are primarily used on rough terrain, MT tyres should be the weapon of choice.
- However, MT-class tyres can be a jeopardy on regular road surfaces and they wear out faster and louder on road.
- Also, if not balanced entirely, MT-class tyres will cause issues on road.
Retreaded (remoulded, "protect") tyres
Main traits:
- A retreaded tyre is a recycled / revived tyre.
- It is a previously used and worn out tyre, which had its worn tread surface grinded off, and a new tread (which can have completely different pattern from the old one) glued on.
- The material of the new tread is specific to the retreading "factory".
- Therefore, retreaded tyres are essentially "tyre zombies".
- That means they are old, worn tyre carcasses which have been restitched and brought back to life like Frankenstein.
Notes on tread patterns:
- Retreaded tyres are produced in all kinds of editions and flavors, with their treads typically mimicking a well known brand name tread pattern.
- They can mimic any tread pattern, either of slick and smooth road tyres, summer or winter tread designs, as well as heavy-duty AT, MT or even more extreme agricultural and industrial tread patterns.
- They can also be made with a custom tread design of any appearance that you can imagine.
Advantages of retreaded tyres:
- They are quite cheap (usually cheaper than any brand name tyre).
- They are ecological (recycled material).
- There is a wide and colorful choice of tread patterns, especially the extreme traction ones.
But there is a cost to pay. Read on.
Disadvantages of retreaded tyres:
- Bear in mind - if a tread appears the same like from a brand name tyre model, it does not mean that the materials and compositions of the tread are the same (affecting grip, wear rate, etc.).
- Also, you hardly ever know which actual tyres were used for resurrection.
- For all-terrain duty, the strength and robustness of tyre's sidewalls are equally important as the tread pattern.
- There are also horror stories of retreaded tyres failing catastrophically during high speed driving.
- The tread layer actually glues off from the tyre carcass.
- The consequences don't look pretty from any angle of view.
- The tread layer actually glues off from the tyre carcass.
- In some countries, an aggressive tread remoulded tyre could render an environmental fine in some back-country roads.
![]()
Beware that Jimnys (as most vehicles with solid front axles) are highly susceptible to developing a "death wobble" issue produced by disbalance or play in their front suspension.
Improper wheel balance is highly likely to trigger it.
Retreaded tyres (even those with ordinary on-road treads) are notorious for being hard or impossible to balance.
Here is a document (made by forum user Bosanek) which summarises all arguments FOR and AGAINST using retreaded tyres.
Tyre tread symmetry and directionality
Introduction
- The previous chapter dealt with tyre construction and tread pattern, primarily regarding robustness and heavy-duty performance.
- This chapter deals with tyre tread layout, which is a common parameter of any tyre construction.
- The issue of tread layouts is important for all-terrain use.
- Reason: some layouts severely restrict tyre's usage flexibility for all-terrain use.
The tread design of each tyre has two important pattern layouts:
- Symmetricity - it can be either symmetrical or asymmetrical;
- Directionality - it can be either "uni-directional" (also called just "directional") or "bi-directional" (also called "non-directional");
These two pattern layouts directly determine / constraint in which orientations and positions a certain tyre can be used on a vehicle.
Therefore, there are four possible tread layouts:
- Symmetric bi/non-directional tread
- Asymmetric bi/non-directional tread
- Symmetric (uni)directional tread
- Asymmetric (uni)directional tread
The pelicularities of each layout will be discussed below.
Symmetric bi/non-directional tread
- This has historically been the most common tyre tread pattern layout, but it's use is steadily decreasing in the 21st century.
- It is still the most common layout for HT/AT/MT tyres.
- No matter how the tyre is turned around or mounted, the tread looks just the same every time.
- Therefore, this layout imposes no restrictions on how the tyre needs to be oriented when being mounted on a wheel, nor on which sides of the vehicle the tyre+wheel assembly can be used afterwards.
- In other words, this layout provides complete flexibility regarding orientations when mounting tyres on wheels and when mounting the tyre+wheel assembly on the vehicle.
- Examples of ordinary road tyres with symmetric bi/non-directional tread layouts
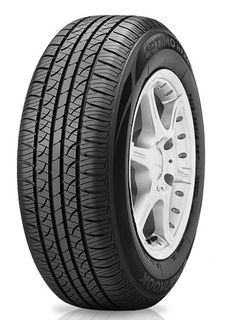
Hankook Optimo H724

Bridgestone Potenza RE92

Bridgestone Turanza AR10


- Examples of HT/AT/MT tyres with symmetric bi/non-directional tread layouts

Yokohama-Geolandar-HT-S

General Grabber AT3
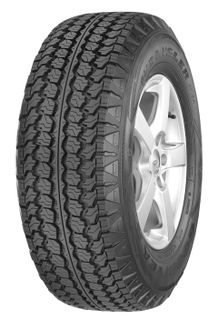
Goodyear Wrangler AT-SA

Falken Wildpeak WP AT01

Kumho Road Venture MT51


Asymmetric bi/non-directional tread
- When someone says or writes just "asymmetric tread", they usually refer to this layout, because most asymmetric treads are bi/non-directional.
- However, there are notable exceptions (read below), so explicit mentioning of tread's directionality too is always desired.
- When a tread is asymmetric, it means that the left and right portion of the tread are different when compared to one another.
- The reason is that one side is optimized for one scenario (for example to handle cornering forces) and the other side for another scenario (for example for water ejection to evade "aquaplanning").
- This means that asymmetric tread layouts generally provide more versatility and better optimization of available tyre tread surface than "plain" symmetric treads.
- The "left" and "right" portion of the tread are usually designed for (and referred as) being the "inner" and "outer" side of the tread/tyre (when it is mounted on a vehicle).
- Examples of ordinary road tyres with asymmetric bi/non-directional tread layouts

Pirelli P-Zero System Asimmetrico

Continental WinterExtremeContact


- Examples of HT/AT/MT tyres with asymmetric bi/non-directional tread layouts

Maxxis Escapade CUV
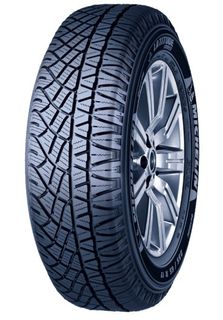
Michelin Latitude Cross


- Tyres with asymmetric bi/non-directional treads typically have an "Inside" and/or "Outside" inscriptions / markings on their sidewalls, indicating proper orientation when mounting them on a wheel.
- Therefore, it is very important to always mount an asymmetric bi/non-directional tyre on a wheel in proper orientation.
- This means that the "outside" side of the tyre should be on the outer side of the wheel.
- Therefore, it is very important to always mount an asymmetric bi/non-directional tyre on a wheel in proper orientation.
- After that, such a tyre+wheel assembly can be used on any side of the vehicle, because the "outside" side of the tyre will always be ... well, on the outer side of the wheel.
- In other words, this layout just requires simple caution to properly orientate a tyre when mounting it on a wheel, and after that it provides complete flexibility regarding positions and orientations when mounting the tyre+wheel assembly on the vehicle.
Symmetric (uni)directional tread
- When someone says or writes just "(uni)directional tread", they usually refer to this layout, because most (uni)directional treads are symmetric.
- When a tread is (uni)directional, it means that its pattern is designed and optimized to do its work for just one tyre rolling direction.
- Concentrating the design effort on only one direction of motion enables better optimization of the tread performance like directional stability, grip, "aquaplanning", wear rate, etc.
- The appearance of (uni)directional treads usually vaguely or strikingly resembles a "V" shape.
- Most winter tyres have this tread layout, because it enables significant optimization of tread performance for very slippery or wet conditions - where every bit of additional grip can make a difference.
- This tread layout can also be encountered on many summer and all-season tyres as well.
- Examples of ordinary road tyres with symmetric (uni)directional tread layouts

Hankook Ventus V12 Evo K110
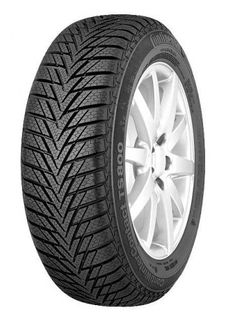
Continental WinterContact TS800

Fulda Kristall Control HP2
Goodyear UltraGrip plus SUV


- Examples of HT/AT/MT tyres with symmetric (uni)directional tread layouts
Kumho Road Venture MT KL71

Yokohama Geolandar MT


- (Uni)directional symmetrical tyres typically have a "Rotation" inscription / marking on their sidewalls combined with some directional marking (usually an embossed arrow shape).
- This marking directly determines in which orientation a tyre needs to be mounted on a wheel, depending on which side of the vehicle will the wheel+tyre assembly be mounted afterwards.
- Since a tyre can be mounted on a wheel with the "Rotation" marking pointing either to the left or to the right (when viewing the wheel from its outside/face side), such a tyre+wheel combination should then only be used either on the left or on the right side of the vehicle.
- In other words, after such a tyre is mounted on a wheel, that assembly should be then used only on one side of the vehicle (depending on how was the tyre oriented when it was mounted on the wheel).
- This prevents the use of five identical tyres.
- Reason: tyres can not be switched from one side of the vehicle to another without dismounting them from the wheel, turning them around and mounting them again - a cumbersome and expensive endeavor.
- This prevents the use of five identical tyres.
- In other words, after such a tyre is mounted on a wheel, that assembly should be then used only on one side of the vehicle (depending on how was the tyre oriented when it was mounted on the wheel).
Asymmetric (uni)directional tread
- This tread design layout is rather rare.
- Although it theoretically provides the best possible potential for the optimization of the tread surface, it inherently invokes a layer of complexity for which 99% of the tyre market is not accustomed to.
- Because both the "outside" parameter and the "rotation" parameter need to be respected simultaneously, the tyre model would have to be made in two distinct editions - with a tread layout for the left side of the vehicle and with the tread layout for the right side of the vehicle.
- In other words, it would have to be like a left shoe and a right shoe for humans.
- The seller / installer / buyer would have to be careful to always sell / install / buy such tyres in a "left" + "right" pairs.
- In that case, each tyre marked as "left" from the factory would have to be mounted on a wheel while respecting its "outside" marking (and then used only on the left side of the vehicle), and the same analogy goes for each tyre marked "right" from the factory.
- It should now be clear why this tread layout is rather rare, because of a high risk of improper mounting by trained monkeys (most tyre installers and car mechanics).
- Examples of tyres with asymmetric (uni)directional tread layouts
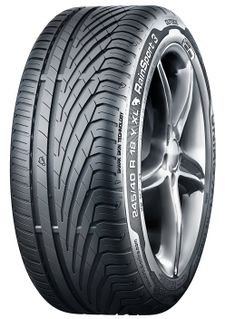
Uniroyal RainSport 3
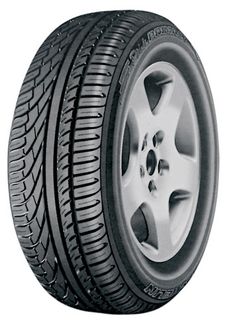
Michelin Pilot Primacy


- For the few found tyre models with this layout, all of them exist either only in "left" or only in "right" tread layout (to keep the matters simple for the sellers / installers / buyers).
- However this means that the tyres on one side of the vehicle will always be improperly mounted.
- They will be either in reverse direction of motion, or with outside portion of the tread on the inside portion of the wheel!
- That's exactly how each car with such tyres rolls around in practice! - seen and confirmed.
- This interesting issue is still under investigation.
- Why did those manufacturers dare to make such tyres when they knew that they can not be properly mounted on one side of the vehicle?
Summary of tread layouts
- For all terrain use, bi/non-directional treads (either symmetric or asymmetric) are definitely recommended.
- Main reason: they are the prerequisite for the very good practice of using five identical tyres.
- Asymmetric treads are in theory better (more versatile) than symmetric treads, but this of course varies in practice, depending on a comparison between particular tyre models.
- (Uni)directional treads should generally be avoided for all terrain use.
- Main reason: they prevent you from using five identical tyres.
- (Uni)directional treads' performance virtues are typically best utilized in very high-speed summer tyres, in winter tyres when used in harsh snowy/icy conditions, or in MT tyres when used mostly in deep mud.
- If that is the predominantly expected terrain, then (uni)directional tyres might be worthy of consideration.
- If you will be using six identical tyres, then (uni)directional tyres provide (almost) no restrictions when compared to bi/non-directional tyres.
Choosing tyre size
Reasons and benefits
Why would you want to change your tyre size?
- Well, for all terrain vehicles, the usual strive is to increase ground clearance.
- Increasing wheel diameter by increasing tyre profile (the second number in tyre size marking) is the most effective way to achieve this.
- It lifts the entire vehicle (including the axles!), and is dead simple to do for mild increases.
- There are additional advantages of increasing the tyre profile ("tyre height").
- This is mentioned in the "Tyre profiles" chapter.
- Increasing wheel diameter by increasing tyre profile (the second number in tyre size marking) is the most effective way to achieve this.
![]() When a wheel diameter is changed by a certain amount, the vehicle's (and the axles') ground clearance will change by only half as much (by the amount of wheel's radius change).
When a wheel diameter is changed by a certain amount, the vehicle's (and the axles') ground clearance will change by only half as much (by the amount of wheel's radius change).
Basic school geometry explains why.
Issues and risks
However, increasing the wheel circumference/radius incurs the following technical issues:
- The vehicle will accelerate harder / slower and will move faster downhill on engine braking (in any gear);
- Transmission will have a heavier duty to perform;
- This leads to premature wear in the long term;
- Fuel economy is slightly decreased;
- This is mostly because of harder acceleration;
- Speedometer and tachometer measurement will change as much as the circumference has changed;
- Larger tyres might not fit;
- They might rub on the bodywork when the front wheels are turning left/right, or when the suspension is compressed on uneven terrain;
- The larger spare tyre might not fit in its spare position (contact with some vehicle body parts) and/or in its case/cover;
- Using snow/mud chains can be risky or impossible, because of (much) less available clearance between the wheels and the surrounding bodywork and mechanical components.
- However, 4WD vehicles might need snow/mud chains only on steep icy terrain, or for plowing very deep snow.
- A 4WD vehicle with AT tyres also could benefit of chains in deep soft muddy terrain.
Additional notes:
- The extent / severity of these issues highly depends on how much the wheel radius has been increased.
- They should be negligible to slight at most, if you stay roughly within +-3% of the factory size.
- Using too wide tyres also induces some of these issues and risks.
- Also, very wide tyres significantly increase the drag force when pulling a bogged vehicle from deep mud.
Some of these technical issues can be (and usually have to be) remedied in case of significant tyre size increases:
- Impact on vehicle's acceleration and engine braking can be remedied by altering the transmission gears ("regearing").
- Regearing the transmission will also remedy the load on some parts of the transmission.
- However, some parts, like the wheel bearings for example, will remain under heavier duty;
- Regearing the transmission will also remedy the load on some parts of the transmission.
- Tyres can be made to fit properly by either or both of the two methods:
- By lifting the vehicle's body or suspension;
- By altering the bodywork (trimming the wheel arches, inner arch linings, etc.) (usually irreversibly), the extent of which highly depends on tyre size;
- In Jimny's case, the larger spare tyre can be made to fit to the tailgate by installing a spacer on the tyre holder;
- However, the spare tyre vinyl cover or hard spare tyre case has to be custom-made (if badly needed);
Additional notes:
- Some of the mentioned remedies can be quite expensive to apply, and might also imply further modifications.
- For example, higher suspension lifts require modified radius arm bushes, brake hoses, propeller shafts, adding wheel spacers, buying a new loan at the bank ....
![]() Using a non-factory tyre size might be illegal or require some vehicle recertification, depending on country or region.
Using a non-factory tyre size might be illegal or require some vehicle recertification, depending on country or region.
Impact of larger tyres on fuel economy
Introduction
- Using larger tyres certainly negatively impacts fuel economy.
- However, calculating how much is not straightforward!
- There is an important factor of calculation which most people do not take into account, and then they get skewed results.
- The factor is that, with larger tyres, the odometer will record less distance than the vehicle has actually traveled.
- Without counting this factor in, the fuel consumption figures get skewed for the worse (the calculated consumption falsely shows to be even higher than it actually is).
- The factor is that, with larger tyres, the odometer will record less distance than the vehicle has actually traveled.
- To count this factor in, you have to calculate the percentage of odometer reading mismatch, and multiply it with the odometer reading (to correct the reading to the true value).
- Read more below for the details.
Full details
The standard method of calculating fuel consumption in practice (in "l / 100 km" measuring unit) is:
- Fill in a full fuel tank of fuel.
- Then note the current odometer reading.
- Drive until the fuel tank gets to a (preferably) reserve level.
- Fill in a full fuel tank of fuel again.
- Then note the current odometer reading.
- Also note how much fuel was poured in.
- The amount of poured fuel during the last fill is the parameter "F".
- Calculate the difference between the two odometer readings.
- That is the parameter "S".
- The formula to calculate the fuel consumption "C" is: C = 100 * F / S.
An example:
- After traveling for 385 km since the last full fuel tank fill, the amount of poured fuel to fill a fuel tank was 34,5 l.
- The calculated fuel consumption: C = 100 * 34,5 / 385 = 8,96 l / 100 km.
- This method of calculation works just fine when using stock sized tyres.
- When using larger tyres, the odometer (and speedometer) reading (parameter "S") is skewed (incorrect) because the device is calibrated for the stock tyre size (wheel circumference).
- The circumference of a wheel in fact represents exactly the path that the wheel travels for one full wheel rotation.
- The speedometer and odometer only count the wheel rotations (by counting the rotations of some particular gear in the transmission), and they expect the wheel circumference to be close to the theoretical stock size (it always varies slightly due to tyre construction and varying tread depth).
- Therefore, when a larger diameter wheel is used, the odometer will count less distance than the vehicle has actually traveled in real life.
- The amount of skew is directly proportional to the amount of wheel circumference change.
- Therefore, when a larger diameter wheel is used, the odometer will count less distance than the vehicle has actually traveled in real life.
An example:
- The theoretical diameter "D1" of a stock sized tyre (205 / 70 / R15) is 668,0 mm.
- Its circumference "C1" is: C1 = D1 * pi = 668,0 * pi = 2098,58 mm.
- The theoretical diameter "D2" of a 215 / 75 / R15 tyre is 703,5 mm.
- Its circumference "C2" is: C2 = D2 * pi = 703,5 * pi = 2210,11 mm.
- The difference: C2 - C1 = 111,53 mm = 11,2 cm.
- That is how much additional distance the larger wheel will travel with each wheel rotation!
- It might not look like much for one wheel rotation, but it's actually a (C2 / C1 - 1) * 100 = 5,31% increase in wheel circumference.
- This directly translates to 5,31% increase in the path traveled, for any distance.
- That means, when your odometer shows that you have traveled 1000 km with these larger tyres, you have actually traveled circa 1053 km!
- This directly translates to 5,31% increase in the path traveled, for any distance.
- Now, if you keep on using the standard fuel consumption calculation formula with the larger tyres (without factoring in the skew in the odometer reading), you will get skewed results.
- Because you have actually traveled more distance (and therefore used more fuel) than your odometer shows, the calculated fuel consumption will be higher than it actually is.
- You will find many driver reports/complaints on the Internet of increased fuel consumption after installing larger tyres, where many drivers even provide "calculated" fuel consumption figures.
- However, most of those people have not factored in this odometer reading skew, rendering their results incompetent.
- If someone has not mentioned that they had factored in the skew in the odometer reading when calculating fuel consumption with larger tyres, than don't trust their fuel consumption figures.
To continue on the above to examples:
- You have 215 / 75 / R15 tyres.
- Their theoretical circumference is 5,31% larger than the theoretical circumference of stock-sized tyres (205 / 70 / R15).
- The recorded odometer difference "S" between two full fuel tank fills is 385 km.
- The amount of filled fuel "F" during the last fuel fill was 34,5 l.
- Standard calculation (without factoring the skew in odometer reading): C = 100 * F / S = 100 * 34,5 / 385 = 8,96 l / 100 km.
- However, if you factor in the skew in the odometer reading: S' = S * 1,0531
- Now, the new (correct) calculation: C = 100 * F / S' = 100 * 34,5 / (385 * 1,0531) = 8,51 l / 100 km!
- This is a difference of 0,45 l / 100 km!
Conclusion
- While the fuel consumption does slightly increase with larger tyres, it isn't nearly as much as standard "calculations / measurements" would indicate.
- To accurately calculate / measure the fuel consumption with larger than stock size tyres, you need to determine the percentage of change in wheel circumference compared to stock size, and then include that factor in the standard formula for calculating fuel consumption.
- The percentage of change in wheel circumference is parameter "P".
- The final formula (l / 100 km unit) is: C = 100 * F / (S * (1 + P/100))
The percentage of change in wheel circumference between stock tyre size and other commonly used sizes with Jimnys can be found in one of the tables in the chapter "Compatible & interesting tyre sizes for Jimny wheels".
Jimny factory tyre size and approved sizes
Factory tyre size(s)
The factory tyre size on all Jimnys is 205 / 70 / R15.
These are the known exceptions:
- Some JDM (Japanese domestic market) models (possibly 175 / 80 / R15 ?).
- Some JDM Jimny models are smaller / lighter, and hence narrower tyres.
- The Japanese Jimny XC/XG models manufactured in 2017 have a tyre size of 175 / 80 / R16.
- Brazilian "4sport" and "4work" editions before 2017 production year (215 / 75 / R15).
- They have different front bumper, wheel arches and some body lift to accommodate the tyres.
- 2WD/RWD-only "el-cheapo" Jimnys (without 4WD mechanics), produced from 1998 to approx 2001 (175 / 80 / R15).
- Suzuki probably chose this size to aid grip in wet and snowy conditions.
Additional notes on factory sizes:
- Size 205 / 70 / R15 is also the factory tyre size on Suzuki Vitara / Escudo / Sidekick 1 (1988-1998, somewhere up to 2004) and many Suzuki SJ413 / Samurai editions.
- While the size 175 / 80 / R15 appears to be much smaller than 205 / 70 / R15 on a first "numeric" glance, the tyre radius (and implicitly ground clearance) is just 3,5 mm smaller.
- So, the "smaller" size is actually quite competitive to the "normal" one.
Approved non-factory tyre sizes
- According to some South African and Australian forums (example: this forum topic), their local Suzuki dealers' official policy is to allow +-3% variation in wheel diameter.
- Therefore, if your Jimny is under warranty (or you want to be mechanically moral), +-3% is your expansion border.
![]() If you want to be certain about this matter, then check with your local Suzuki dealer!
If you want to be certain about this matter, then check with your local Suzuki dealer!
Compatible & interesting tyre sizes for Jimny wheels
Quick and simple decision
The three most popular, non-extreme size upgrades from the factory size of 205 / 70 / R15 are to:
- 205 / 75 / R15
- Ground clearance and tyre's sidewall height increase by cca. 10 mm;
- 195 / 80 / R15
- Ground clearance and tyre's sidewall height increase by cca. 13 mm;
- 215 / 75 / R15
- Ground clearance and tyre's sidewall height increase by cca. 18 mm;
- However, even these non-extreme sizes may impose certain risks of collisions between tyres and the vehicle body in some vehicle configurations.
- That mostly depends if the vehicle has 2nd gen. front bumper or not, if it has front mudflaps or not, if wheel spacers are used, etc.
- The risk is generally the lowest with the first size in the list, and the highest with the third size in the list.
- Any tyre size upgrade will also introduce certain deviations in vehicle's driving characteristics (road handling, acceleration, top speed, engine braking, transmission's stress).
- However, for these three non-extreme size upgrades, those deviations range from "negligible" to "small".
- The first size in the list is the least deviant, as it provides the smallest diameter change, while also keeping the same tyre width.
- Bear in mind that while the first size might be allowed by Suzuki (depending on company's regional policy), the second and third sizes are definitely not allowed by Suzuki (regional exceptions may apply).
- Also bear in mind that ANY tyre and/or wheel ("rim") sizes apart from those which are strictly specified in vehicle's handbook or vehicle's registration documents are prohibited in certain countries (example: Germany)!
- In such cases, the vehicle usually has to be put through a state-prescribed certification process in order to legalize the use of a desired different tyre and/or wheel ("rim") size.
![]() MT class tyres, and especially "remoulded" (retreaded) tyres, typically deviate significantly from their theoretical sizes (they tend to be quite larger)!
MT class tyres, and especially "remoulded" (retreaded) tyres, typically deviate significantly from their theoretical sizes (they tend to be quite larger)!
Regarding "tyre vs. vehicle body" collision risks
Sizes 205 / 75 / R15 and 195 / 80 / R15 generally have no risks of collisions with the vehicle's body, with two exceptions:
- If you have a 2nd gen. front bumper (see below), you might have to straighten it if it is sagged, or trim it just slightly (invisibly) on the bottom (simple job with a grinding tool).
- If you have front mud flaps, you might have to trim a plastic spacer behind them (which is easy to dismount and mount) by approx 10-15 mm.
Size 215 / 75 / R15 could be more problematic:
- It may require some trimming of the bottom of the front bumper, especially if it is a 2nd gen. bumper.
- Front mudflaps will probably need to be removed.
- The spare tyre might contact with the rear bumper.
- Wheel arch trimming is generally not needed, except if wheel spacers are used without a lift.
- Brazilian "HR" (2010-2012) "4sport" and "4work" (untill 2016) Jimny editions (which came with "215 / 75 / R15" tyres from the factory), also came with an approximate 25 mm body lift from the factory (to remedy the collision risks).
- The Brazilian "4sport" edition also had a minimalist front bumper, which increased the clearance in front of front tyres (eliminating the collision risk when steering) and provided higher approach angle.
This was a quick and simple guide to the issue of tyre sizes.
![]() If you have or expect collision issues between your existing or planned tyres and the vehicle, you can remedy them by Lifting the vehicle and/or by Trimming the wheel arches and/or by trimming the front bumper.
If you have or expect collision issues between your existing or planned tyres and the vehicle, you can remedy them by Lifting the vehicle and/or by Trimming the wheel arches and/or by trimming the front bumper.
![]() If you use a pendant-style tow bar mounted bicycle carrier, a wider spare tyre might collide with the bicycle carrier. This depends on how long the tow ball + tow neck section is.
If you use a pendant-style tow bar mounted bicycle carrier, a wider spare tyre might collide with the bicycle carrier. This depends on how long the tow ball + tow neck section is.
Read "Tow bar" and "Bicycle carriers" wiki articles for more information.
Thorough consideration
This chapter is for those who want to fully understand the possible effects and issues when using non-stock tyre sizes, and for those who intend to use significantly larger tyres than the stock size ones.
- The following two tables contain detailed information on effects of various non-stock tyre sizes for Suzuki Samurai and Suzuki Jimny.
- Many of the effects and issues from the tables below are rarely taken into consideration until it is too late!
First of all, some general remarks about the tables below:
- The two tables used to be a single large table, but it was split into two tables (a "left" part and a "right" part) in order to improve readability on-line and when printed.
- The data in the first table is valid both for Jimny and for Samurai, as it mostly contains theoretically calculated mathematical figures and some general common comments.
- Also, stated gearing deviations in the first table affect both vehicle models in a similar amount.
- All the data in the second table is Jimny-specific and deals only with the risks of collisions between the tyres (wheels) and Jimny's various body parts.
- Reason: Samurais typically have smaller body panels and therefore larger clearances around the wheels, so there are typically much lower risks of collisions.
- All tyre sizes from these tables should fit on Samurai's and Jimny's stock steel and alloy wheels.
- The content of both tables was compiled by forum user Bosanek.
- Bosanek sourced the data in the second table in smaller part from his personal experience, and in larger part from various forum topics here and there throughout the Internet.
- Most of the collision risk evaluation comments in the second table should be taken as rough guidelines only, and not as precise statements.
- Reason 1: Every Jimny's "stance/posture" (and therefore clearance around the wheels) is slightly different (suspension sags a bit over time and use, the bumpers can get sagged too, etc.);
- Reason 2: There can be slight or even significant dimensional variations between different tyre models of the same theoretical size (read more below);
Some additional notes:
- Percentage of circumference / diameter change in the first table is also the percentage of speedometer and tachometer measurement change.
- Suzuki's official allowed wheel diameter change (shown in the first table) for Jimny is within +-3%.
- Wheel diameter is most affected by the "H" parameter (tyre sidewall height). Tyre width is less important.
- For example, the diameter of a 195 / 80 / R15 tyre is larger than the diameter of a 205 / 70 / R15 tyre!
- The former tyre size is narrower but higher than the latter tyre size!
- Tyre sizes in real life do not have to be 100% accurate as their theoretical measurements, because of variations in tyre construction for different tyre models.
- Tyres in AT class and especially MT class tend to deviate less or more from theoretical measurements, because of their "clunkier" and deeper treads and/or sidewalls.
- The most deviant by far (in terms of sizing) are "retreaded" tyres (remoulded, refurbrished, "protect", etc.). They are typically significantly larger than specified by standard sizing numbers.
| Tyre size parameters | Wheel diameter [mm] |
Wheel radius [mm] |
Sidewall height [mm] |
Wheel circumference [mm] |
Circumference change from stock size [%] |
Fits into Suzuki's +- 3% allowed variation? |
Ground clearance change from stock size [mm] |
General comment | Gearing deviation (acceleration, top speed, engine braking, odo/speedo innacuracies) | ||
|---|---|---|---|---|---|---|---|---|---|---|---|
| W | H | R | |||||||||
| 195 | 65 | 15 | 634,5 | 317,3 | 126,8 | 1993 | -5,01 | NO | -17 | Very cheap size for very cheapish owners | Significant, but not mechanically stressing as it is negative |
| 195 | 70 | 15 | 654,0 | 327,0 | 136,5 | 2055 | -2,1 | YES | -7 | Cheap size for cheapish owners | Negligible |
| 195 | 75 | 15 | 673,5 | 336,8 | 146,3 | 2116 | +0,82 | YES | +3 | No real benefit over factory size | Practically none |
| 195 | 80 | 15 | 693,0 | 346,5 | 156,0 | 2177 | +3,74 | NO | +13 | Quite good size for off roading. Moderate gains with some collisions and deviations. |
Minor to small |
| 195 | 82 | 15 | 700,8 | 350,4 | 159,9 | 2202 | +4,91 | NO | +16 | Rare size. Quite good size for off roading. Moderate gains with some collisions and deviations. |
Small to moderate |
| 205 | 70 | 15 | 668,0 | 334,0 | 143,5 | 2099 | 0 | YES | 0 | Factory Samurai / Jimny dimension | None |
| 205 | 75 | 15 | 688,5 | 344,3 | 153,8 | 2163 | +3,07 | PROBABLY YES | +10 | Mild gains with rarely any collisions or deviations. Recommended as the simplest upgrade. |
Negligible to minor |
| 205 | 80 | 15 | 709,0 | 354,5 | 164,0 | 2227 | +6,14 | NO | +21 | Rare size. Very good size for off roading. Significant gains with moderate risks and deviations. |
Significant, possibly mechanically stressing. |
| 215 | 70 | 15 | 682,0 | 341,0 | 150,5 | 2143 | +2,1 | YES | +7 | Relatively low effective gain - height does not increase a lot compared to width increase. |
Negligible |
| 215 | 75 | 15 | 703,5 | 351,8 | 161,3 | 2210 | +5,31 | NO | +18 | Quite good size for off roading. Moderate gains with some collisions and deviations. |
Small to moderate |
| 215 | 80 | 15 | 725,0 | 362,5 | 172,0 | 2278 | +8,53 | HELL NO | +29 | Rare size. Exceptionally good size for off roading. Quite significant gains with significant risks and deviations. |
Large, requires regearing |
| 225 | 70 | 15 | 696,0 | 348,0 | 157,5 | 2187 | +4,19 | NO | +14 | Relatively low effective gain - height does not increase a lot compared to width increase. |
Minor to small |
| 225 | 75 | 15 | 718,5 | 359,3 | 168,8 | 2257 | +7,56 | HELL NO | +25 | Very good size for off roading. Significant gains with moderate risks and deviations. |
Large, needs regearing |
| 225 | 80 | 15 | 741,0 | 370,5 | 180,0 | 2328 | +10,93 | HELL NO | +37 | Rare size. Exceptionally good size for off roading. Quite significant gains with significant risks and deviations. |
Extreme and requires regearing, plus wheel bearing and CV joint improvements. |
| 235 | 70 | 15 | 710,0 | 355,0 | 164,5 | 2231 | +6,29 | HELL NO | +21 | Relatively low effective gain - height does not increase a lot compared to width increase. |
Significant, mechanically stressing |
| 235 | 75 | 15 | 733,5 | 366,8 | 176,3 | 2304 | +9,81 | HELL NO | +33 | Exceptionally good size for off roading. Quite significant gains with significant risks and deviations. |
Extreme and requires regearing, plus wheel bearing and CV joint improvements. |
| 235 | 80 | 15 | 757,0 | 378,5 | 188,0 | 2378 | +13,32 | HELL NO | +45 | Extremely good size for off roading. Extreme gains with extreme risks and deviations. |
Extreme and requires regearing, plus wheel bearing and CV joint improvements. |
| Tyre size parameters | Risk of tyre vs. front bumper collision |
Risk of tyre vs. front mud flap collision (if front mud flaps are fitted) |
Risk of tyre vs. wheel arch collision |
Risk of spare tyre vs. rear door collision |
Risk of spare tyre vs. rear bumper collision | |||||
|---|---|---|---|---|---|---|---|---|---|---|
| W | H | R | Without 3 cm wheel spacers |
With 3 cm wheel spacers |
Without 3 cm wheel spacers |
With 3 cm wheel spacers |
Without 3 cm wheel spacers |
With 3 cm wheel spacers | ||
| 195 | 65 | 15 | None | None | None | None | None | None | None | None |
| 195 | 70 | 15 | None | None | None | None | None | None | None | None |
| 195 | 75 | 15 | None | None | None | None | None | None | None | None |
| 195 | 80 | 15 | If 2nd. gen front bumper is used, might require (invisible) minor front bumper bottom trimming. Otherwise, no risk. |
Wheel spacers increase the risk for all bumper generations. Some bottom trimming of front bumper cures it. |
Requires minor trimming of front mud flap spacers. | Requires moderate trimming of front mud flap spacers. | None | None | None | Very low |
| 195 | 82 | 15 | Might require minor or moderate trimming of the bottom of the front bumper (especially if 2nd gen. front bumper is used). | Wheel spacers increase the risk for all bumper generations. Some bottom trimming of front bumper cures it. |
Requires moderate trimming of front mud flap spacers. | Requires moderate trimming of front mud flap spacers. | None | None | None | Low |
| 205 | 70 | 15 | None | None | None | None | None | None | None | None |
| 205 | 75 | 15 | None, except if the 2nd gen. bumper is sagged. | If 2nd. gen front bumper is used, might require (invisible) minor front bumper bottom trimming. Otherwise, no risk. |
Requires minor trimming of front mud flap spacers. | Requires moderate trimming of front mud flap spacers. | None | None | None | None |
| 205 | 80 | 15 | Might require minor or moderate trimming of the bottom of the front bumper (especially if 2nd gen. front bumper is used). | Wheel spacers increase the risk for all bumper generations. | Requires severe trimming of front mud flap spacers. | Requires removal of front mud flaps. | ? | Probably requires some trimming of front wheel arches. | None | Possible. Use of a spacer mount resolves it. |
| 215 | 70 | 15 | None | Usually none | None | Requires minor trimming of front mud flap spacers. | None | None | None | None |
| 215 | 75 | 15 | Might require minor or moderate trimming of the bottom of the front bumper (especially if 2nd gen. front bumper is used). | Wheel spacers increase the risk for all bumper generations. | Requires moderate trimming of front mud flap spacers. | Requires moderate to severe trimming of front mud flap spacers. | None | Possible | None | Possible. Use of a spacer mount resolves it. |
| 215 | 80 | 15 | Requires moderate or significant trimming of the front bumper. | Wheel spacers increase the risk for all bumper generations. | Requires removal of front mud flaps. | Requires removal of front mud flaps. | Requires some trimming of front wheel arches. | Requires some trimming of front wheel arches. | None | Will collide. Use of a spacer mount resolves it. |
| 225 | 70 | 15 | ? | Wheel spacers increase the risk for all bumper generations. | Requires moderate trimming of front mud flap spacers. | Requires moderate to severe trimming of front mud flap spacers. | Probably requires some trimming of front wheel arches. | Probably requires some trimming of front wheel arches. | Possible. Use of a spacer mount resolves it. |
Possible. Use of a spacer mount resolves it. |
| 225 | 75 | 15 | Requires moderate or significant trimming of the front bumper. | Wheel spacers increase the risk for all bumper generations. | Requires removal of front mud flaps. | Requires removal of front mud flaps. | Requires some trimming of front wheel arches. | Requires some trimming of front wheel arches. | Possible. Use of a spacer mount resolves it. |
Will collide. Use of a spacer mount resolves it. |
| 225 | 80 | 15 | Requires significant trimming of the front bumper. | Wheel spacers increase the risk for all bumper generations. | Requires removal of front mud flaps. | Requires removal of front mud flaps. | Requires significant trimming of front wheel arches. | Requires significant trimming of front wheel arches. | Possible. Use of a spacer mount resolves it. |
Will collide. Use of a spacer mount resolves it. |
| 235 | 70 | 15 | Requires moderate or significant trimming of the front bumper. | Wheel spacers increase the risk for all bumper generations. | Requires removal of front mud flaps. | Requires removal of front mud flaps. | Probably requires some trimming of front wheel arches. | Probably requires some trimming of front wheel arches. | Will collide. Use of a spacer mount resolves it. |
Will collide. Use of a spacer mount resolves it. |
| 235 | 75 | 15 | Requires significant trimming of the front bumper. | Wheel spacers increase the risk for all bumper generations. | Requires removal of front mud flaps. | Requires removal of front mud flaps. | Requires significant trimming of front wheel arches. | Requires significant trimming of front wheel arches. | Will collide. Use of a spacer mount resolves it. |
Will collide. Use of a spacer mount resolves it. |
| 235 | 80 | 15 | Requires significant trimming of the front bumper. | Wheel spacers increase the risk for all bumper generations. | Requires removal of front mud flaps. | Requires removal of front mud flaps. | Requires significant trimming of front wheel arches. | Requires significant trimming of front wheel arches. | Will collide. Use of a spacer mount resolves it. |
Will collide. Use of a spacer mount resolves it. |
![]() The availability of different tyre models in a desired tyre size can vary significantly.
The availability of different tyre models in a desired tyre size can vary significantly.
Not all tyres are manufactured in every listed tyre size for every market or all the time.
- As it is evident from the tables above, even if you choose to stay within Suzuki's alleged +3% allowed wheel diameter increase, there are several tyre profiles which can be used to achieve the goal of higher ground clearance.
- It is preferred to achieve the goal by increasing sidewall height (second number in tyre profile sizing code) instead of altering tyre width (first number in tyre profile sizing code).
- Maximum "gain" is achieved if both are increased at the same time.
Tyre models in Jimny-compatible sizes
- There is a wide variety of HT, AT and MT class tyre models which are available in Jimny-compatible sizes.
- It would be a pity to use an ordinary limousine road tyre instead!
- This table (made by forum user Bosanek) contains the list of all brand-name HT, AT and MT tyres which he has found on the worldwide market.
- In addition to the list of tyre models, that table also contains the availability of each tyre model in most popular Jimny-compatible sizes!
- A lot of time has been spent populating that table, and adding custom remarks there.
- The table is still incomplete in some details, but will be updated from time to time.
- The sizing availability is the most incomplete, as it takes a lot of investigation to fill the required data for each tyre model.
![]() Not all of those tyre models in the list are available in sizes which are compatible for Jimny. Sizing availability might depend on the market, and can change for better or worse at any time.
Not all of those tyre models in the list are available in sizes which are compatible for Jimny. Sizing availability might depend on the market, and can change for better or worse at any time.
Therefore, once you settle on your desired tyre size, now you can browse through tyre models and choose the one which is available in that size and suits your criteria the best.
User experiences with certain tyre models
Here are the AT tyre models with which Jimny owners have had great or good experiences with:
- Goodyear Wrangler AT/SA+
- General Grabber AT (not AT2!)
- Continental ContiCrossContact AT
- BF Goodrich AT/KO
Additional notes:
- All of the above listed tyre models have proven themselves as being very good on-road in any time of year, while also proving to be rather versatile off road.
- Also, General has recently (09/2016) released model AT3, which looks very interesting indeed.
- Avoid the model AT2, it is very old and deprecated one!
- Grabber AT2 is actually older than Grabber AT.
- Avoid the model AT2, it is very old and deprecated one!
- Many other AT tyre brands and models not mentioned above might also be quite good - investigate on your own!
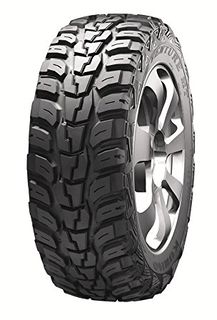
If you insist on heavy-duty off-road performance (but still want to retain some on-road credibility), there are three such MT class tyre models with which Jimny owners have been relatively satisfied with:
- BF Goodrich Mud-Terrain T/A KM2
- Hankook Dynapro MT (RT03)
- Kumho Road Venture KL71 ((uni)directional!)
- Maxxis Trepador M8060 ((uni)directional!) (Martin Lines comment: I have found these particularly good on a standard Jimny)
Additional notes:
- Many other MT tyre brands and models not mentioned above might also be quite good - investigate on your own!
Spare wheel and tyre usage
Introduction
- All proper all terrain vehicles, like Jimny, come with a full size matching spare wheel, which is the same as the other four wheels.
- That is for a reason.
- That spare wheel and tyre are not meant to be just carried around and sit idle all the time.
- For all terrain vehicles, spare wheel is not a fashion accessory nor a "dead cargo".
- It is an important operational element of the vehicle, as well as an important safety device.
- Therefore, the spare wheel and tyre must not be overlooked.
- It should be actively used.
- Otherwise, there are multiple risks of staying stranded in the event of the simplest tyre puncture, or even damaging vehicle's transmission in the event that the spare wheel does indeed have to be used!
- If you use only four same tyres in a typical 4-tyre rotation scheme, you might easily end up with only three half-worn same tyres - useless for a 4WD vehicle.
- For example, a sidewall puncture is generally impossible to repair properly.
- You will have to discard the remaining three tyres and buy all four/five new tyres - what a waste.
- For example, a sidewall puncture is generally impossible to repair properly.
However, there are some rules and restrictions when actively using five same tyres - read more in the following subchapters.
Using five identical tyres
![]() Buy and use five same (identical) tyres! The spare tyre should not sit idle all the time! That is even written in Jimny's owner manual.
Buy and use five same (identical) tyres! The spare tyre should not sit idle all the time! That is even written in Jimny's owner manual.
- The spare wheel and tyre should be actively and periodically rotated together with the other four wheels and tyres, and all should be the same.
- In other words, the 5th wheel and tyre should play an equal role and importance as the other four wheels and tyres.
- In case of an all-terrain vehicle like the Jimny, that gives you so much benefits.
- There is only one downside - you pay 25% more at once when buying the tyre set.
Here is a document (made by forum user Bosanek) which shows the actual 5-tyre rotation scheme, and also lists "FOR" and "AGAINST" reasons to actively use all five identical tyres in a 5-tyre rotation scheme.
- It is a good and handy practice to rotate the tyres with every engine oil change.
- If you recently bought a set of four new identical tyres (they have not got worn more than 1-2 mm at most), you still have time to buy the fifth one.
- Reason: the first tyre rotation schedule has not yet been performed.
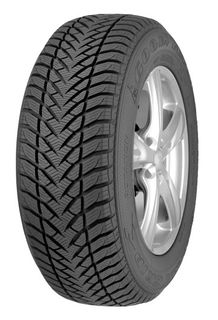
![]() The five-tyre rotation scheme is especially suited to practice when using all-season tyres. Many AT-class tyres are all-season.
The five-tyre rotation scheme is especially suited to practice when using all-season tyres. Many AT-class tyres are all-season.
![]() If you have a hard or soft spare wheel cover, you won't be able to use it with a spare tyre which is larger than the stock size.
If you have a hard or soft spare wheel cover, you won't be able to use it with a spare tyre which is larger than the stock size.
Warning against using (uni)directional tyres
- Five-tyre rotation scheme is not practical with tyres which have (uni)directional treads.
- Reason: each such tyre must be used on only one side of the vehicle, depending on how it was oriented during its mounting on the wheel.
- (Uni)directional tyres require a six tyre rotation scheme (or a plain four tyre single-side rotation scheme).
- See the chapter "Тyre tread symmetry and directionality" for details.
- Therefore, when using five tyres, always use bi/non-directional tyres.
- Luckily, most HT, AT and MT tyre models have symmetrical treads, but there are exceptions.
- Beware of this!
- Tread (a)symmetry is not related to the above note about tread directionality.
- In other words, either symmetric or asymmetric treads can be used, as long as they are bi/non-directional.
Using six identical tyres
- Using six identical tyres in a six tyre rotation scheme provides the most "advanced" (double) redundancy and robustness.
- It is very recommended for extended overland expeditions in remote areas, or when frequently venturing in some really hard core off roading where tyre or wheel damage is a major operating risk.
- The major disadvantage of a six tyre rotation scheme is that it requires the purchase of a 6th wheel, preferably the same one as the existing five wheels.
- Additional disadvantage is the required space to carry the sixth wheel in/on the vehicle.
Here is a document (made by forum user Bosanek) which shows the actual 6-tyre rotation schemes (separately for bi/non-directional and for (uni)directional tyres), and also lists "FOR" and "AGAINST" reasons to actively use all six identical tyres in a 6-tyre rotation scheme.
Considerations when using (uni)directional tyres
- If you want to use tyres which have (uni)directional treads, the six tyre rotation scheme is your only "advanced" option, apart from the plain four tyre single-side rotation scheme (not recommended).
- See the chapter "Тyre tread symmetry and directionality" for details on tyre tread directionality.
- When using (uni)directional tyres in a six tyre rotation scheme, the tyres are split into two groups, each containing three tyres.
- One group of tyres is used only on the left side of the vehicle, while the other group of tyres is used only on the right side of the vehicle.
- Therefore, you always have one spare tyre per one side of the vehicle.
- That is unless you own a Mercedes G63 6x6.
- Then you need an eight tyre rotation scheme.
- But then you probably have servants or slaves doing that care for you.
- Then you need an eight tyre rotation scheme.
- That is unless you own a Mercedes G63 6x6.
Using a non-matching spare tyre
Introduction
![]() Using (periodically rotating) a matching spare tyre together with the other four tyres is strongly recommended, as per the above chapter "Using five identical tyres".
Using (periodically rotating) a matching spare tyre together with the other four tyres is strongly recommended, as per the above chapter "Using five identical tyres".
However, if, for whatever reason, a non-matching spare tyre has to be used on a 4WD vehicle, special caution has to be applied in order to avoid expensive transmission damage!
This subchapter is a guide what to do in this unfortunate event.
First of all, a non-matching tyre in this context means any of the following:
- Different tyre size (width or height) than the other four tyres;
- Different tyre model than the other four tyres;
- Tyre's tread depth more than 1 mm or 2 mm different than the tread depth of the other four tyres;
The cause of the issue with using a non-matching spare tyre:
- Any 4WD transmission with a non-existing center differential (or when a center differential is locked) expects the same rotational speed and rotational friction from all four wheels.
- If that is not the case, the gears and shafts of the transmission literally tension and wind up because of the discrepancies caused by a non-matching wheel.
- If the tension and wind up become sufficiently high, something in the transmission will break.
- With a non-matching spare wheel in the game, the breaking point could be just a few wheel turns away!
Installation position
- With part-time 4WD vehicles like the Jimny, the non-matching spare wheel should always be used on the front axle.
- The reason is that the front wheels are disconnected from the entire transmission when the vehicle is in 2WD and 2WD-L mode, and therefore using a smaller wheel does not impact the transmission then.
So, if one of your front tyres get punctured, just replace that wheel with your non-matching spare wheel and tyre.
However, if one of your rear tyres gets punctured, the procedure would be:
- Remove the punctured rear wheel;
- Remove one good front wheel;
- Install that front wheel in the place of the punctured rear wheel;
- Install the spare non-matching wheel in the place of the removed front wheel.
That's a lot of work if it's hot, cold, wet, dusty, raining, windy or night time! But it is the only proper way.
- Now, when the non-matching spare tyre is on your front axle, as long as you don't engage 4WD, you should be fine.
- So, do your best to get to the nearest tyre repair workshop strictly in 2WD mode.
- If you have manually operating front wheel hubs, make sure that they are disengaged all the time.
Using 4WD mode with a non-matching spare tyre
If you get a puncture in the middle of offroading where you need 4WD to get to civilization, you are in trouble.
- After installing the spare non-matching wheel on the front axle per the above instructions, constrain the use of 4WD only when it is absolutely necessary.
- Disengage 4WD as soon as it is not strictly necessary, and engage it later when necessary again, and so on.
- If you have manually operating front wheel hubs, you have to engage and disengage them every time in sync with engaging and disengaging 4WD.
- Alternatively, using 2WD-L mode would be safe in regards of the issue of non-matching spare tyre, and it might provide enough aid to get you trough difficult sections instead of using 4WD.
- However, Jimnys have to be modified first in order to enable 2WD-L transmission mode.
- See the chapter 2WD-L transmission mode for details.
- While 4WD is used, the size or friction discrepancy on one wheel will cause constant transmission wind up as long as the vehicle is moving in 4WD.
- However, as long as 4WD is used on rather slippery ground (snow, mud, very loose gravel), the wind up should be able to constantly relieve itself, without harmful consequences.
- In other words, one wheel will have to continously "underslip" in order to compensate for the discrepancy.
- Only very slippery ground can enable that.
- The most difficult situation would be with rather rocky or bumpy dry road, where you usually need to use 4WD-L 1st gear to pass slowly.
- Because the road is dry and/or rather solid, there is not enough chance for the transmission to relieve itself of the continuous discrepancy (for a wheel to continuously underslip).
- Therefore, transmission damage in these conditions is quite likely!
- Therefore, if you have to use a non-matching spare tyre on a dry rocky or bumpy road, the best option is 2WD-L 1st gear.
- However, if your Jimny is not modified to have 2WD-L mode, it might be better to use 2WD 1st gear instead of 4WD-L 1st gear.
- That means you have to go through faster, or drive "improperly" by riding the clutch and/or the brakes.
- However, if your Jimny is not modified to have 2WD-L mode, it might be better to use 2WD 1st gear instead of 4WD-L 1st gear.
- It is the driver's decision whether to risk the damage to the suspension done by going faster through rocks and bumps, or to the clutch if riding it, or on the other hand, to risk damage to the transmission in 4WD-L mode.
Tyre air pressures
![]() Changing your tyre pressures to suit the (off)road conditions is the most effective vehicle mod ever!
Changing your tyre pressures to suit the (off)road conditions is the most effective vehicle mod ever!
Introduction
- Learn and use the skills of tyre pressure management.
- In general terms, reducing tyre pressure by 20-30% from stock on-road pressure is the operating norm for hard (rough) gravel and general off-road conditions.
- For deep mud, deep snow, sand and other boggy conditions, even more pressure reduction can be used (but with caution).
- Example of Goodyear Wrangler AT/SA+ 205 / 75 / R15 tyres on a Jimny, when deflated from 1,7 bar to 1,1 bar

Notice the relatively large contact area with the ground
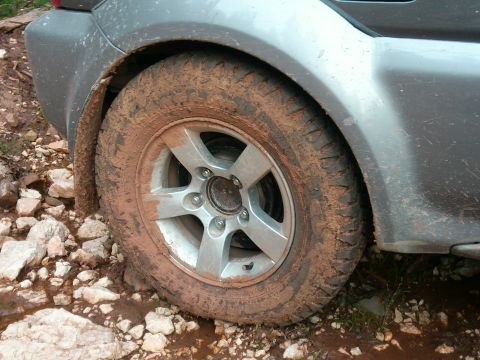
Notice how the tyre deforms to accommodate uneven ground under it


- Reducing air pressure in tyres from standard on-road pressure usually provides significant advantages when driving on unpaved surfaces and in off-road conditions.
- However, there are a few potential disadvantages and risks too, depending on the situation.
Advantages and benefits
- Increased contact area with the ground, thus:
- Improving traction on most surfaces;
- Improving flotation on soft ground;
- Softer behavior of the tyre, so the tyre absorbs a much larger portion of impacts and vibrations, thus:
- Improving ride comfort;
- Reducing vehicle stress;
- Reduced risk of tyre tread damage (cutting, chipping) because the tread acts less stiffly when contacting rough objects on the ground, instead deforming gently over them.
Disadvantages and risks
- Vehicle's ground clearance decreases slightly (usually about 1 cm for Jimnys) when tyres' air pressure is reduced by ~30%.
- Tyre's sidewall "bulges out" more when the air pressure is significantly reduced (see pictures above).
- This increases the risk of contacting the sidewall with sharp objects along the road.
- On roads where there is a significant risk of tyre sidewalls contacting rough/sharp objects (for example deep rutted tracks with a lot of debris in the walls of the ruts), it might be better not to decrease tyre air pressures significantly.
![]() When tyre pressures are reduced (for any reason), vehicle's top speed should be limited to approx 50 km/h / 30 mph on tarmac roads, or ~ 40 km/h / 20 mph on gravel roads. Otherwise, the tyres might overheat and disintegrate prematurely!
When tyre pressures are reduced (for any reason), vehicle's top speed should be limited to approx 50 km/h / 30 mph on tarmac roads, or ~ 40 km/h / 20 mph on gravel roads. Otherwise, the tyres might overheat and disintegrate prematurely!
Increased contact area between the tyre and the ground has two negative side effects as well:
- Increased tyre tread wear;
- Increased fuel consumption (because of higher friction);
However, these two disadvantages are more than compensated by the following:
- Significantly improved comfort;
- Significantly reduced vehicle vibrations/stress;
- By the way, increased tyre wear can be considered an issue only if you keep driving on-road (slowly) with reduced tyre air pressures for long distances.
- What is cheaper:
- To spend a bit more fuel and to replace the tyres more often due to increased tread wear when driving off-road?
- To replace suspension components (and tooth fillings) more often due to excessive vibrations?
When tyre air pressure is reduced quite significantly (say 40% or more), two special risks emerge:
- Dislodging (dismounting) the tyre from the wheel when turning sharply during relatively high vehicle velocity;
- This is because the air inside the tyre actually holds the tyre pressed onto the wheel rims.
- With significantly reduced air pressure, the holding force is much smaller, and it is more easily defeated with significant side-cornering forces.
- Turning the wheel without turning the tyre (the wheel turns along its rotational axis);
- This usually happens when a sudden high torque is applied ("stomping" the throttle "fast'n'furious" style).
- The wheel literally "slips" inside the tyre.
- The tyre usually still stays on the wheel, with minimum to no air loss during the incident.
- However, if wheel balancing weights had been used to balance that wheel, the wheel balancing will be spoiled afterwards (because the correlation of the wheel balancing weights to the tyre has been skewed).
- This incident is usually not noticeable when it happens, but the wheel disbalance which it causes certainly will be!
- If wheel balancing beads (pellets) had been used to balance that wheel, than wheel balancing will not be affected.
- So, the point is that you should not drive sharply when air pressures are significantly reduced, and you should not have an issue.
Dependency of tyre pressures on axle load
- Required / recommended tyre pressure generally also changes with load (weight on the axle).
- The heavier the load, the more pressure (air quantity in the tyres) on that axle is required to carry it.
- For almost any vehicle, manufacturers specify different tyre pressures for different loads.
- For example - with the driver only, with full passengers with cargo, when towing a trailer, with loaded cargo bay, etc.
- For Jimny (as far as it is known), Suzuki has not specified different tyre pressures for empty and laden conditions.
- That is probably because the vehicle has such a small load rating (cca 300 kg at most - roughly 150 kg per axle!) that it does not matter that much.
Specific tyre pressures for Jimnys
- So, for a Jimny, the factory recommended on-road tyre pressure for stock size tyres (205 / 70 / R15) is 1,6 bar (23 PSI) front and 1,8 bar (26 PSI) rear.
- Some Jimny owners even the tyre pressures to 1,7 bar on all four tyres, for simplicity.
- When driving on gravel roads or general off road, it is completely fine (and even advisable) to reduce the tyre pressure by 25-30% to 1,25-1,15 bar (17 - 18 PSI).
- The difference in ride quality is astonishing, while the traction is significantly improved.
Effect of tyre size on tyre pressures
- When using tyres which are larger than stock size, all (both on-road and off-road) tyre pressures should be reduced from the above written numbers.
- Because it is the air itself (air molecules) that carries all the weight, the concept is to always have the same number of air molecules in the tyre for certain road and load conditions.
- The larger the tyre, the more air molecules fit inside for the same tyre pressure.
- So, to achieve the presence of the same number of air molecules in the tyre regardless of tyre size, a lower tyre pressure has to be used with a larger tyre.
- There is no simple formula for calculating how much the on-road (and implicitly off-road) tyre pressure should be reduced with certain larger tyre sizes.
- This topic is still under investigation.
Tyre air pressure measurement, inflation and deflation
Measurement
- It is compulsory to carry a good quality tyre pressure measurement tool.
- It is best to buy products for which there is some verified good customer feedback.
- Example is when browsing on Amazon web stores, which have the integrated system of customer opinions on products which are on sale.
- Don't just glance over the "feedback stars" - read a few meaningful opinions!
- Reason: many people give a certain product "five stars" just because it was delivered quickly and the packaging was nice and shiny!
- Don't just glance over the "feedback stars" - read a few meaningful opinions!
- Other source of customer feedback on certain products can be from various Internet forums.
- Example is when browsing on Amazon web stores, which have the integrated system of customer opinions on products which are on sale.
The choice of an analogue vs. a digital pressure measurement tool comes down to this:
- Analogue ones are larger and also more sensitive to shocks (if you drop them for example);
- Digital ones are usually easier to read;
- This is especially important during night time;
- That is when a digital tool with illuminated display really comes in handy;
- This is especially important during night time;
- Digital ones usually use batteries.
- Some use non-replaceable batteries, meaning that, once the battery is depleted, the tool is wasted.
- Since all batteries perform poorly in cold weather, a relatively weak battery can render a digital tool non-functional in cold weather;
- Analogue tools are much less sensitive to cold/heat and also to getting wet.
- Some analogue tools also have an "air release" valve, enabling tyre deflation to be performed while monitoring the air pressure in real time.
Conclusion: It is best to have one analogue and one digital tool, to back-up one another.
Inflation
- It is also very desirable to have your own portable 12 V air compressor.
- Portable 12 V air compressors exist in various qualities, capabilities and prices.
- See more below.
- Portable 12 V air compressors exist in various qualities, capabilities and prices.
- There are also fixed in-car air compressor installations available, for very advanced users.
- You also get those as a factory fitment on many military vehicles and on the Mercedes G63 AMG 6x6.
- The (expensive) ARB differential locker comes with its own air compressor to operate it.
- That air compressor can also be utilized for tyre inflation.
Two most important operational parameters of an air compressor are:
- The volume of air (in litres) per minute that it pumps.
- If you haven't figured out yet what that means, this translates to how fast it is.
- For how long can it work before it has to be turned off to cool itself (to avoid overheating).
- If this time is too short for your application, you will have to make a long pause just before inflating the 4th (final) tyre ...
Other attributes of a portable air compressor to consider are:
- The length of its power cable and the length of its air hose;
- Too long cable and hose might not be that much desirable;
- It takes more work to untangle and to store them, and they take up more space when stored.
- Too long cable and hose might not be that much desirable;
- The way that the cable and the hose pack inside the compressor's housing (or around it);
- Compressor's housing size and proportions;
- If it has a practical and not too bulky case to store it in while it is not used;
- Optional adapters for the air hose, to inflate bicycle tyres, balls, air mattresses, your butt or your ego ...
- The presence of an analogue or a digital air pressure gauge (and its accuracy);
- Also if the gauge is back-illuminated or not;
- If it has an air release button or valve;
- It enables you to deflate the tyre while the compressor is connected to it;
- This is useful if you accidentally over-inflate a tyre;
- It enables you to deflate the tyre while the compressor is connected to it;
- If you want to get a cheap, but good quality portable 12V tyre air compressor, try asking around at vehicle junkyards.
- They might have OEM portable 12V tyre air compressors extracted from some dead commercial vehicles (usually vans).
- Some commercial vehicles were initially sold with such tools as additional equipment together with a standard wheel jack, triangle, tow rope, etc.
- Such air compressors get seldom if ever used during their lifetime.
- Some commercial vehicles were initially sold with such tools as additional equipment together with a standard wheel jack, triangle, tow rope, etc.
- Therefore, an (almost) unused Mercedes, Peugeot, Toyota or Iveco etc. OEM air compressor might be just the right deal.
- Tyres can be inflated at many fuel filling stations too.
- It is recommended do to so whenever there is a fuel filling station with an air compressor nearby.
- Reason: their equipment is usually much quicker than portable personal air compressors.
- It is recommended do to so whenever there is a fuel filling station with an air compressor nearby.
- However, pressure measurement instruments at fuel filling stations generally should not be trusted, as they could be wildly inaccurate!
- There are local exceptions of course, but this is a general rule.
- So, use the air compressors at fuel filling stations for speed, but check the outcome with your trusted pressure measurement gauge.
- Trusting that a publicly (ab)used pressure measurement instrument at a fuel filling station is accurate is like trusting that a prostitute has no STD.
Deflation
- Tyre deflation can simply be done by the stone age era method - using sticks and stones.
- There are various cheap and expensive tools, which enable fast and/or controlled tyre deflation.
- The quality and usefulness of those tools vary widely.
- However, both the speed and control aspects, which some of those tools provide, can be achieved by other (free) means.
Regarding deflation speed:
- Since tyres on Jimnys are relatively small (compared to most 4WD vehicles), the practice has shown that using the stone age method is generally not much slower than with the advanced tools.
- In other words, the time savings provided by most tyre deflation tools are hardly worth the cost and effort on such relatively small tyres.
- Employing a passenger to deflate two tyres in parallel with you (using sticks and stones) is almost as fast as using most of those tools.
- Just tell them that there ain't no free 4WD ride - they have to break some sweat for it!
- Also beware that the method, by which all of those "fast" deflators achieve their speed, is by temporarily removing (dislodging) the valve core while they are attached to the valve.
- This has two negative aspects:
- It wears the valve core, and after many such deflations, the valve core can become significantly worn and susceptible to failure;
- When a valve core fails, your tyre will lose all air quicker than you can read this sentence;
- The deflation speed is so fast that it can easily over-deflate if you are not very well timed (or if the automatic deflation control is not super reliable);
- It wears the valve core, and after many such deflations, the valve core can become significantly worn and susceptible to failure;
- This has two negative aspects:
Regarding controlled deflation:
- First of all, the term "controlled deflation" means either:
- To get an indication when the desired pressure reduction has been achieved (in order to manually stop further deflation);
- To have the deflation process stop automatically when desired pressure reduction is achieved;
- Many tyre air deflation tools promise one of those methods of controlled deflation.
- However, beware that the reliability of their deflation control mechanisms can be questionable, even with the expensive products!
- Luckily, there is a cheap (free) alternative method of controlled deflation, which simply uses your own brains.
- The concept is based on the fact that, after several inflation-deflation iterations (while using a proper tyre air pressure measurement tool), you should be able to roughly determine how much time you need to deflate your tyres from your typical on-road tyre pressure to your typical off-road tyre pressure.
- For example, one experience says that it takes approximately 25 seconds to reduce a 205 / 75 / R15 tyre's pressure from 1,7 bar to 1,20-1,15 bar.
- When you gain such experience, you won't have to stop the deflation and check the tyre pressure several times with the pressure measurement tools when deflating each tyre.
- In fact, your wrist watch will become your main tool.
- This way, you will be able to deflate your tyres in one go with solid certainty in the amount of achieved deflation.
- Your tyre air pressure measurement instrument will just serve you for eventually double-checking the outcome.
- The concept is based on the fact that, after several inflation-deflation iterations (while using a proper tyre air pressure measurement tool), you should be able to roughly determine how much time you need to deflate your tyres from your typical on-road tyre pressure to your typical off-road tyre pressure.
However, there is one type of tyre air deflation tool which is certainly worthy of consideration:
- It is a "dumb" die-cast, push-pin, screw-on-valve tyre deflator.
- Such tools are usually the cheapest of them all.
- They are super reliable as they have no moving parts.
- As a matter of fact, they are usually a single-piece cast metal.
- It can't get more robust than that!
- Such deflators simply push the tyre valve's pin in (as you would do with a stone) all the time while they are screwed onto the valve.
- This lets the air out of the tyre at the same rate (speed) as you would with a stone, until you unscrew them.
- So they are harmless to the valve, as they do not fiddle with the valve core to increase deflation speed, as all of the "super fast" deflators do.
- This lets the air out of the tyre at the same rate (speed) as you would with a stone, until you unscrew them.
- In summary, these deflators do exactly the same thing as you would while pressing the valve pin with a stone, but in a more elegant manner.
- They have no deflation control mechanisms, so the user must take care to unscrew them at the right time (to avoid over-deflation).
- There are three advantages of this type of deflators over the stone age method:
- No need to crouch next to the tyre all the time during deflation;
- Also avoids having to endure the burst of freezing cold air from the tyre valve over your fingers all the time during deflation;
- If you are well organized and follow the timings, one person can deflate two tyres almost in parallel;
- Тhis doubles the overall deflation speed and brings it practically on par as with the expensive fast tools.
The procedure to perform an (almost) parallel two-tyre deflation with these tools:
- First, you need two such deflators;
- They usually come in a set of four, so you'll even have spares.
- Second, you need to know beforehand (from past experience) how much time is needed to perform the desired amount of deflation on your tyres.
- That time is the parameter "D";
- Now, screw the 1st deflator onto the 1st tyre.
- Immediately note the current time on your watch;
- That time is the parameter "T1";
- Immediately note the current time on your watch;
- While the 1st tyre is being deflated, screw the 2nd deflator onto the 2nd tyre.
- Immediately note the current time on your watch;
- That time is the parameter "T2";
- If you are not being slow like a Jimny full of obese people, the time "T1+D" has not passed in the meantime.
- Now wait for the time "T1+D", and then unscrew the 1st tyre deflator.
- If you are not being clumsy like Suzuki's documentation writing bureaucrats, the time "T2+D" has not passed in the meantime.
- Wait for the time "T2+D", and then unscrew the 2nd tyre deflator.
- Immediately note the current time on your watch;
- Congratulations, you have successfully deflated two tyres almost in parallel.
- Be free to feel proud of yourself while every bystander looks at you and thinks you are a car-freak.
- Now repeat the same procedure with the remaining two tyres.

- An example of such a "dumb", die-cast, "push-pin", "screw-on-valve" tyre deflator is Draper 22487.
- While it says "TPMS" in the product's marketing name, there is nothing specific to TPMSes about it.
- It does not require the presence of a TPMS system in a vehicle and it has no modes of operation or deflation control or whatever.
- It is plainly dumb as a rock.
- The price on manufacturer's website is unrealistically high for some reason (currently around 28 GBP), while it sells for a few pounds on most 3rd party web stores.
- Forum user Bosanek has had excellent experience with this particular tool.
- However there are other such products of the same type in the market.
- Find and buy one of your own choice.
- Since they are a dumb die-cast single-piece of metal, they all have the same quality and performance.
- You can't go wrong with any of them!
- Since they are a dumb die-cast single-piece of metal, they all have the same quality and performance.
- Find and buy one of your own choice.
Wheel balancing
Jimnys, as all vehicles with solid front axle suspensions, are susceptible of developing a "death wobble" vibration at a certain speed range.
![]() Read more about death wobble in Death Wobble wiki article.
Read more about death wobble in Death Wobble wiki article.
Since wheel disbalance can easily cause death wobble, you need to take additional considerations in order to balance your wheels properly.
You can educate yourself about wheel balancing issues at the dedicated chapter "Wheel balancing" of the above mentioned death wobble wiki page: Wheel balancing
Wheel damages and repairs
Introduction
- In the context of this chapter, the term "wheel" refers to the entire metallic wheel/rim on which a rubber road tyre is mounted (without the tyre).
- It is not unusual for a wheel to become damaged.
- Generally, the risk is higher when driving on unpaved roads or off road.
- For example on rough gravel roads or on rocky terrain.
- However, the damage can occur even on a promenade.
- For example when hitting a street curb or a pothole on the road.
Notes on wheel (mis)alignment
- Forces sustained by strong wheel impacts or excessive vibrations can also cause the suspension / steering system to lose proper alignment.
- Misaligned front suspension and steering system will cause improper steering.
- This means inaccurate self centering of the steering wheel, vehicle not going straight when the steering wheel is straight, excessive tyre wear, etc.
- Misaligned front suspension and steering system can also cause Death wobble.
- Misaligned front suspension and steering system will cause improper steering.
- In case of wheel misalignment, wheel re-alignment has to be performed in a professional workshop.
- Read the chapter Wheel alignment in the Death Wobble wiki article for some details about the process.
Types of wheel damages and repairs
Scratches
- Wheels can get scratched, causing steel wheel to rust and alloy ones to lose appeal.
- However, scratches do not present structural damage, so they are not given much attention in this article.
Bents
- The mildest (and most often) type of structural wheel damage is a bent.
- Bents cause the wheels to become warped.
- Warped wheels cause rotational disbalance.
- Rotational wheel+tyre assembly disbalance is one of the most common causes of the Death Wobble phenomenon.
- Warped wheels cause rotational disbalance.
- It is not always possible to detect a warped wheel, even to the trained eyes.
- Professional measurement machinery is sometimes necessary.
- In many cases of warped wheels, wheel+tyre assembly balancing measures can not compensate for the bent(s).
- The distortions have to be remedied first.
- Most ordinary wheel balancing machines can't even detect the warps.
- That is because most of them measure the disbalance in only one plane of motion (longitudinal), and not the transverse "jerking" forces.
- Such machines would complete the balancing process on a warped wheel just fine, and everything would appear to be perfectly balanced (according to the measurements of those machines).
- In reality, the wheel still (sometimes invisibly) wobbles from side to side while rotating.
- There are specialized workshops and machines which can detect and correct the wheel bents, and therefore straighten the wheels (both the steel and alloy ones).
- Only after those wheel straightening measures are applied, it makes sense to perform wheel+tyre assembly balancing.
Dents
- The medium type of structural wheel damage is a dent.
- Dents are usually obviously visible (if you care to look).
- You should occasionally check your wheels for dents, scratches and mud/grit deposits from the inner side.
- That is the side which is facing the brake disc / brake drum when the wheel is mounted.
- A significant dent on a rim will usually be instantly noticeable.
- Reason: it will allow the air to leak out from the tyre faster than you can fart when you least expect to.
- Dents have a higher tendency to appear on steel wheels than on alloy wheels.
- Dents on steel wheels are typically quite easy to repair.
- Dents on alloy wheels are typically relatively difficult to repair (but more or less possible for sufficiently qualified and equipped servicemen).
- After a wheel dent is repaired, the wheel should definitely be checked for distortions throughout (see the preceding chapter).
Cracks
- The most extreme type of structural damage is a cracked or shattered wheel.
- Steel wheels rarely, if ever, crack or shatter - they usually crunch.
- Alloy wheels are more susceptible to cracking or shattering.
- The required force to cause an alloy wheel to crack or shatter is usually quite extreme (if good quality wheels are used).
- Some specialized workshops can even mend (patch up) cracked and/or shattered wheels, even in most extreme cases.
- An extreme case is when a wheel is brought to them as a collection of dozen pieces in a bag, and returned like it once used to be - at least visually.
- The answer to the question "whether a mended cracked or shattered wheel will structurally be able to perform its intended duty (and be without any uncorrectable distortions)" is for you to discover.
- In this situation, you might be better off to buy a Land Rover Discovery (but without cracked wheels).
Additional considerations
Importance of tyre profile
- The risk for any of these wheel damage types generally increases with lower profile tyres, and vice versa (less risk with higher profile tyres).
- Reason 1: With lower profile tyres, wheels are closer to the ground, and smaller rocks can reach them.
- Reason 2: With lower profile tyres, there is much less "cushioning" (damping) capacity in tyre's sidewalls when they hit a pothole, curb or a rock, leaving it on the rigid wheel to handle most of the shock.
- Therefore, for general mixed terrain or off road use, higher profile tyres ("taller" tyres) are always more recommended over lower profile ones.
- Higher profile tyres provide other additional benefits for all terrain use.
- Read the chapter "Tyre profiles" for more information.
- Higher profile tyres provide other additional benefits for all terrain use.
- Now you start to get the idea why the 21st century breed of city-terrain steroid-pumped 4WD vehicles with factory-styled oversized wheels and low profile tyres are utterly absurd in the basic concept.
Importance of tyre air pressure
- Beware that the risk of wheel damage increases when the tyre air pressure is too high or too low.
- When the tyre air pressure is too high, the tyre will be too stiff, having the following consequences:
- It will translate most (if not all) of the vibrations and shock loads to the wheel (and further on to suspension and steering components, the rest of the vehicle, up to your kidneys and teeth).
- It will not deform gently around a rough or sharp object (rough gravel, rocks, etc.) instead "attacking" it stiffly head on.
- In such a clash, the tyre usually loses by having a piece of its tread torn off.
- "Too high" tyre air pressure generally means higher than factory-recommended on-road tyre pressures.
- The only reason to ever use too high tyre air pressures is if you want to cure your stone kidney disease.
- When the tyre air pressure is too low, there is not enough air quantity inside to handle/cushion the sudden shock loads.
- This leaves the wheel as the "first point of impact".
- The "suddeness" of the shock load directly depends on the velocity of the vehicle.
- Therefore, driving with partially deflated tyres is not a problem, as long as vehicle's speed is correspondingly reduced according to the terrain conditions.
- The lower the pressure, the slower the speed!
- Therefore, driving with partially deflated tyres is not a problem, as long as vehicle's speed is correspondingly reduced according to the terrain conditions.
- Read the chapter "Tyre pressures" for more information on tyre air pressures.
Tyre damages and repairs
Introduction
- Tyres are the most vulnerable part of a vehicle, and they definitely endure the most harshness when the vehicle is driven in all-terrain conditions.
- To appreciate the role and life of your tyres, imagine or try running bare-footed on the same terrain where you drive on.
- Tyres can sustain several types of damage, and not every type is instantly noticeable.
Educate yourself more about tyre punctures and repairs through this article from USA's Rubber Manufacturer Association and through this article and video from the international Tire Industry Association.
Types of tyre damages and repairs
Tread puncture
- This is the most well known and classic tyre damage.
- Tread surface, in the context of tread puncture repair, is considered to be the central 3/4s of the side of the tyre which regularly contacts the ground.
- The remaining outer sections of the ground contact area are called "shoulder area".
- For the predominant radial tyres, general tyre industry convention is that this shoulder area falls in the category of "tyre sidewall" considering puncture repair options (see below).
- A tread puncture can happen either as a (more or less) round pierce (for example a nail), or as a cut (for example a large piece of glass).
- Most tread punctures (if not overly large) can be successfully and permanently repaired by professionals in tyre repair workshops.
- For a tread puncture repair to be proper and permanent, the tyre must be demounted from the wheel first, and the repair performed from the inside of the tyre.
- The best type of a tread puncture repair is when two methods are combined - a plug (stem) and a patch.
- Both of those repair methods should be performed from the inside of the tyre.
- Applying just a plug or just a patch is not proper, but many "professional" tyre servicemen are lazy and just do one of the two.
- Persuade them to use both (first plug, then patch)!
- If talking does not work, then money usually does.
- Persuade them to use both (first plug, then patch)!
- A plug repair is when the punctured hole or cut is drilled through to clean it, and then a rubber strip (+ a glue cure) is inserted into the hole.
- A patch repair is when a piece of rubber is glued onto the surface, and then "cooked" for a while to vulcanize (fuse) with the surface on which it is applied.
- "Plug type" DIY tyre repair kits exist from infinite number of manufacturers, and they cost only a few coins.
- They are handy to carry in the trunk, as they can be used for DIY "on the field" repair of tyre tread punctures.
- However, using just a plug repair from the outside of the tyre (without demounting it from the wheel first) should be done only in an emergency when no other options are available.
- It should be considered as a temporary measure until you get a first proper opportunity to have the tyre demounted, the old (temporary) plug drilled out, and the tyre properly repaired as described above.
- Using (recently) much advertized aerosol/liquid/gel tyre filler solutions is highly discouraged!
- Those solutions are typically held in pressurized cans, which you connect to the tyre inflation valve and then spray the aerosol/liquid/gel inside the tyre.
- The solution then spreads through the tyre and (in theory) plugs the puncture while you are pumping the tyre up.
- Even if this succeeds, it is strictly a temporary measure just to get you out of the situation.
- In most cases, tyres which have been treated with these liquid fillers can not be properly repaired afterwards.
- Reason: The liquid has hardened all throughout the inside of the tyre and made a complete mess, especially regarding balancing.
- Cleaning all the hardened aerosol/liquid/gel out requires a lot of labor effort and cost.
- The cost of cleaning is usually more than half the value of a new tyre.
- Cleaning all the hardened aerosol/liquid/gel out requires a lot of labor effort and cost.
- Reason: The liquid has hardened all throughout the inside of the tyre and made a complete mess, especially regarding balancing.
- This renders your "temporarily repaired" tyre practically permanently ruined.
Sidewall puncture
- Sidewall puncture is the nastiest type of tyre damage.
- Unfortunately, the risk of sidewall punctures is generally the highest when performing all terrain driving.
- A sidewall puncture can happen either as a more or less round pierce (for example a nail), but much more often as a cut (for example a piece of a tree branch sticking out from the ground).
- For the predominant radial tyres, general tyre industry convention is that any damage in the sidewall area can not be successfully repaired.
- Examples of tyre sidewall punctures
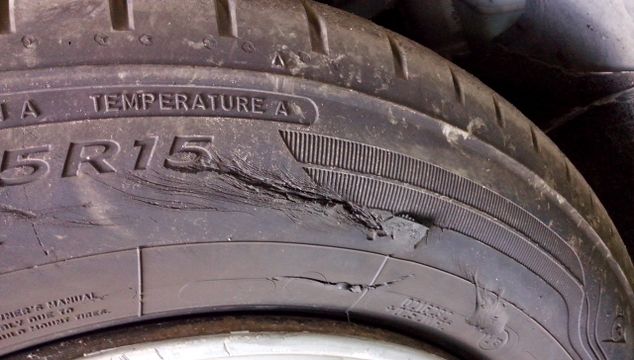
Multiple damages in one picture

A relatively small but terminal damage


- However, there are tyre repair workshops which can repair sidewall damage on radial tyres, even in extreme damage cases.
- Those are typically the same workshops which produce remoulded (retreaded) tyres, since the process of repairing a tyre sidewall is in some aspects similar to retreading a tyre.
- The method of repairing tyre "shoulders" and sidewalls is called "section repair".
- In short, the section repair consists of cutting out the damaged area, filling it with special raw rubber, then applying special (reinforced) patches from the inside, together with some special glues, and cooking (vulcanizing) all that with the sidewall for extended period of time, in a very similar process as when retreading a tyre.
- The reinforced patches contain nets of some strong material (kevlar, titanium, etc. or hairs from Arabian horse tails) and require special raw rubber made from frog balls or from salmon sperm, with specially tailored glue made from bird milk or whatever to properly fuse with the tyre.
- Sidewall section repairs are typically applied to heavy duty tyres which are used on tractors, industrial machines and heavy-duty trucks which work in forestry, construction sites, excavation sites etc.
- Sidewall section repairs have proven to be successful on much smaller and lighter tyres used on all-terrain vehicles.
- However, it is (in most cases) highly discouraged to use such tyres on the road - restrict to using them off road only!
- If you have to venture out on the road, keep the speed under cca 40-50 km/h (25-30 mph)!
- General observation of tyre repair workshops (which perform these kinds of repairs) is that AT class and MT class all terrain tyres are much better suited to performing this kind of sidewall puncture repair than ordinary limousine road tyres.
- The reason is that AT class and especially MT class tyres have certain degree of robustness and reinforcements as a part of their overall construction (aiding the infusion of the patch), while ordinary limousine road tyres have barely anything to "cling on to".
- If a tyre sidewall repair fails later on, it usually fails suddenly (instantly) and catastrophically.
- You do not want that to happen while your velocity is high!
- If a tyre sidewall repair fails later on in a tricky off roading situation (undulated terrain, steep or sloped terrain, rocks, mud, shit, etc.) raising the vehicle to replace the wheel might turn into a grand project on itself.
- "High lift" jacks are typically used to raise the vehicle in these difficult conditions, but Jimnys do not have suitable lifting points below the factory front and rear bumpers, and barely suitable ones on the sides!
Educate yourself more about tyre section repairs through this and this article.
Sidewall bulge
- A bulge usually occurs on a tyre's sidewall.
- The cause of a bulge can either be:
- A rather heavy sudden shock load (for example hitting a street curb or a big pothole at speed);
- A deficiency in the tyre itself (very hard to prove);
- A bulge on a tyre means that its internal structure (cords, plies, etc.) has disintegrated in that section of the tyre.
- Bulges are relatively hard to spot.
- Reason: they do not leak air and you usually have to take a good look at the tyre to notice them, especially if the bulge is on the side of the tyre which faces vehicle's underbody.
- Bulges are one of the main reasons why you should occasionally visually inspect all your tyres from both sides.
- A bulge, if it's sufficiently large, can disturb wheel's balance.
- Bulges are much more dangerous than they appear!
- They usually don't affect the operation of the tyre, and no air leaks through them.
- Because of this, even when they get noticed, they are usually not taken that seriously;
- "The tyre still serves just fine, doesn't it?";
- Because of this, even when they get noticed, they are usually not taken that seriously;
- They usually don't affect the operation of the tyre, and no air leaks through them.
- However, when a bulge finally fails, it usually bursts suddenly and catastrophically!
- You do not want that to happen to you when the vehicle's velocity is high!
- Bulges usually fail at high speeds or at a next rough impact (street curbs, big potholes, hard gravel, etc.).
- When a bulge fails on a front tyre at high speed, you'll suddenly get into a wrestling match with your steering wheel.
- When a bulge fails on a rear tyre at high speed, you'll most probably get a spectacular theatrical movie-style rollover, with you in the best seat to experience it in full HD vision with surround 3D sound.
- If the size of the bulge is quite small (approximately like a button on a shirt or a small coin), it can usually be treated so it does not expand and get worse from then on.
- Such a tyre should be usable, but vehicle's speed should be limited to approximately 80 km/h (45 mph) just to be safe!
- However, if the bulge is relatively large (like half of a finger or larger), it's a "FUBAR" case ("f**** up beyond repair").
- Such a tyre should be discarded, or vehicle's speed kept under 40-50 km/h (25-30 mph), while being prepared for the burst at any time!
- It is best to consult a well reputed tyre repair specialist to assess your own case.
Sidewall indentation
- A tyre might have a "vertical" indentation in a its sidewall (vertical means that the indentation runs orthogonally across the sidewall, from the bead to the tread of the tyre).
- If the indentation is present from when the tyre was new (ever since it was mounted on the wheel and inflated for the first time), then it is typically a "feature".
- It is a place where the internal plies and the cords of the sidewall overlap.
- In that case, there is nothing to worry about, as such an indentation is not a weak spot in tyre's construction.
- However, if you notice an indentation in the sidewall of your tyre in mid-use, and you are not certain if it was there since the tyre was new, you should have the tyre inspected by a reputable tyre repair specialist, just to be safe.
![]() Reference for the explanation of the nature of indentations in tyre's sidewall is this article on Continental's web site.
Reference for the explanation of the nature of indentations in tyre's sidewall is this article on Continental's web site.
Cuts
To be written ...
Chips
To be written ...
Disintegration
To be written ...
Cracking
To be written ...
Page last edited on 18/02/2018 by user Bosanek